Repairs/Adjustments 08/20/2015 GBC AdvancedPunch Pro
4-58
REP 2.22 Drive Roller Assembly Replacement
PARTS LIST ON PL 3.4
Use this procedure to remove and install a Drive Roller Assembly (Part #
7715093) used in Nips N1 - N14, except Nip N5.
Do not use this procedure for Nip N5, Do REP 2.22.1.
Procedures for individual Drive Rollers are located immediately after this
general procedure.
Removal Procedure
1. Switch power OFF to entire printing system.
2. Do REP 1.6 to remove the Rear Cover.
3. Open the Front Door.
4. Locate the appropriate Drive Roller.
5. For all Drive Rollers (except N1 and N11), do REP 3.1 to remove the
Punch Module.
6. Do REP 2.21 to remove the Belt from the appropriate Drive Roller
Shaft.
7. Do REP 2.20 to remove the Pulley from the appropriate Drive Roller
Shaft.
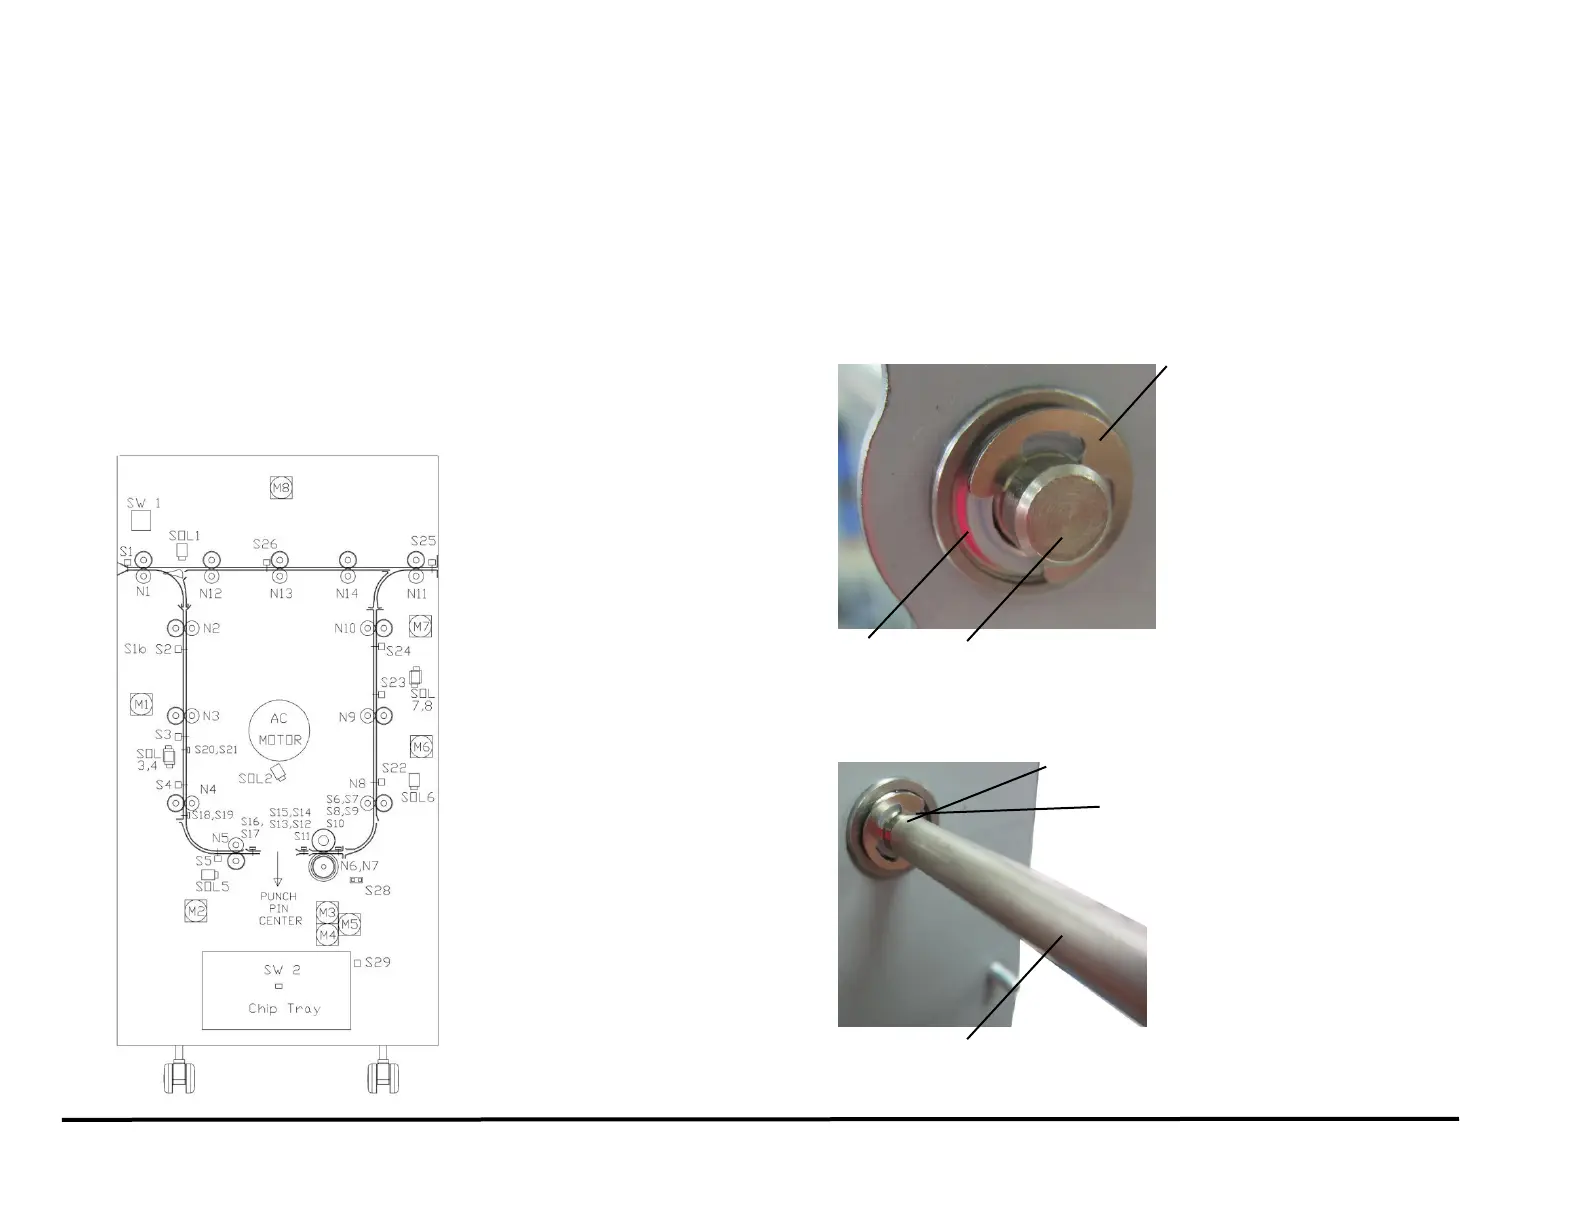
8. Remove the E-Ring and the Washer from the end of the Drive Roller
Shaft at the front of the machine.
9. Remove the E-Ring and the Washer from the end of the Drive Roller
Shaft at the rear of the machine.
10. Remove the Drive Roller.