GBC AdvancedPunch Pro 11/07/2018 RAPS
2-27
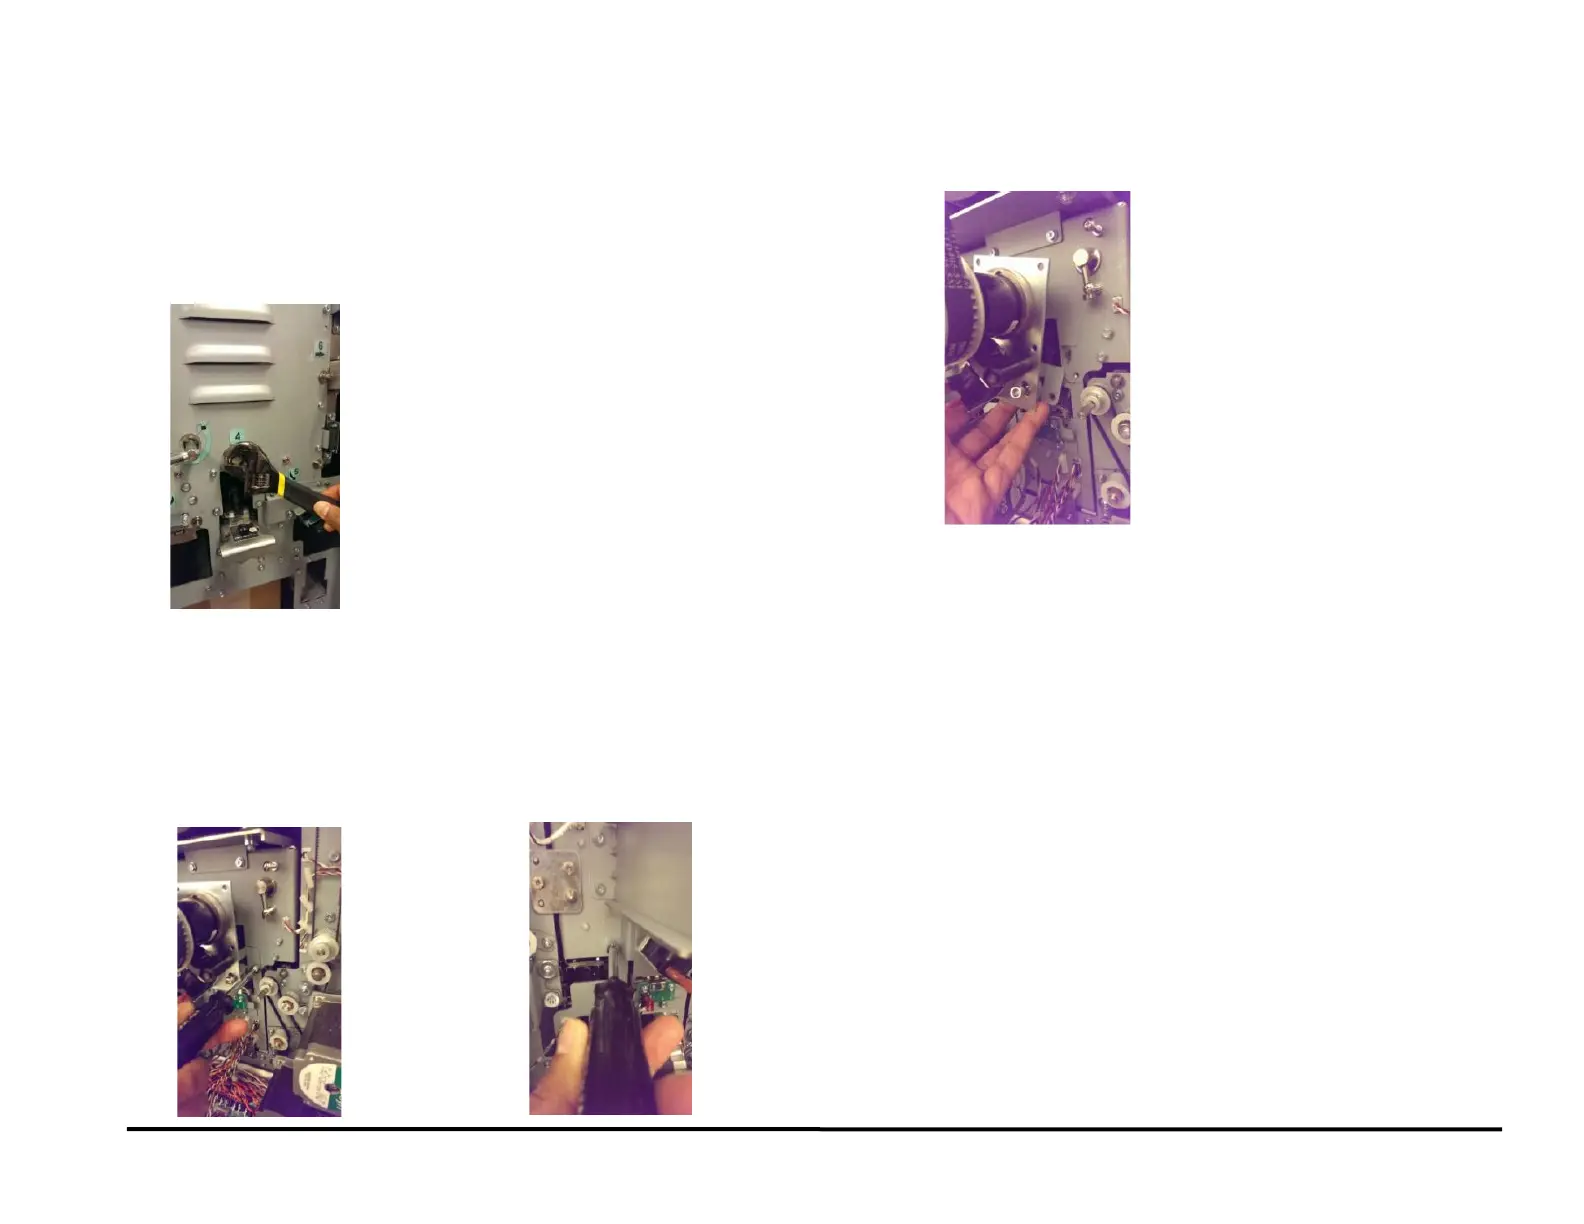
RAP 2.7 Multiple Sheets Jammed - Die Pins Partially
Through the Sheets
Use this RAP if there are multiple sheets jammed with the die pins
partially through the sheets.
1. Using the Caster adjustment wrench found inside the front door,
Crank the punch shaft in the clock-wise direction (when viewed from
the front of the machine) using the flats in the front of the machine.
Flats are also present in the back side of the shaft which can be
accessed by removing the rear cover.
2. Remove the jammed sheets.
3. If it is too difficult to crank the punch shaft:
• Remove rear cover.
• Disconnect the clutch wires at the Clutch Solenoid (PL 5.1,
PL 5.6).
• Remove two screws that hold the Clutch Stud bracket.
• Rotate the Clutch along with the shaft in the opposite direction
(clockwise direction when viewed from the back) until the pins exit
the sheet.
• Remove the jammed sheets.
• Return the Clutch Bracket and the Clutch to their positions and
install the Screws.
• Connect the clutch wires at the Clutch Solenoid (PL 5.1, PL 5.6).
• Confirm the punch cycles correctly by entering the Service User
Interface, GP 6.2, and running Cycle Punch Function Test, GP
6.2.12 to verify the punch cam returns to home position. If it does
not, perform Punch Cam Indexing, ADJ 1.5.