Repairs/Adjustments 08/20/2015 GBC AdvancedPunch Pro
4-86
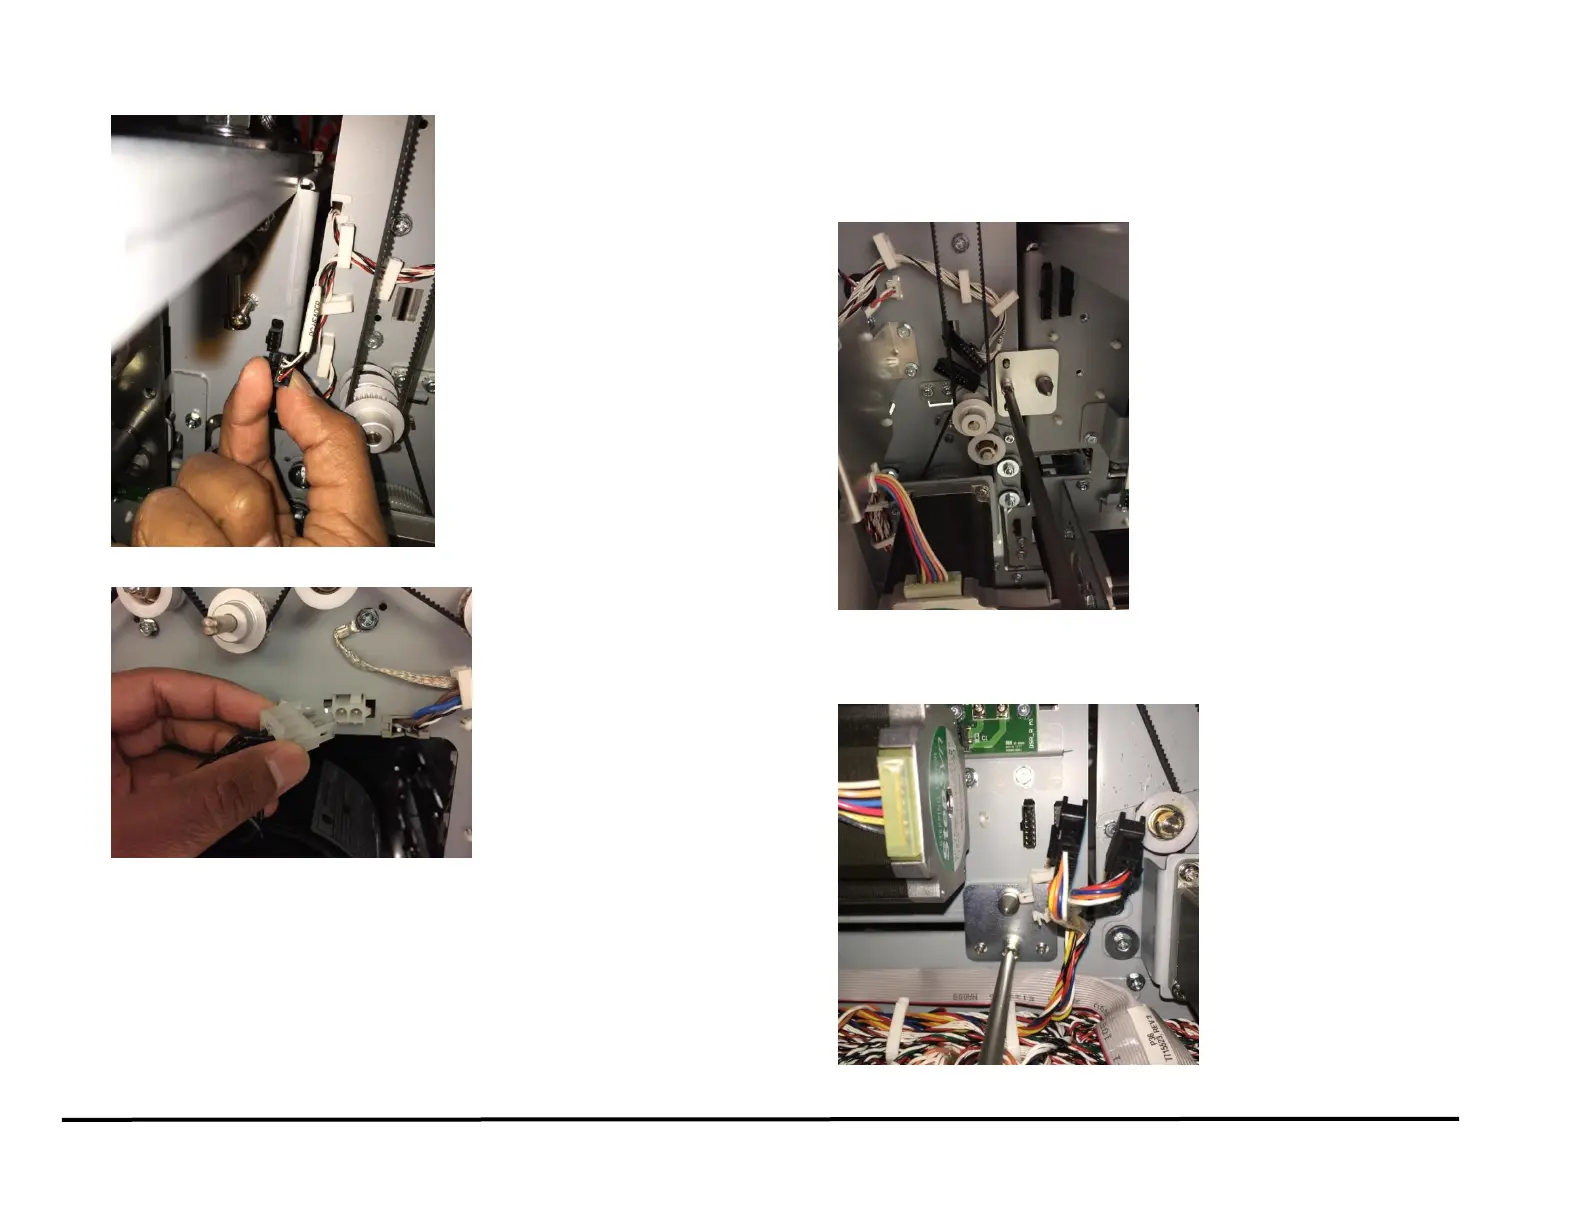
16. Disconnect the Connector for Sensors S16 and S17.
17. Disconnect the Connector for Punch Motor M10.
(Cont.)
18. Do the following to remove the Punch Module Mount Bracket (Lock
Plates).
Use a Phillips Head Screwdriver to loosen the Captive Screw
from the left Punch Module Mount Bracket.
Remove the left Punch Module Mount Bracket.
Use a Phillips Head Screwdriver to loosen the Captive Screw
from the right Punch Module Mount Bracket.
Remove the right Punch Module Mount Bracket.
 Loading...