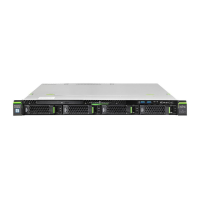
RX100 S7
Upgrade and Maintenance Manual
Contents
11.2.1 Required tools . . . . . . . . . . . . . . . . . . . . . . . . . . 280
11.2.2 Preliminary steps . . . . . . . . . . . . . . . . . . . . . . . . 281
11.2.3 Removing the riser module 1 . . . . . . . . . . . . . . . . . . 281
11.2.4 Removing the air duct . . . . . . . . . . . . . . . . . . . . . . 282
11.2.5 Removing the heat sink . . . . . . . . . . . . . . . . . . . . . 283
11.2.6 Cleaning the heat sink underside and the processor surface . . 283
11.2.7 Removing the defective processor . . . . . . . . . . . . . . . 284
11.2.8 Installing the new processor . . . . . . . . . . . . . . . . . . . 286
11.2.9 Applying the thermal paste to the processor surface . . . . . . 288
11.2.10 Installing the heat sink . . . . . . . . . . . . . . . . . . . . . . 290
11.2.11 Installing the air duct . . . . . . . . . . . . . . . . . . . . . . . 291
11.2.12 Installing the riser module 1 . . . . . . . . . . . . . . . . . . . 292
11.2.13 Concluding steps . . . . . . . . . . . . . . . . . . . . . . . . 292
11.3 Replacing the heat sink . . . . . . . . . . . . . . . . . . . . 293
11.3.1 Required tools . . . . . . . . . . . . . . . . . . . . . . . . . . 293
11.3.2 Preliminary steps . . . . . . . . . . . . . . . . . . . . . . . . 293
11.3.3 Removing the riser module 1 . . . . . . . . . . . . . . . . . . 293
11.3.4 Removing the air duct . . . . . . . . . . . . . . . . . . . . . . 294
11.3.5 Removing the defective heat sink . . . . . . . . . . . . . . . . 294
11.3.6 Cleaning the processor surface . . . . . . . . . . . . . . . . . 294
11.3.7 Removing the protective cover from the new heat sink . . . . . 294
11.3.8 Installing the new heat sink . . . . . . . . . . . . . . . . . . . 294
11.3.9 Installing the air duct . . . . . . . . . . . . . . . . . . . . . . . 294
11.3.10 Installing the riser module 1 . . . . . . . . . . . . . . . . . . . 295
11.3.11 Concluding steps . . . . . . . . . . . . . . . . . . . . . . . . 295
12 Optical disk drive . . . . . . . . . . . . . . . . . . . . . . . . 297
12.1 Position of the ODD bay . . . . . . . . . . . . . . . . . . . . 297
12.2 Installing the ODD . . . . . . . . . . . . . . . . . . . . . . . 297
12.2.1 Required tools . . . . . . . . . . . . . . . . . . . . . . . . . . 298
12.2.2 Preliminary steps . . . . . . . . . . . . . . . . . . . . . . . . 298
12.2.3 Removing the dummy cover . . . . . . . . . . . . . . . . . . . 299
12.2.4 Removing the retaining spring from the dummy cover . . . . . 299
12.2.5 Installing the retaining spring on the ODD . . . . . . . . . . . . 300
12.2.6 Installing the ODD . . . . . . . . . . . . . . . . . . . . . . . . 300
12.2.7 Connecting the cables to the ODD . . . . . . . . . . . . . . . 301
12.2.8 Concluding steps . . . . . . . . . . . . . . . . . . . . . . . . 301
12.3 Removing the ODD . . . . . . . . . . . . . . . . . . . . . . . 302
12.3.1 Required tools . . . . . . . . . . . . . . . . . . . . . . . . . . 302
 Loading...
