Repairs/Adjustments 08/20/2015 GBC AdvancedPunch Pro
4-92
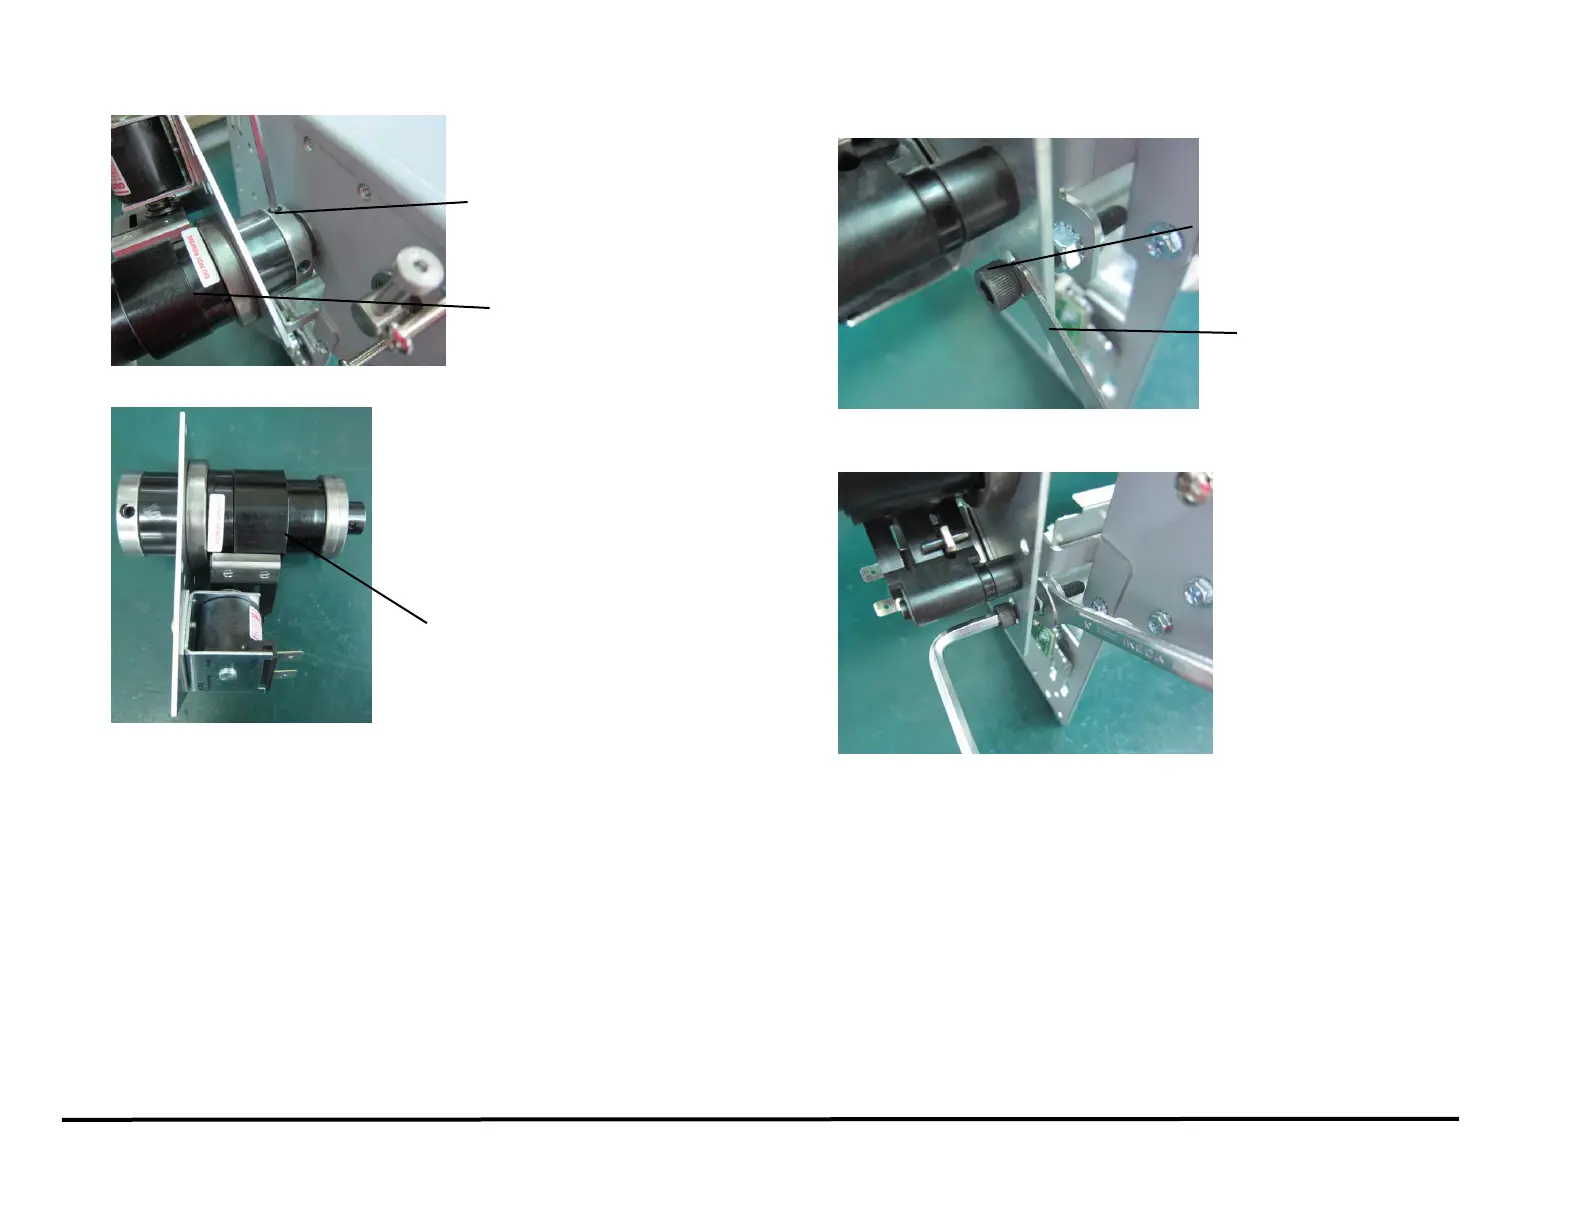
10. Loosen the Set Screws (2) from the Clutch.
11. Remove the Clutch from the Shaft.
Installation Procedure
1. Loosen the Set Screws (2) from the new Clutch.
2. Place the new Clutch in position on the Shaft.
3. Rotate the Clutch until the holes for the Set Screws line up with the
notches on the Shaft.
The Cone point set screw should be properly seated in the notch of
the Punch shaft.
4. Put a drop of Loctite on each Set Screw.
5. Tighten the Set Screws (2).
6. Place the long M56Screw and the Lock Nuts (2) in position.
7. Use a shim of thickness between 3 and 5mm to set the gap between
the head of the Screw and the Clutch Bracket.
8. Use a 10 mm wrench and a 6mm Allen Wrench to tighten the Lock
Nuts (2).
9. Recheck the gap.
10. Do ADJ 1.5 Punch Cam Indexing.
(Cont.)
 Loading...