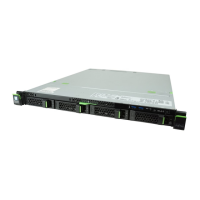
RX100 S7
Upgrade and Maintenance Manual
Contents
5.2.11.2 Clearing the SEL . . . . . . . . . . . . . . . . . . . . . . . 92
5.2.12 Updating the NIC configuration file in a Linux environment . . . 93
5.2.13 Enabling BitLocker functionality . . . . . . . . . . . . . . . . . 94
5.2.14 Performing a RAID array rebuild . . . . . . . . . . . . . . . . . 95
5.2.15 Looking up changed MAC / WWN addresses . . . . . . . . . . 96
5.2.15.1 Looking up MAC addresses . . . . . . . . . . . . . . . . . 96
5.2.15.2 Looking up WWN addresses . . . . . . . . . . . . . . . . . 96
5.2.16 Using the Chassis ID Prom Tool . . . . . . . . . . . . . . . . . 97
5.2.17 Configuring LAN teaming . . . . . . . . . . . . . . . . . . . . 98
5.2.17.1 After replacing / upgrading LAN controllers . . . . . . . . . 98
5.2.17.2 After replacing the system board . . . . . . . . . . . . . . . 98
5.2.18 Switching off the ID indicator . . . . . . . . . . . . . . . . . . 99
5.2.19 Performing a fan test after replacing a defective fan . . . . . . 99
6 Power supply . . . . . . . . . . . . . . . . . . . . . . . . . . 101
6.1 Standard power supply . . . . . . . . . . . . . . . . . . . . 102
6.1.1 Replacing the standard power supply unit . . . . . . . . . . . . 102
6.1.1.1 Required tools . . . . . . . . . . . . . . . . . . . . . . . . 102
6.1.1.2 Preliminary steps . . . . . . . . . . . . . . . . . . . . . . . 102
6.1.1.3 Disconnecting the power cables . . . . . . . . . . . . . . . 103
6.1.1.4 Removing the defective standard power supply unit . . . . . 104
6.1.1.5 Installing the new standard power supply unit . . . . . . . . 105
6.1.1.6 Connecting the power cables . . . . . . . . . . . . . . . . 106
6.1.1.7 Concluding steps . . . . . . . . . . . . . . . . . . . . . . . 106
6.2 Converting a standard power supply to a redundant power
supply . . . . . . . . . . . . . . . . . . . . . . . . . . . . . . 107
6.2.1 Required tools . . . . . . . . . . . . . . . . . . . . . . . . . . 107
6.2.2 Preliminary steps . . . . . . . . . . . . . . . . . . . . . . . . 108
6.2.3 Disconnecting the power cables . . . . . . . . . . . . . . . . . 108
6.2.4 Removing the standard power supply unit . . . . . . . . . . . . 109
6.2.5 Removing the adapter plate . . . . . . . . . . . . . . . . . . . 110
6.2.6 Installing the power distribution board . . . . . . . . . . . . . . 111
6.2.7 Installing the PSU cage . . . . . . . . . . . . . . . . . . . . . 112
6.2.8 Connecting the power cables . . . . . . . . . . . . . . . . . . 114
6.2.9 Installing the power supply module . . . . . . . . . . . . . . . 114
6.2.10 Installing the dummy cover . . . . . . . . . . . . . . . . . . . 116
6.2.11 Installing the cable tie . . . . . . . . . . . . . . . . . . . . . . 117
6.2.12 Installing the additional fan module . . . . . . . . . . . . . . . 117
6.2.13 Concluding steps . . . . . . . . . . . . . . . . . . . . . . . . 119
 Loading...
