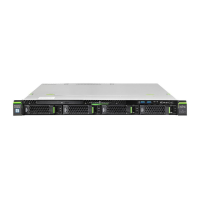
Upgrade and Maintenance Manual
RX100 S7
Contents
6.3 Redundant power supply . . . . . . . . . . . . . . . . . . . 120
6.3.1 Installing the second power supply module . . . . . . . . . . . 120
6.3.1.1 Required tools . . . . . . . . . . . . . . . . . . . . . . . . 120
6.3.1.2 Preliminary steps . . . . . . . . . . . . . . . . . . . . . . 120
6.3.1.3 Removing the dummy cover . . . . . . . . . . . . . . . . 121
6.3.1.4 Installing the second power supply module . . . . . . . . . 122
6.3.1.5 Installing the cable tie . . . . . . . . . . . . . . . . . . . . 123
6.3.1.6 Connecting the power cord . . . . . . . . . . . . . . . . . 123
6.3.1.7 Checking the power supply modules . . . . . . . . . . . . 124
6.3.1.8 Concluding steps . . . . . . . . . . . . . . . . . . . . . . 124
6.3.2 Replacing a power supply module . . . . . . . . . . . . . . . 125
6.3.2.1 Required tools . . . . . . . . . . . . . . . . . . . . . . . . 125
6.3.2.2 Preliminary steps . . . . . . . . . . . . . . . . . . . . . . 126
6.3.2.3 Removing the power cord . . . . . . . . . . . . . . . . . . 126
6.3.2.4 Removing the defective power supply module . . . . . . . 127
6.3.2.5 Installing the new power supply module . . . . . . . . . . 128
6.3.2.6 Connecting the power cord . . . . . . . . . . . . . . . . . 129
6.3.2.7 Checking the power supply modules . . . . . . . . . . . . 129
6.3.2.8 Concluding steps . . . . . . . . . . . . . . . . . . . . . . 129
6.3.3 Replacing the power distribution board . . . . . . . . . . . . . 130
6.3.3.1 Required tools . . . . . . . . . . . . . . . . . . . . . . . . 130
6.3.3.2 Preliminary steps . . . . . . . . . . . . . . . . . . . . . . 130
6.3.3.3 Removing the dummy cover (if applicable) . . . . . . . . . 131
6.3.3.4 Removing the power supply modules . . . . . . . . . . . . 131
6.3.3.5 Disconnecting the power cables . . . . . . . . . . . . . . 132
6.3.3.6 Removing the PSU cage . . . . . . . . . . . . . . . . . . 133
6.3.3.7 Removing the defective power distribution board . . . . . . 135
6.3.3.8 Installing the new power distribution board . . . . . . . . . 136
6.3.3.9 Installing the PSU cage . . . . . . . . . . . . . . . . . . . 137
6.3.3.10 Connecting the power cables . . . . . . . . . . . . . . . . 139
6.3.3.11 Installing the power supply module . . . . . . . . . . . . . 139
6.3.3.12 Installing the dummy cover (if applicable) . . . . . . . . . . 141
6.3.3.13 Concluding steps . . . . . . . . . . . . . . . . . . . . . . 141
7 Hard disk drives / solid state drives . . . . . . . . . . . . . 143
7.1 2.5-inch HDD/SSD subsystem . . . . . . . . . . . . . . . . 145
7.1.1 Equipping the 2.5-inch HDD/SSD bays . . . . . . . . . . . . . 145
7.1.2 Installing a 2.5-inch HDD/SSD module . . . . . . . . . . . . . 146
7.1.2.1 Required tools . . . . . . . . . . . . . . . . . . . . . . . . 146
7.1.2.2 Preliminary steps . . . . . . . . . . . . . . . . . . . . . . 146
 Loading...
