Epson Stylus Pro 4900/Epson Stylus Pro 4910 Revision A
DISASSEMBLY & ASSEMBLY Disassembly and Assembly Procedure 146
Confidential
3.4.2.12 Rear Unit Sensor
1. Remove the Front Cover. (p142)
2. Remove the Left Cover. (p137)
3. Remove the Rear Unit. (p145)
4. Remove the Rear Cover. (p144)
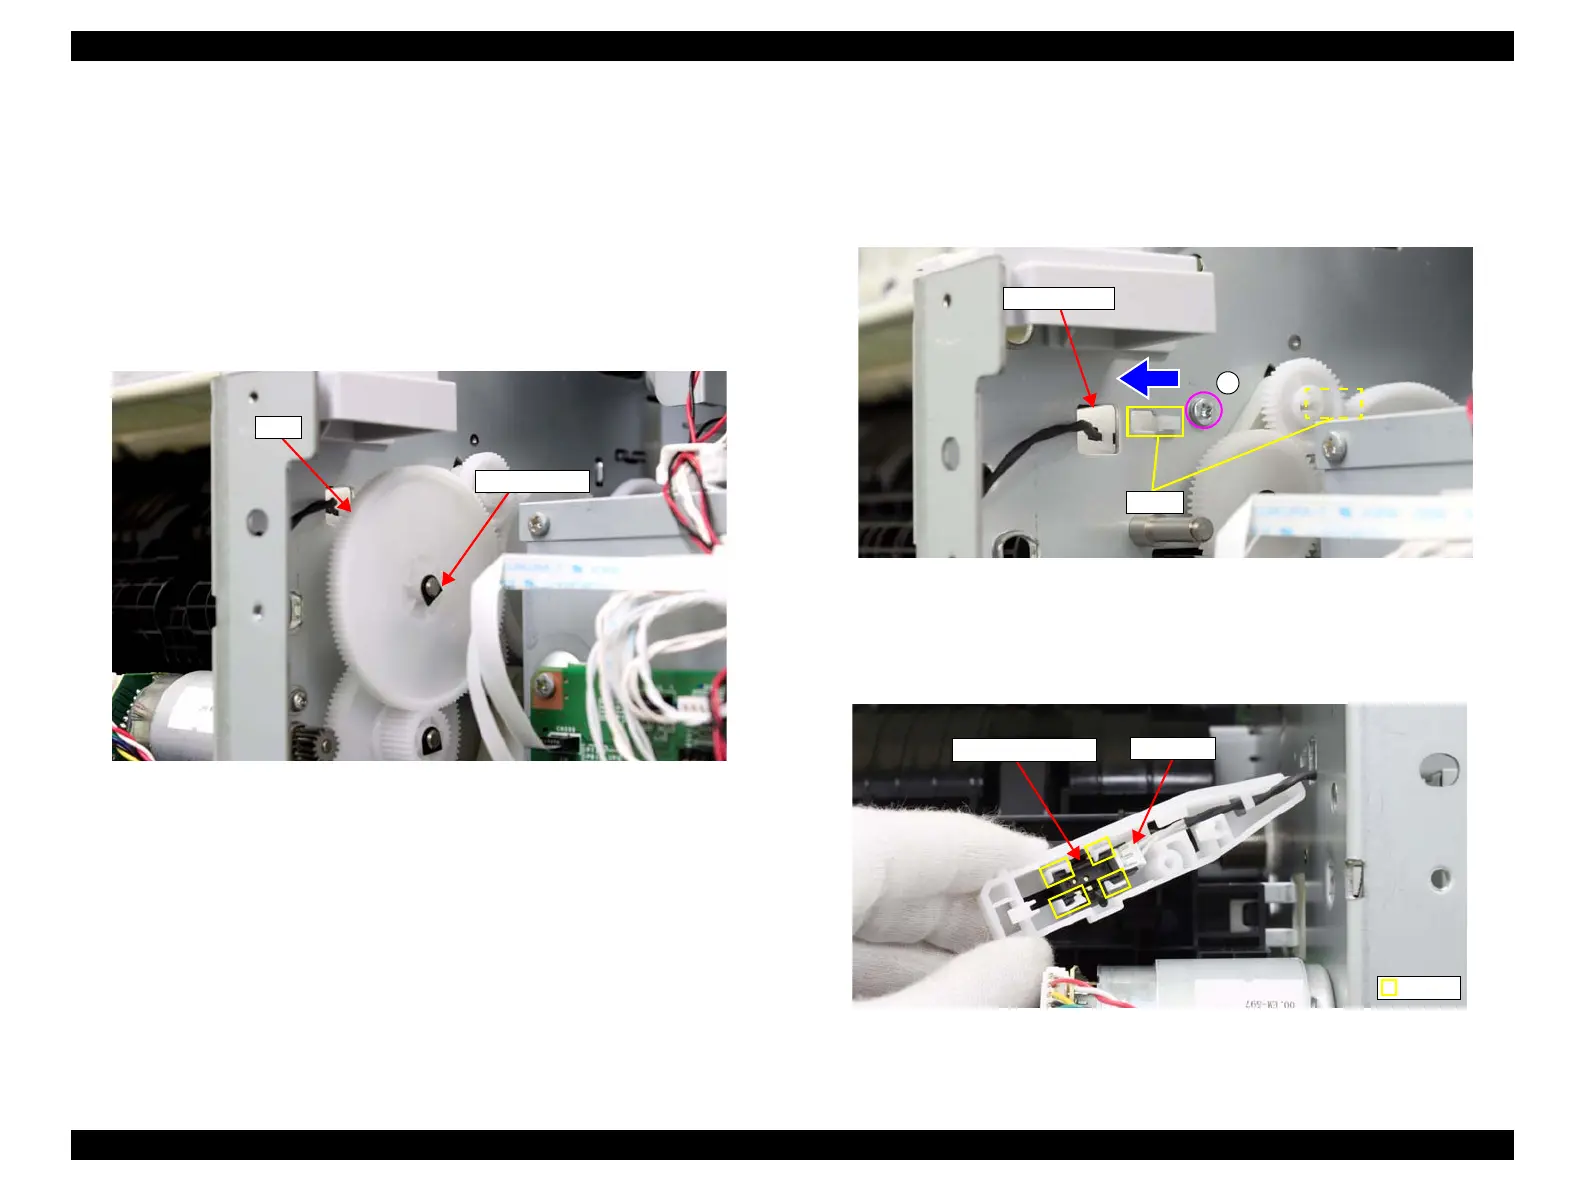
5. Remove the retaining ring that secures the gear.
6. Remove the gear.
Figure 3-45. Removing the gear
7. Remove the screw that secures the sensor holder.
A) Silver, Phillips, Bind P-tite M3x8: one piece
8. Slide the sensor holder in the direction of the arrow to release the two hooks, and
remove the sensor holder.
Figure 3-46. Removing the sensor holder
9. Disengage the hooks that secure the Rear Unit Sensor, and remove the Rear Unit
Sensor.
10. Disconnect the connector from the Rear Unit Sensor.
Figure 3-47. Removing the Rear Unit Sensor
Gear
Retaining ring
Sensor holder
A
Hooks
Rear Unit Sensor
Connector
Hook
 Loading...


