Epson Stylus Pro 4900/Epson Stylus Pro 4910 Revision A
DISASSEMBLY & ASSEMBLY Disassembly and Assembly Procedure 211
Confidential
3.4.6.6 Paper Empty Sensor
1. Remove the Front Cover. (p142)
2. Remove the Right Upper Cover. (p138)
3. Remove the Control Panel Cover. (p136)
4. Remove the Right Cover. (p139)
5. Remove the Left Cover. (p137)
6. Remove the Media Eject Cover. (p148)
7. Remove the Right IC Cover Frame. (p140)
8. Remove the Maintenance box 1. (p128)
9. Remove the Home (Right) Side Cartridge Holder. (p239)
10. Remove the Maintenance box 1 Holder. (p245)
11. Remove the two screws that secure the lower cover.
A) Silver, Phillips, Bind machine screw M4x8: two pieces
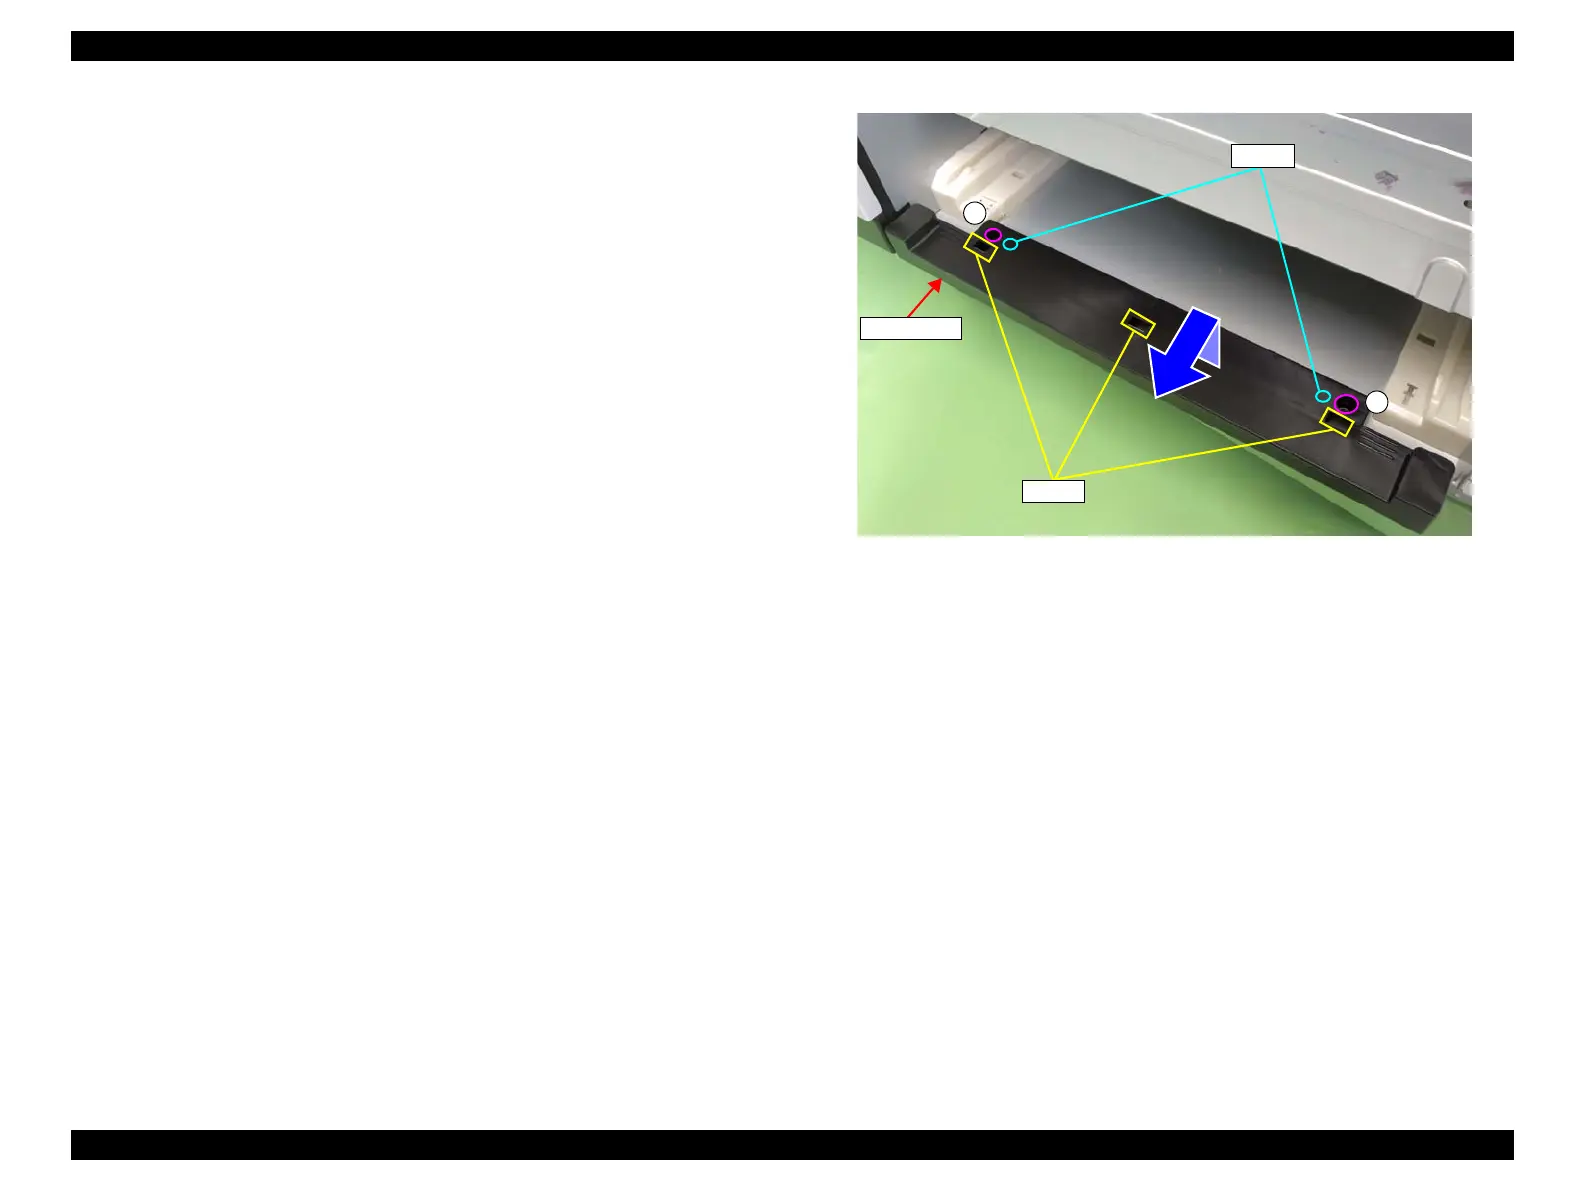
12. Tilt the lower cover frontward to release the two dowels.
13. Pull out the lower cover frontward to disengage the hooks, and remove the lower
cover.
Figure 3-135. Removing the lower cover
Lower cover
A
A
Hooks
Dowels
 Loading...


