Epson Stylus Pro 4900/Epson Stylus Pro 4910 Revision A
ADJUSTMENT CR Related Check & Adjustments 324
Confidential
14. Check if the height of the CR Unit is within the standard value.
Within the standard value: Go to Step 16
Out of the range: Go to Step 15
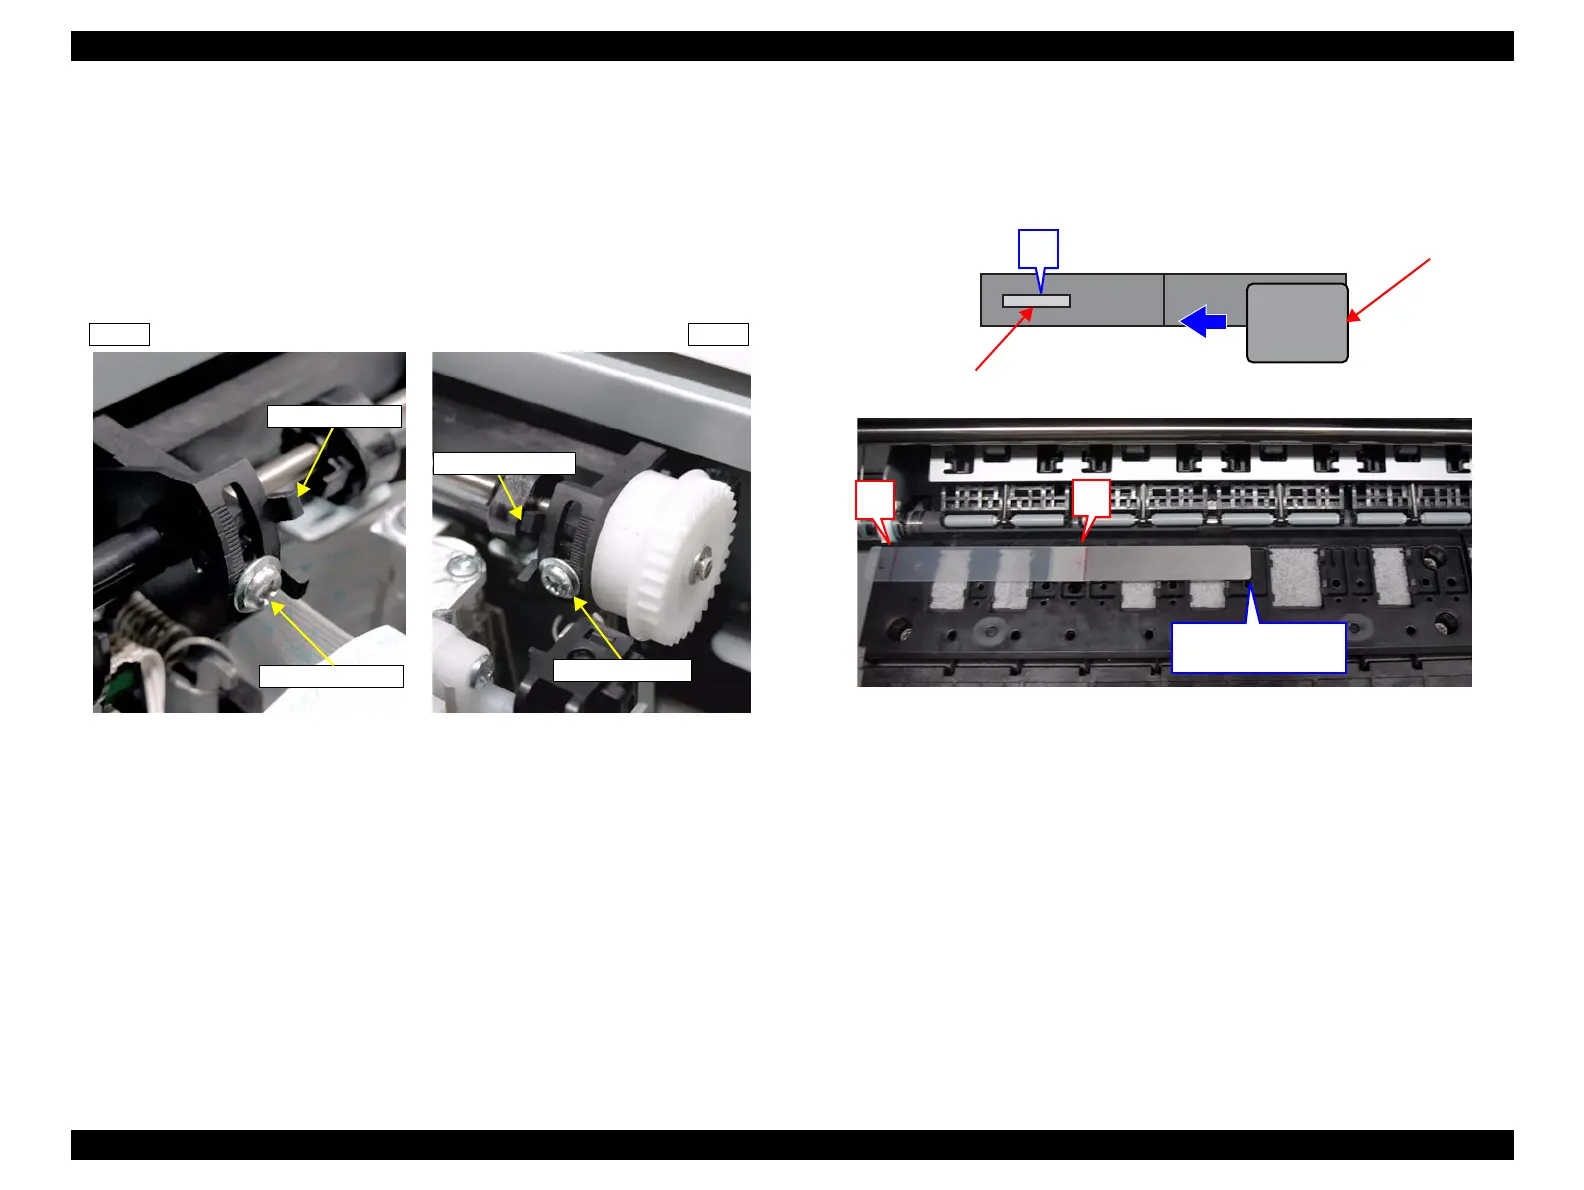
15. Loosen the adjustment screw and carry out the PG adjustment with the adjustment
lever.
After adjustment, secure the screw and return to Step 9.
Figure 4-29. Adjustment screw and lever
<Checks and adjustments on the Full side of the Platen>
16. Move the CR Unit to the Home side.
17. Place the thickness gauge on the position C as shown in Figure 4-30.
Figure 4-30. Position of the thickness gauge C
18. Move the CR Unit slowly over the thickness gauge.
19. Check if the height of the CR Unit is within the standard value.
Within the standard value: Go to Step 23
Stop at 1.55: Return to Step 7
Pass over 1.65: Go to Step 20
20. Place the thickness gauge of 1.75 mm on the position C as shown in Figure 4-30.
21. Move the CR Unit slowly over the thickness gauge.
Adjustment screw
Adjustment lever
Adjustment lever
Adjustment screw
Left Right
Thickness gauge
CR Unit
Edge of the
thickness gauge
C
L
R

 Loading...


