Epson Stylus Pro 4900/Epson Stylus Pro 4910 Revision A
ADJUSTMENT Head Related Checks and Adjustments 340
Confidential
5. Start the Service Program and press the [F11] key.
The lock of the CR Unit is released.
6. Open the Printer Cover.
7. Remove the Right Upper Cover. (P. 138)
8. Remove the CR Cover. (P. 149)
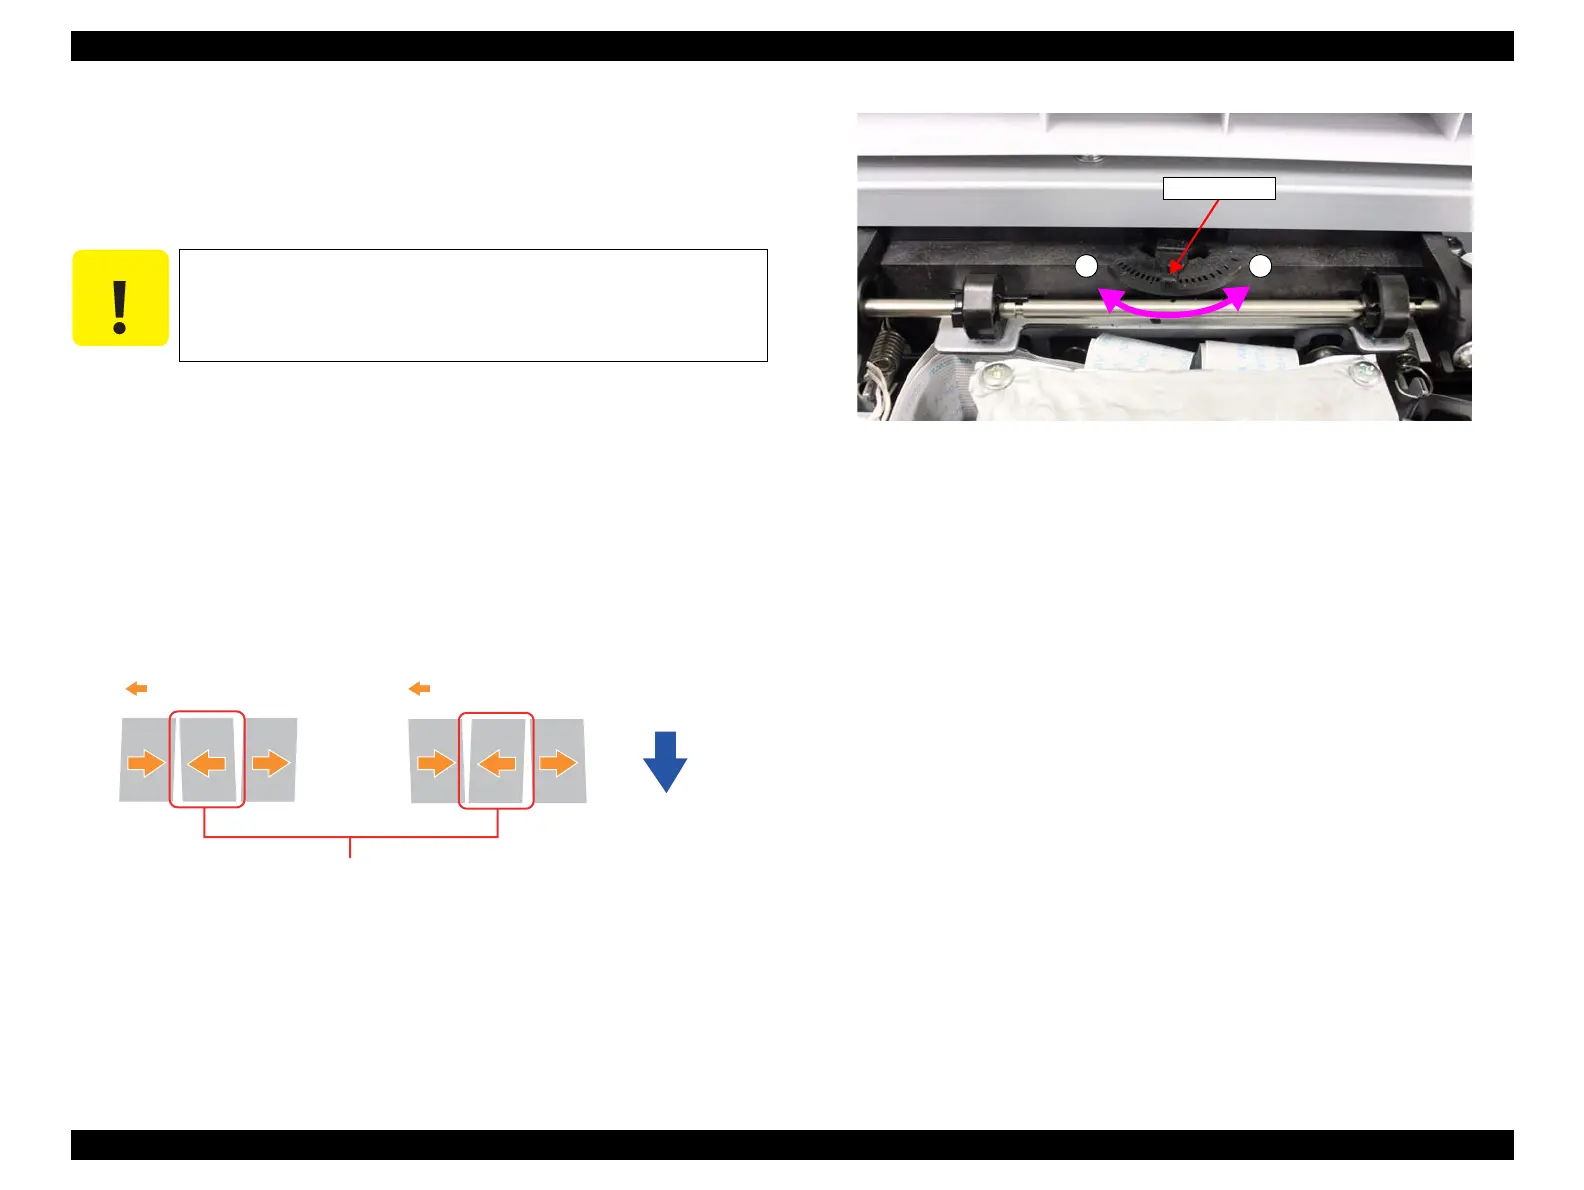
9. Check the block in the middle, and move the head tilt lever to up and down and
adjust the slant of the Printhead.
If the top line is tilting to the left. (PG in the front of the head is too narrow):
Rotate the lever to the + side to raise the front of the head.
If the top line is tilting to the right. (PG in the front of the head is too wide):
Rotate the lever to the - side to lower the front of the head.
Figure 4-48. Head tilt lever
10. Install the CR Cover.
11. Close the Front Cover.
12. Print the adjustment pattern again and check the adjustment result.
13. Repeat Step 4 to Step 12 till the adjustment is finished.
14. Press the [F12] key and cap the Printhead.
15. Turn the printer OFF to complete the adjustment.
C A U T I O N
Be sure to execute the following steps with the CR Unit on the right
end. If the CR Unit is on the platen, the Printhead may be damaged.
Top side is slanted to the left
Turn the lever to - side
CR scan direction
Top side is slanted to the right
Turn the lever to + side
CR scan direction
Check the center block
Paper feed direction
Head tilt lever
- +
 Loading...


