Epson Stylus Pro 4900/Epson Stylus Pro 4910 Revision A
ADJUSTMENT Media Feed Related Checks and Adjustments 384
Confidential
PROCEDURE
1. Turn the printer ON.
2. Press [Paper Source ] to select cut sheets.
3. Press [Paper Set] to unlock the paper pressure.
4. Open the Printer Cover.
5. Insert the paper to the Printer Cover Sensor to turn the sensor ON.
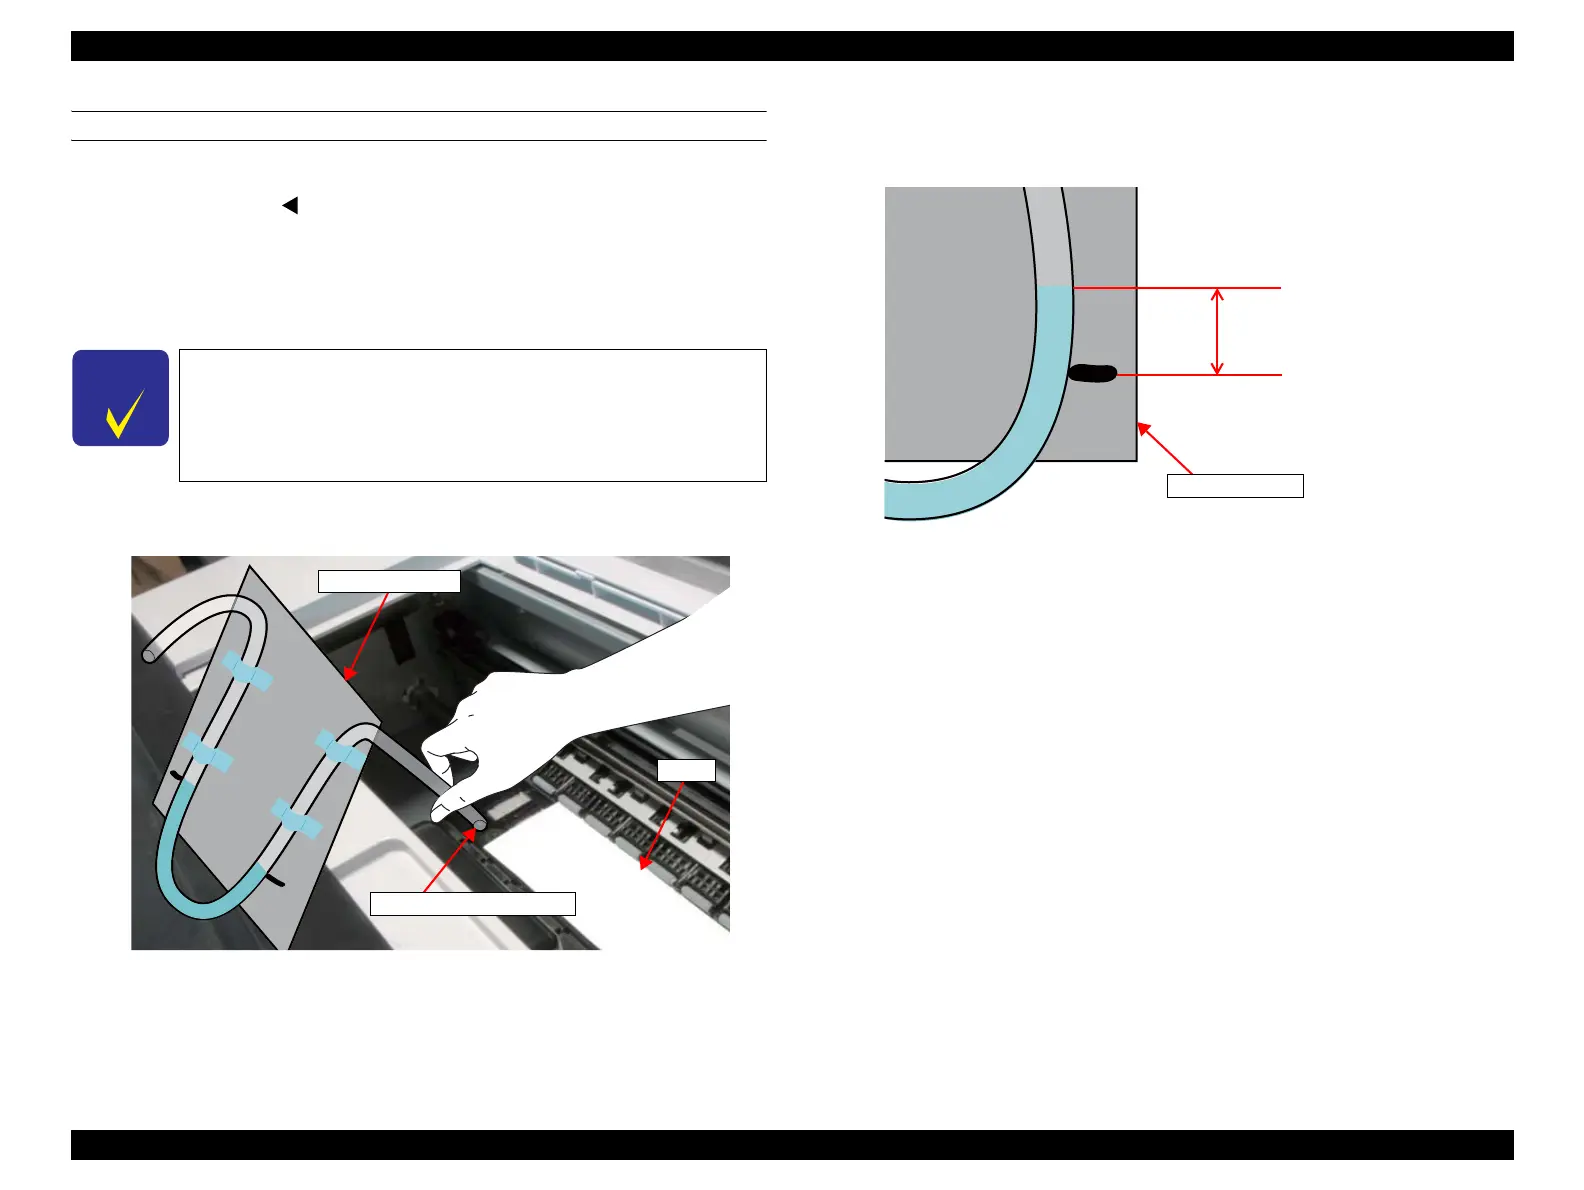
6. Push the tube strongly against the sucking hole on the left end.
Figure 4-93. Checking the suction power
7. Start the Service Program and select Suction Check & Adjustment.
8. Click [Run].
9. Measure the rise distance of water surface.
Figure 4-94. Measuring the surface
10. Double the value measured in Step 9 (The water surface in the tube on the right
rises, and the one on the left lowers. Summing up the moved distances of the water
surfaces can provide the result.) Check the result if it is within the standard.
Within the standard value: Go to Step 14
Out of the range: Go to Step 11
11. Click [Read].
12. Input the adjustment value. Input the value as 1 mm=1% so that it will be within
the standard value.
13. Click [Write], and return to Step 6.
14. Remove the measurement jig and paper.
15. Click [Finish].
16. Turn the printer OFF to complete the adjustment.
C H E C K
P O I N T
Insert the sheet to the position shown in Figure 4-93 and press
[Paper Set] to lock the paper presser. Make sure to follow the
following points.
Place it with the gloss side up
Do not close the sucking hole on the left end
Paper
Measurement jig
Sucking hole on the left end
Measurement jig
Within 12.5 ± 1 mm
(25
± 2mm/2)
 Loading...


