Epson Stylus Pro 4900/Epson Stylus Pro 4910 Revision A
DISASSEMBLY & ASSEMBLY Disassembly and Assembly Procedure 241
Confidential
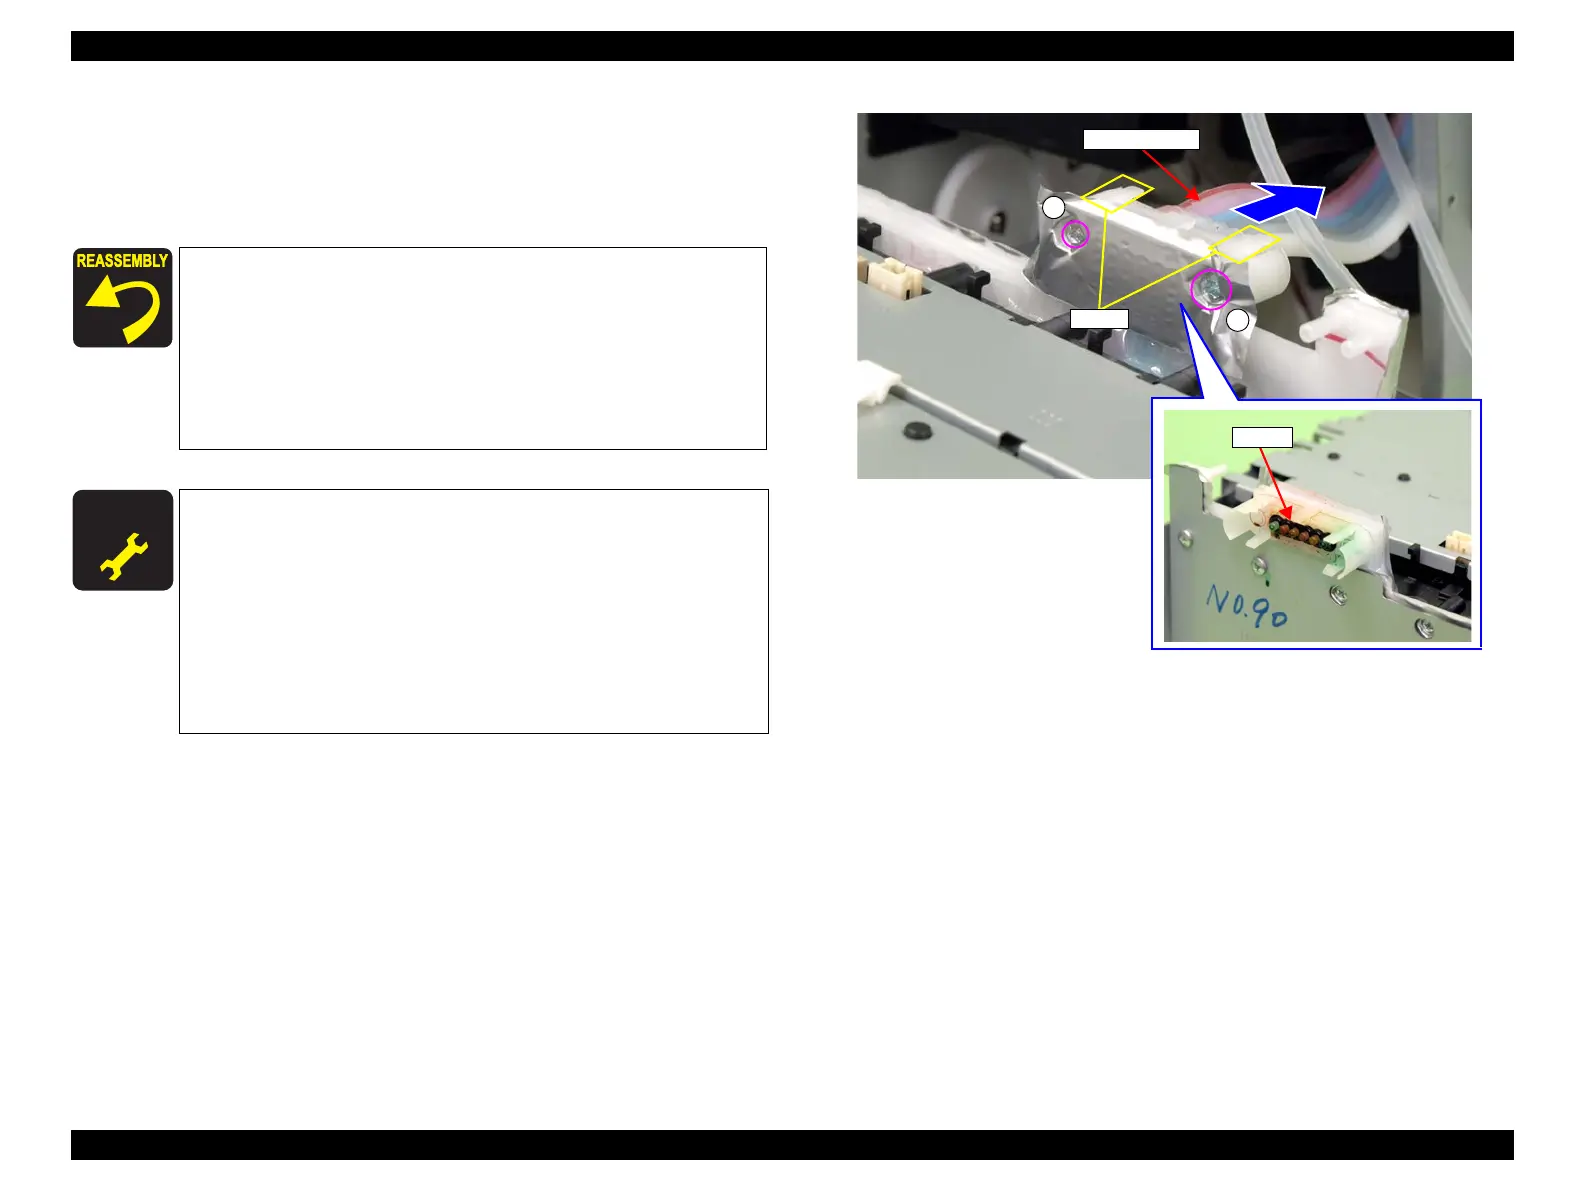
14. Remove the two screws that secure the Right Ink Tube, and disconnect the Right
Ink Tube.
B) Silver, Phillips, Bind machine screw M3x10: two pieces
15. Remove the O-ring.
Figure 3-176. Disconnecting the Ink Tube
Make sure to tighten the screw that secures the Ink Tubes using
a torque driver with the following torque.
0.39 ± 0.05N/m
Make sure to install the O-ring. The O-ring is included in the
Home (Right) Side Cartridge Holder. Make sure to confirm
there is no damage or no foreign material attached on the
sealing rubber or the joint section visually then. Installing a
damaged part such as mentioned above may cause ink leakage.
A D J U S T M E N T
R E Q U I R E D
Be sure to refer to Chapter 4 “Adjustment” (see p277) and perform
specified adjustments after replacing or removing the Home
(Right) Side Cartridge Holder.
<Adjustment items>
1. Ink Eject and Initial Charge
2. Counter Reset (Ink Holder Home Side (R) Counter)
3. ILS & CSIC Check
4. Ink Eject and Initial Charge
5. Nozzle Check
B
B
Hooks
Right Ink Tube
O-ring
 Loading...


