Epson Stylus Pro 4900/Epson Stylus Pro 4910 Revision A
DISASSEMBLY & ASSEMBLY Disassembly and Assembly Procedure 159
Confidential
3.4.3.4 Power Supply Board
1. Remove the Front Cover. (p142)
2. Remove the Rear Cover. (p144)
3. Remove the Left Cover. (p137)
4. Remove the Power Supply Box. (p157)
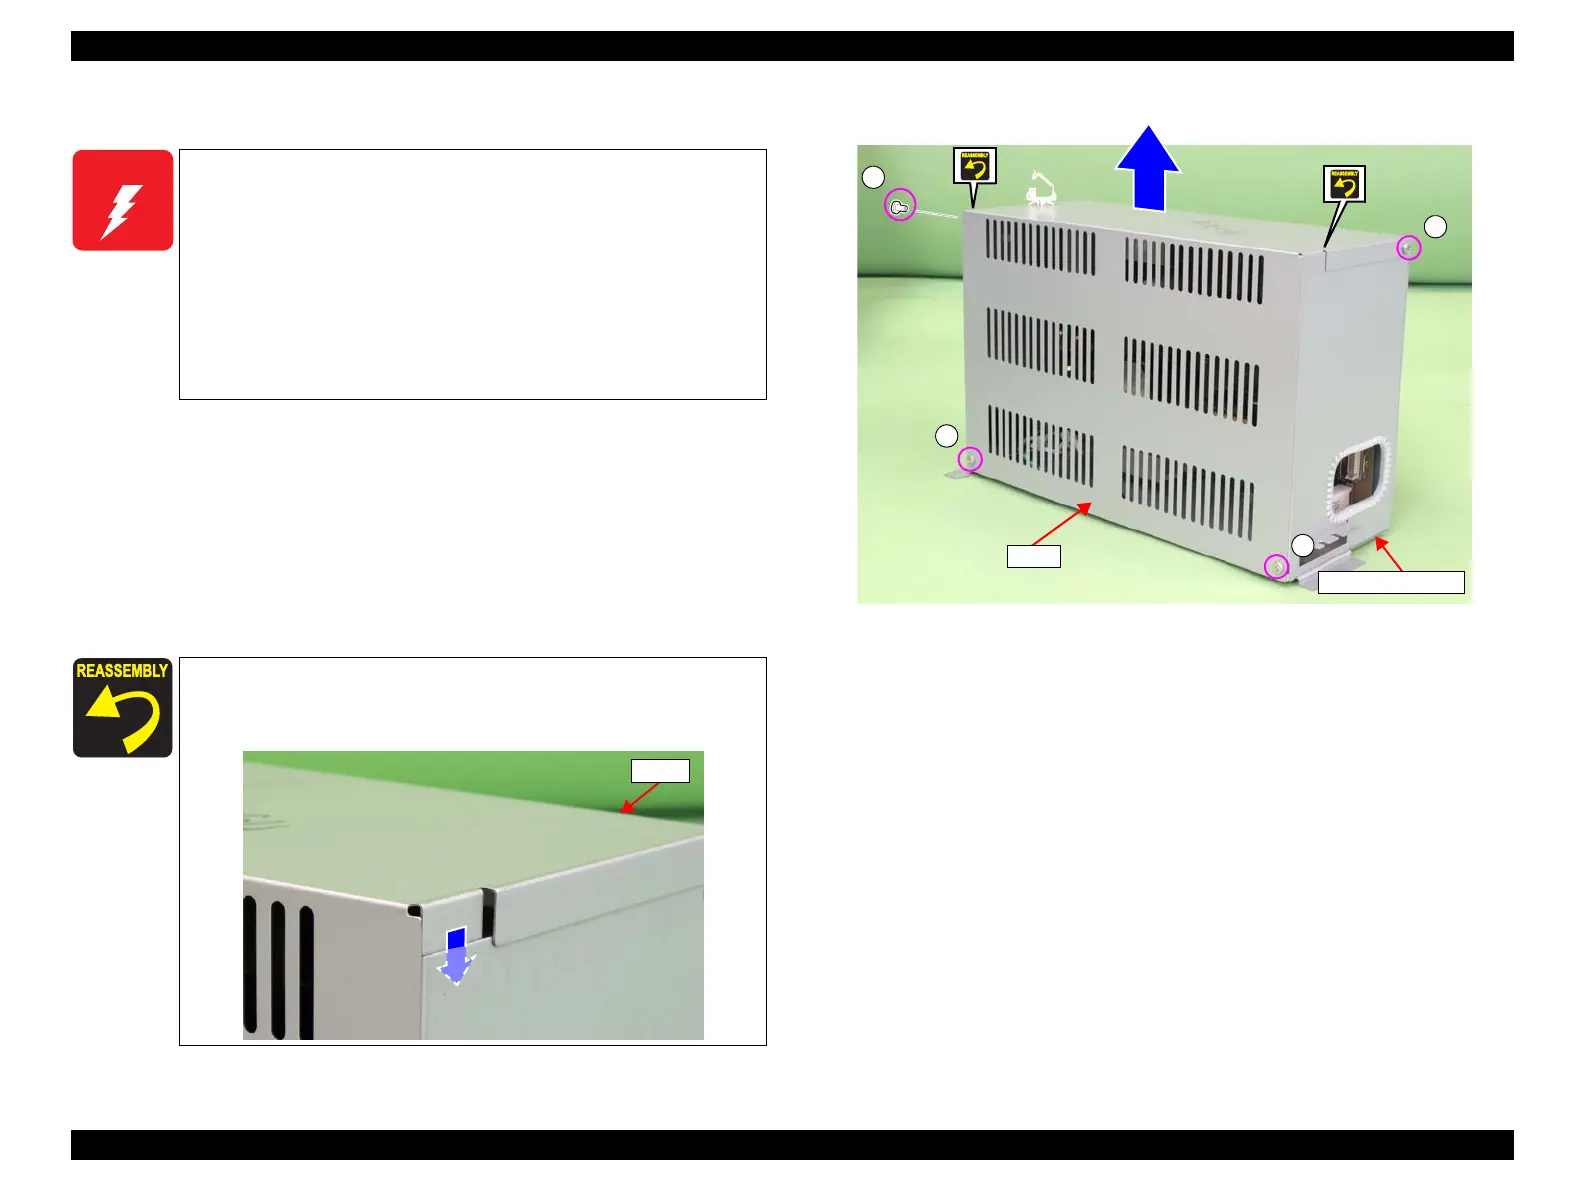
5. Remove the four screws that secure the cover of the Power Supply Box, and
remove the cover.
A) Silver, Phillips, Bind machine screw M3x6: four pieces
Figure 3-63. Removing the cover
W A R N I N G
When removing the Power Supply Board, do not start the work
immediately after disconnecting the AC cable. Wait for at least
five minutes for the electrolytic capacitor to finish discharging
residual charges.
When powering this product, high-voltage current may be
applied on the Power Supply Board. To prevent ELECTRIC
SHOCK, do not touch the Power Supply Board when the power
is ON. If the shock should happen, the flowing current is very
tiny, about a few hundreds μA, therefore it will not do any
harm on the human body.
When installing the cover of the Power Supply Box, make sure to
install it so that the part with an asterisk is set inside the Power
Supply Box.
*
Cover
A
Cover
Power Supply Box
A
A
A
 Loading...


