Epson Stylus Pro 4900/Epson Stylus Pro 4910 Revision A
DISASSEMBLY & ASSEMBLY Disassembly and Assembly Procedure 149
Confidential
3.4.2.15 CR Cover
1. Remove the Front Cover. (p142)
2. Remove the Right Upper Cover. (p138)
3. Remove the Control Panel Cover. (p136)
4. Remove the Right Cover. (p139)
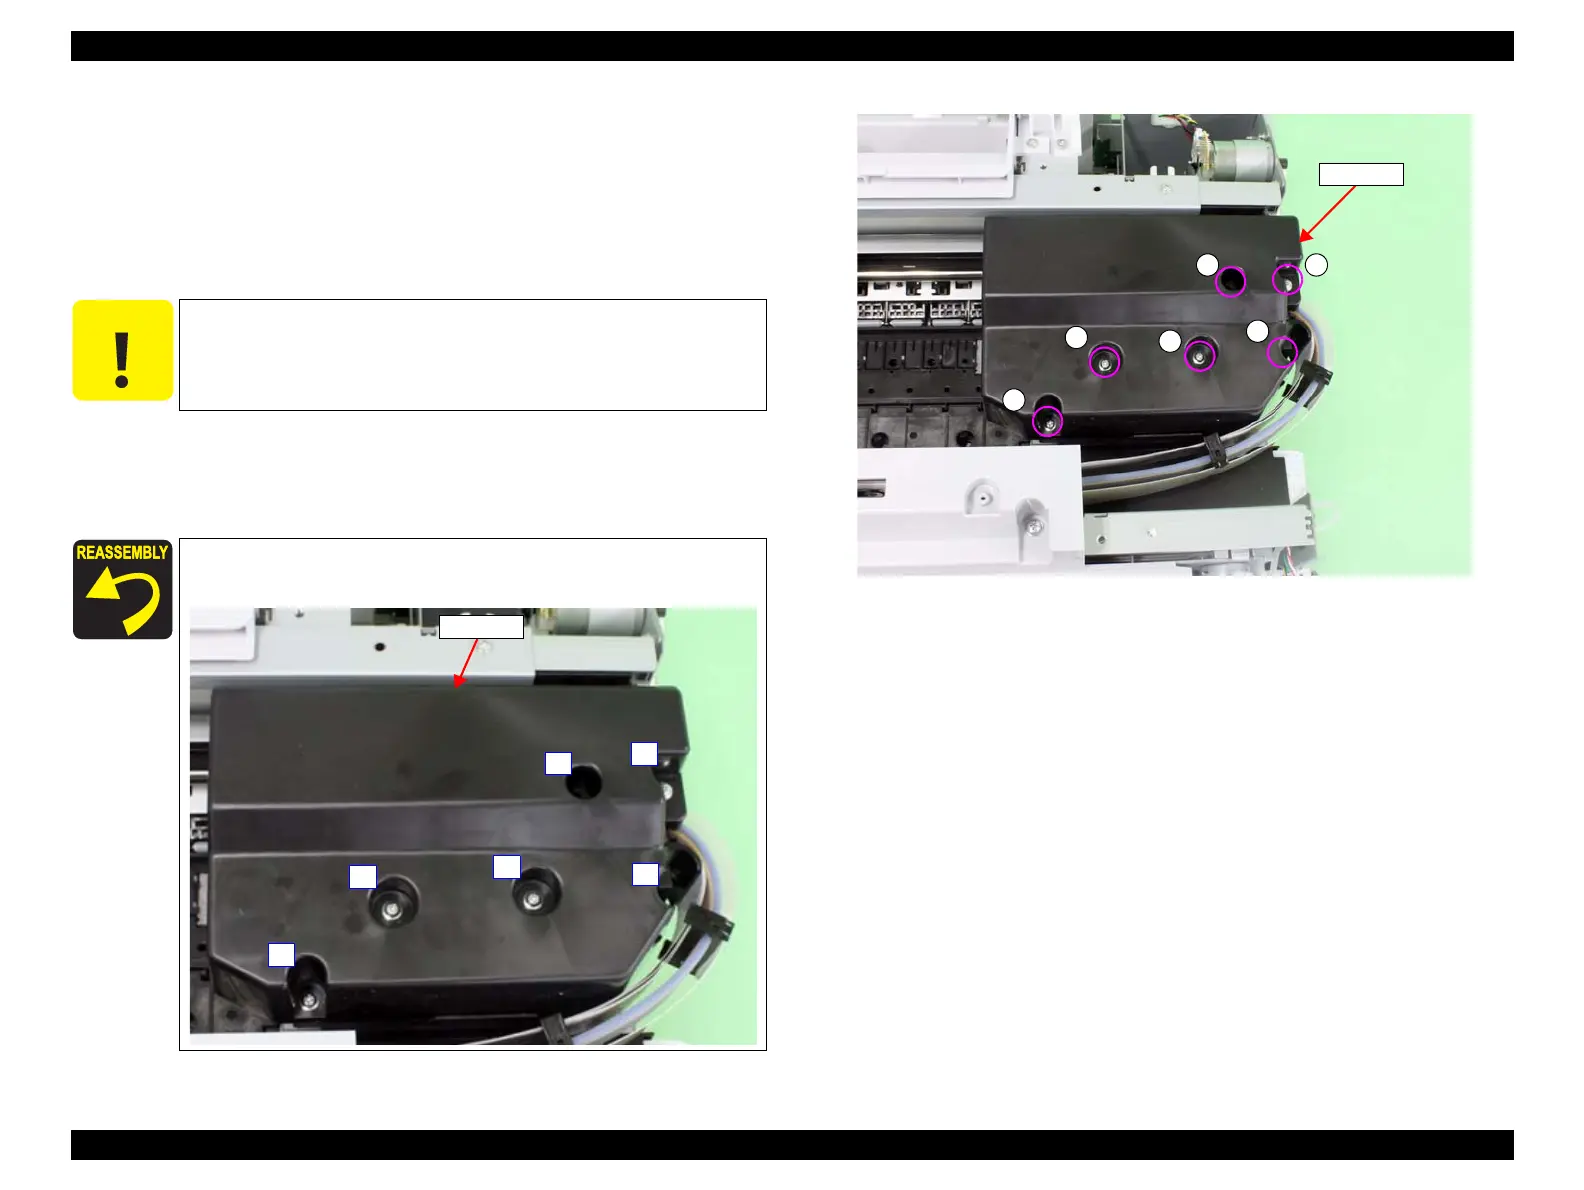
5. Remove the six screws that secure the CR Cover.
A) Silver, Phillips, Round Washer Head P-tite M3x8: six pieces
6. Remove the CR Cover.
Figure 3-51. Removing the CR Cover
C A U T I O N
If you do repair work on the Platen, the Printhead may get
damaged. Therefore, make sure to move the CR Unit to the home
position or to the Full side when working.
When installing the CR Cover, be sure to secure the screws in the
order shown in the figure below.
5
4
3
2
1
6
CR Cover
A
A
A
A A
A
CR Cover
 Loading...


