Epson Stylus Pro 4900/Epson Stylus Pro 4910 Revision A
DISASSEMBLY & ASSEMBLY Disassembly and Assembly Procedure 185
Confidential
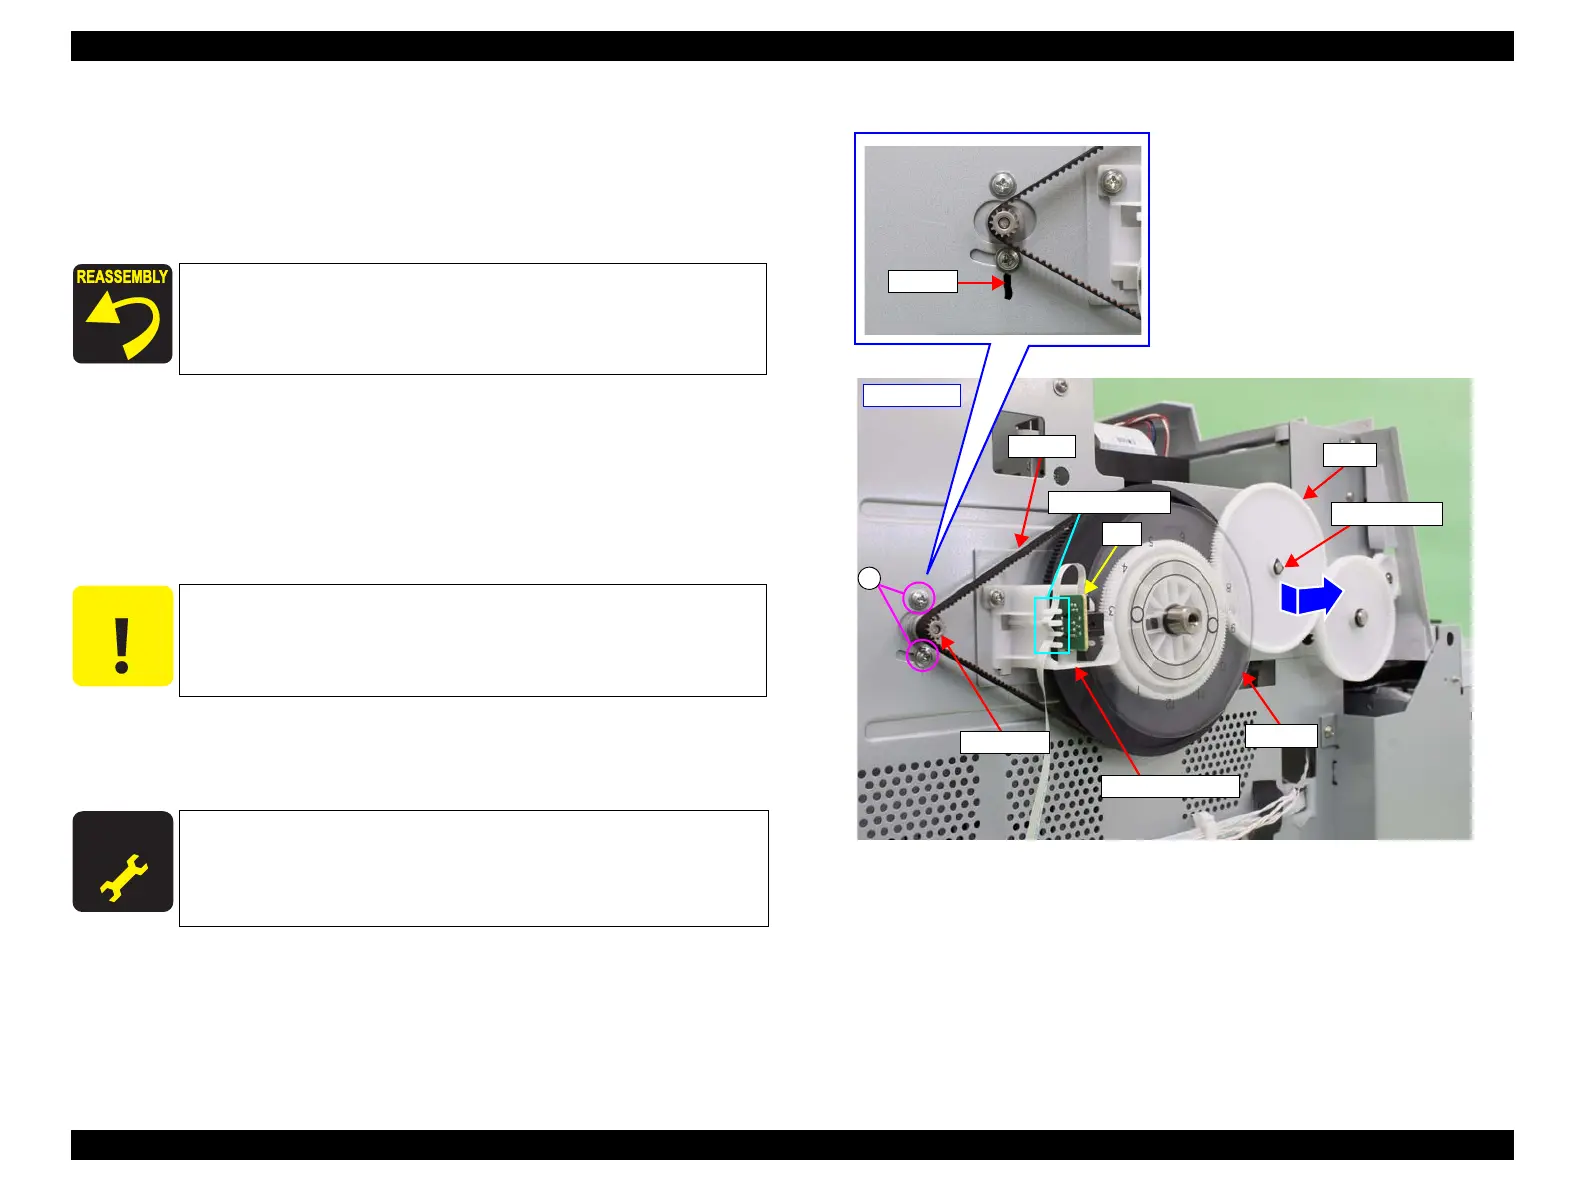
3.4.5.4 PF Belt
1. Remove the Front Cover. (p142)
2. Remove the Left Cover. (p137)
3. Mark the screw positions.
4. Loosen the two screws that secure the PF Motor.
A) Silver, Phillips, Round Washer Head S-tite M3x5: two pieces
5. Detach the belt from the pinion gear of the PF Motor.
6. Remove the FFC from the PF Encoder, and release the FFC from the harness
guides of the PF encoder holder.
7. Remove the retaining ring, and remove the gear in the direction of the arrow.
8. Remove the PF Belt.
Figure 3-98. Removing the PF Belt
Securing the PF Motor at the marked position makes the
subsequent tension adjustment easier.
C A U T I O N
In the next steps, be careful not to damage the PF Scale.
A D J U S T M E N T
R E Q U I R E D
Be sure to refer to Chapter 4 “Adjustment” (see p277) and perform
specified adjustment after replacing or removing the PF Belt.
<Adjustment item>
PF Belt Adjustment
- Left side -
PF Belt
Marking
A
Gear
Retaining ring
PF encoder holder
FFC
Harness guides
Pinion gear
PF Scale
 Loading...


