Epson Stylus Pro 4900/Epson Stylus Pro 4910 Revision A
ADJUSTMENT CR Related Check & Adjustments 318
Confidential
CHECK 2
Move the CR Unit to the right end.
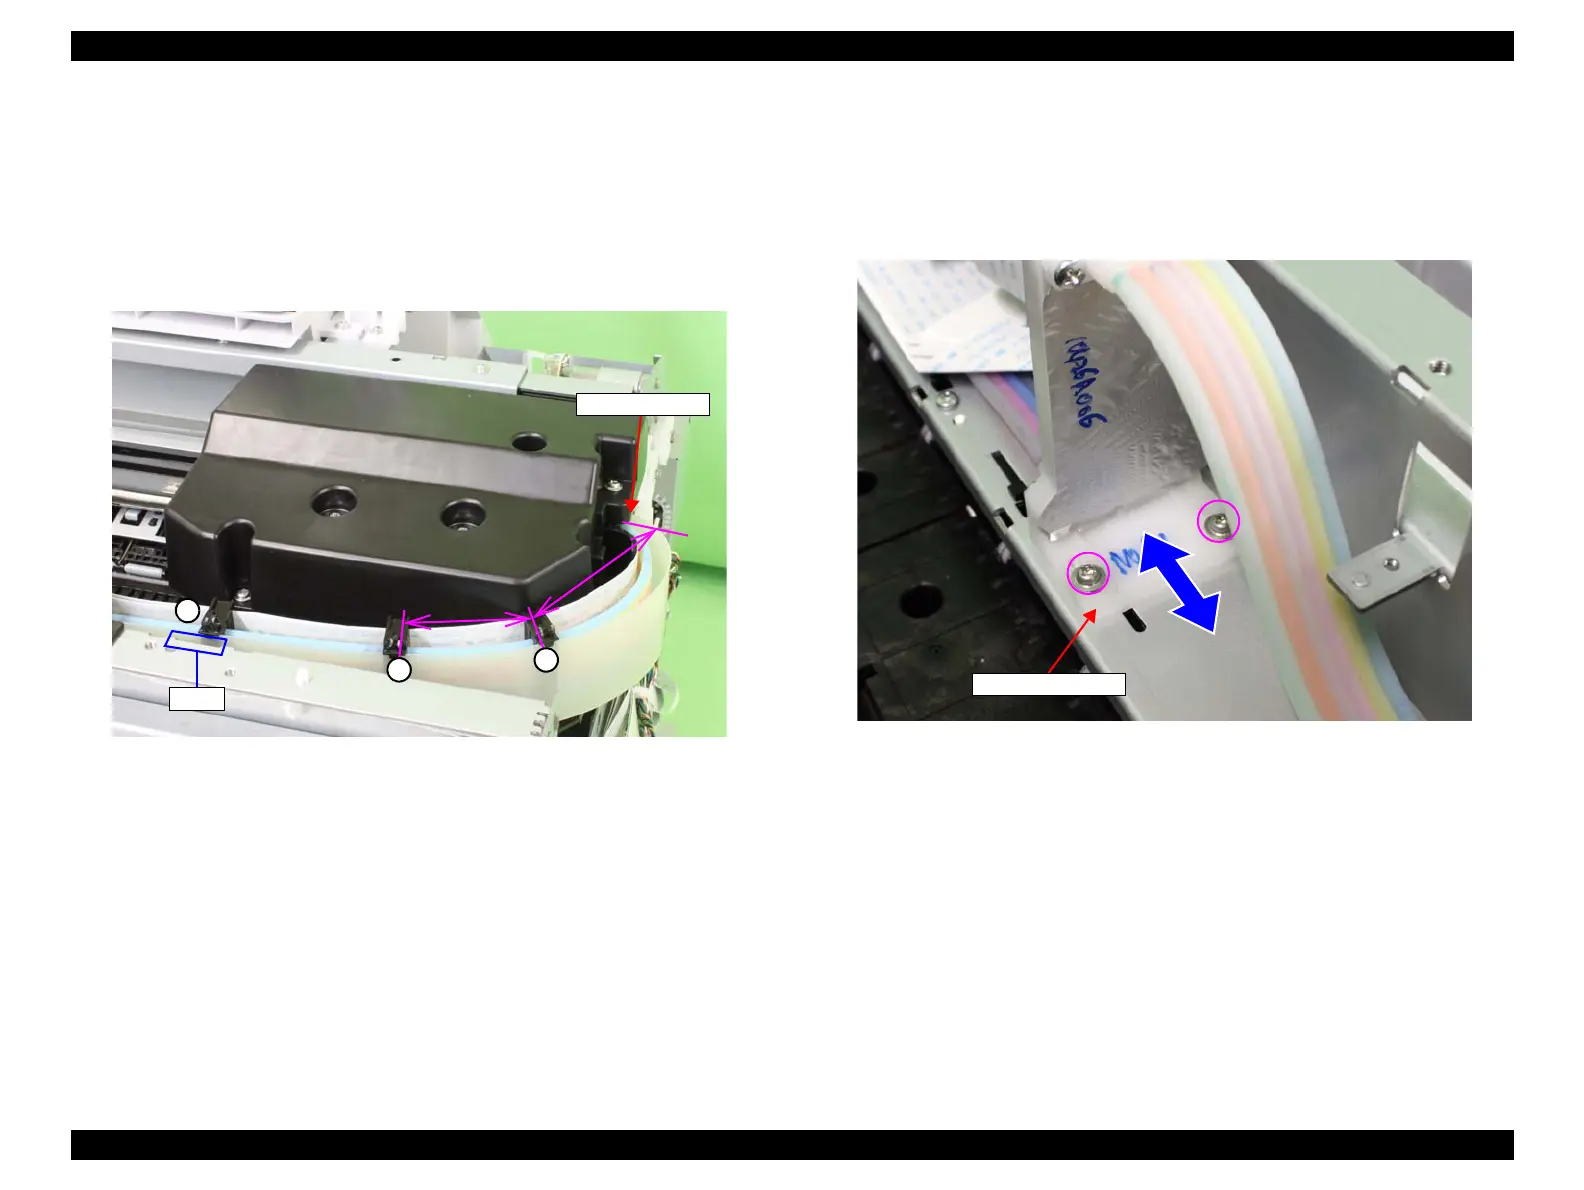
Check that the tube holders 3, 4 and 5 are at the following positions. If they
are not at the correct positions, adjust the positions.
Tube holder 3: Position of the cutout.
Tube holder 5: Corner of the CR Cover.
Tube holder 4: Position where B = A x 1/2.
Figure 4-22. Adjusting the Ink Tubes 3, 4 and 5
6. Move the CR Unit to right and left to check if the Head FFC is routed tightly or
slackly too much. Confirm that the Head FFC does not touch the Ink Tube.
No abnormality: Go to Step 12
Abnormality is found: Go to Step 7
7. Turn the printer OFF.
8. Remove the tube cover. (P. 250)
9. Loosen the two screws that secure the tube mounting plate, and move the position
of the tube mounting plate to adjust the length of the tube.
10. Tighten the screws of the tube mounting plate.
11. Install the tube cover, and return to Step 6.
12. Press the [F12] key and cap the Printhead.
13. Turn the printer OFF to complete the adjustment.
Figure 4-23. Adjusting the position of the Ink Tube
3
Cutout
A
B
Origin of the tube
4
5
FFC mounting plate

 Loading...


