Epson Stylus Pro 4900/Epson Stylus Pro 4910 Revision A
ADJUSTMENT CR Related Check & Adjustments 316
Confidential
4.10 CR Related Check & Adjustments
4.10.1 FFC Position Check
4.10.1.1 FFC Position Check after replacing the Head FFC
EXECUTION MODE
Normal Mode
PROCEDURE
1. Turn the printer ON.
2. When any paper is loaded, remove it.
3. Start the Service Program and press the [F11] key.
The lock of the CR Unit is released.
4. Open the Printer Cover.
5. Move the CR Unit to right and left to check if the Head FFC is routed tightly or
slackly too much. Confirm that the Head FFC does not touch the Ink Tube.
No abnormality: Go to Step 10
Abnormality is found: Go to Step 6
6. Turn the printer OFF.
7. Remove the tube cover. (P. 250)
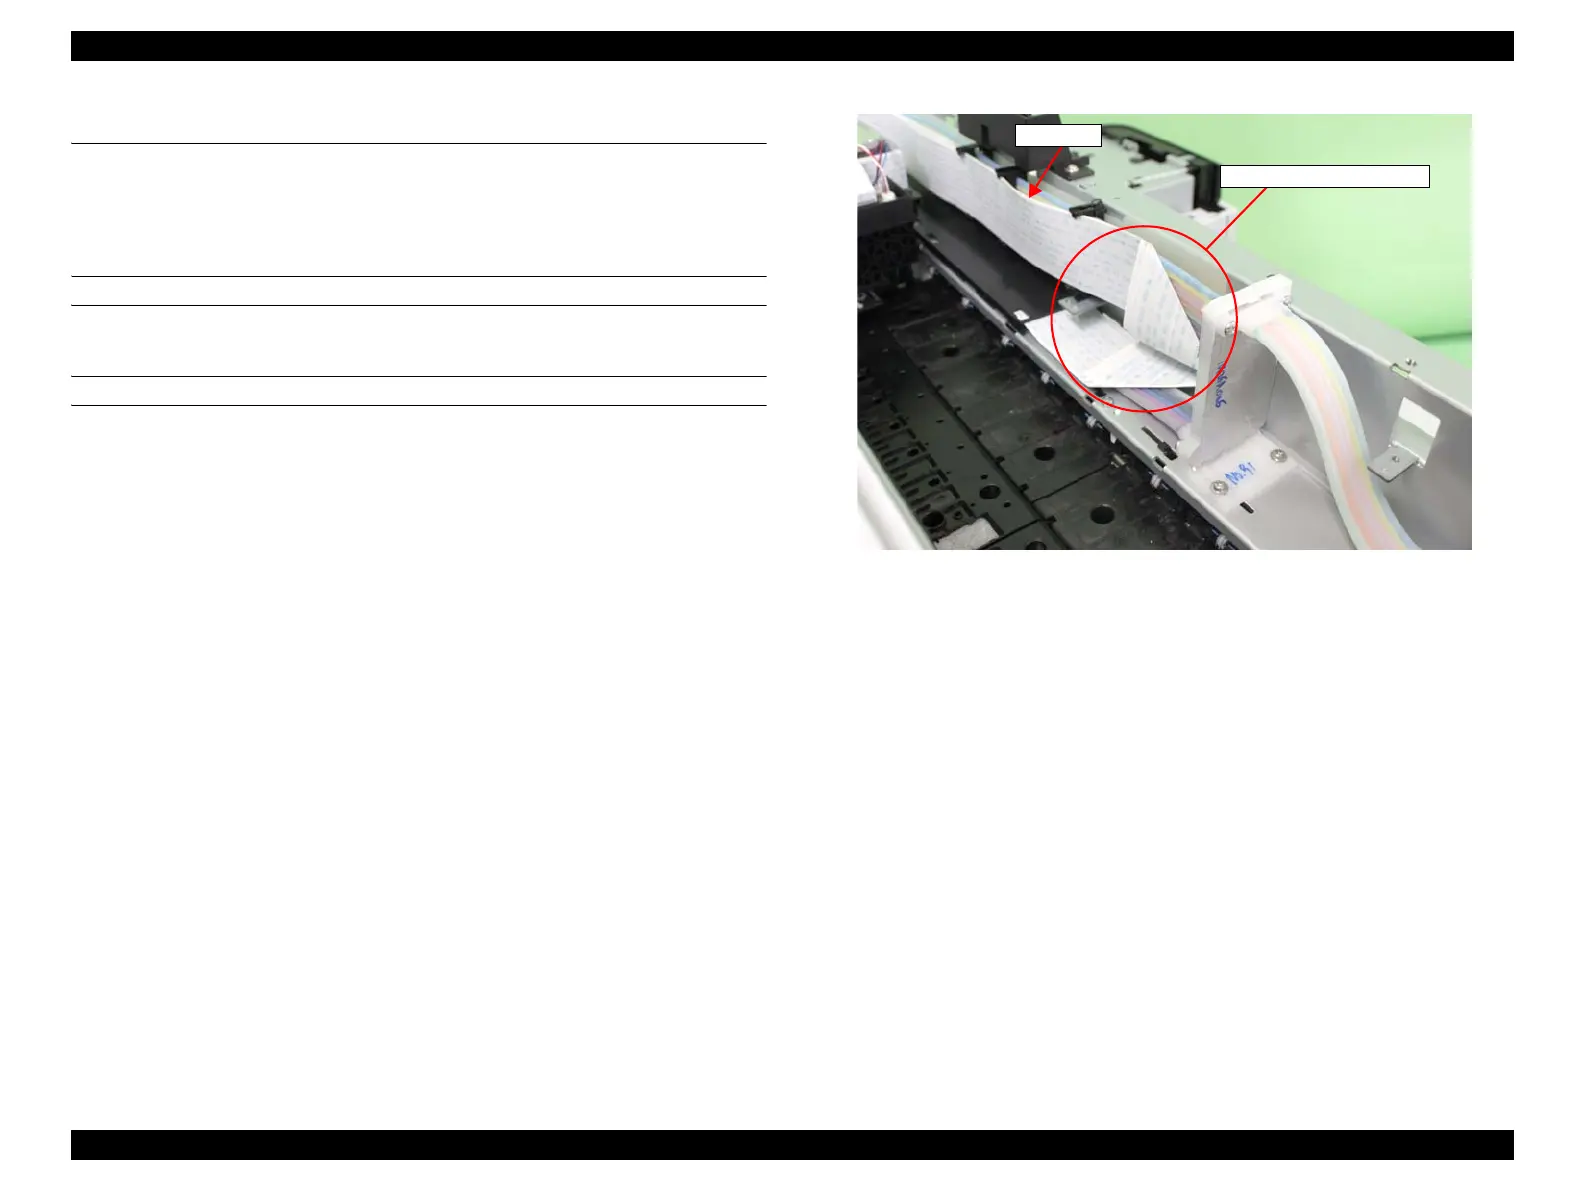
8. Adjust the length of the FFC by folding the FFC at the position shown in Figure
4-19.
9. Install the tube cover, and return to Step 5.
10. Press the [F12] key and cap the Printhead.
11. Turn the printer OFF to complete the adjustment.
Figure 4-19. FFC Position Check
Head FFC
Folding adjustment position
 Loading...


