Epson Stylus Pro 4900/Epson Stylus Pro 4910 Revision A
ADJUSTMENT Media Feed Related Checks and Adjustments 372
Confidential
4.13.4 Rear AD Adjustment
REQUIRED TOOL
Standard Sheet (JETRAS JP-D300S)
EXECUTION MODE
Serviceman Mode
PROCEDURE
1. Turn the printer ON in the Serviceman Mode.
Turn the power ON while pressing [Menu ] + [Paper Feed ] + [OK]
simultaneously.
2. Select SELF TESTING → Mecha Adjustment → Rear AD.
3. Press [OK] while [Enter] Start is displayed.
Check if Retry AD Adjust is displayed on the Control Panel.
4. Press [Paper Source ] for several times and return to Top Menu.
5. Select Rear AD again, and press [Paper Set] while [Enter] Start is displayed to
release the paper presser.
6. Select SELF TESTING → Mecha Adjustment → Rear AD, and press [OK]
while [Enter] Start is displayed.
Check if the 3 digits number is displayed on the Control Panel. If Retry AD
Adjust is displayed, check if there is a defect (tears/rips, contamination, wrinkles)
on the Standard Sheet, and execute obtaining AD value again.
7. Press [Paper Source ] for several times and return to top menu.
8. Press [Paper Set] to release the paper presser.
9. Remove the Standard Sheet, and turn the printer OFF.
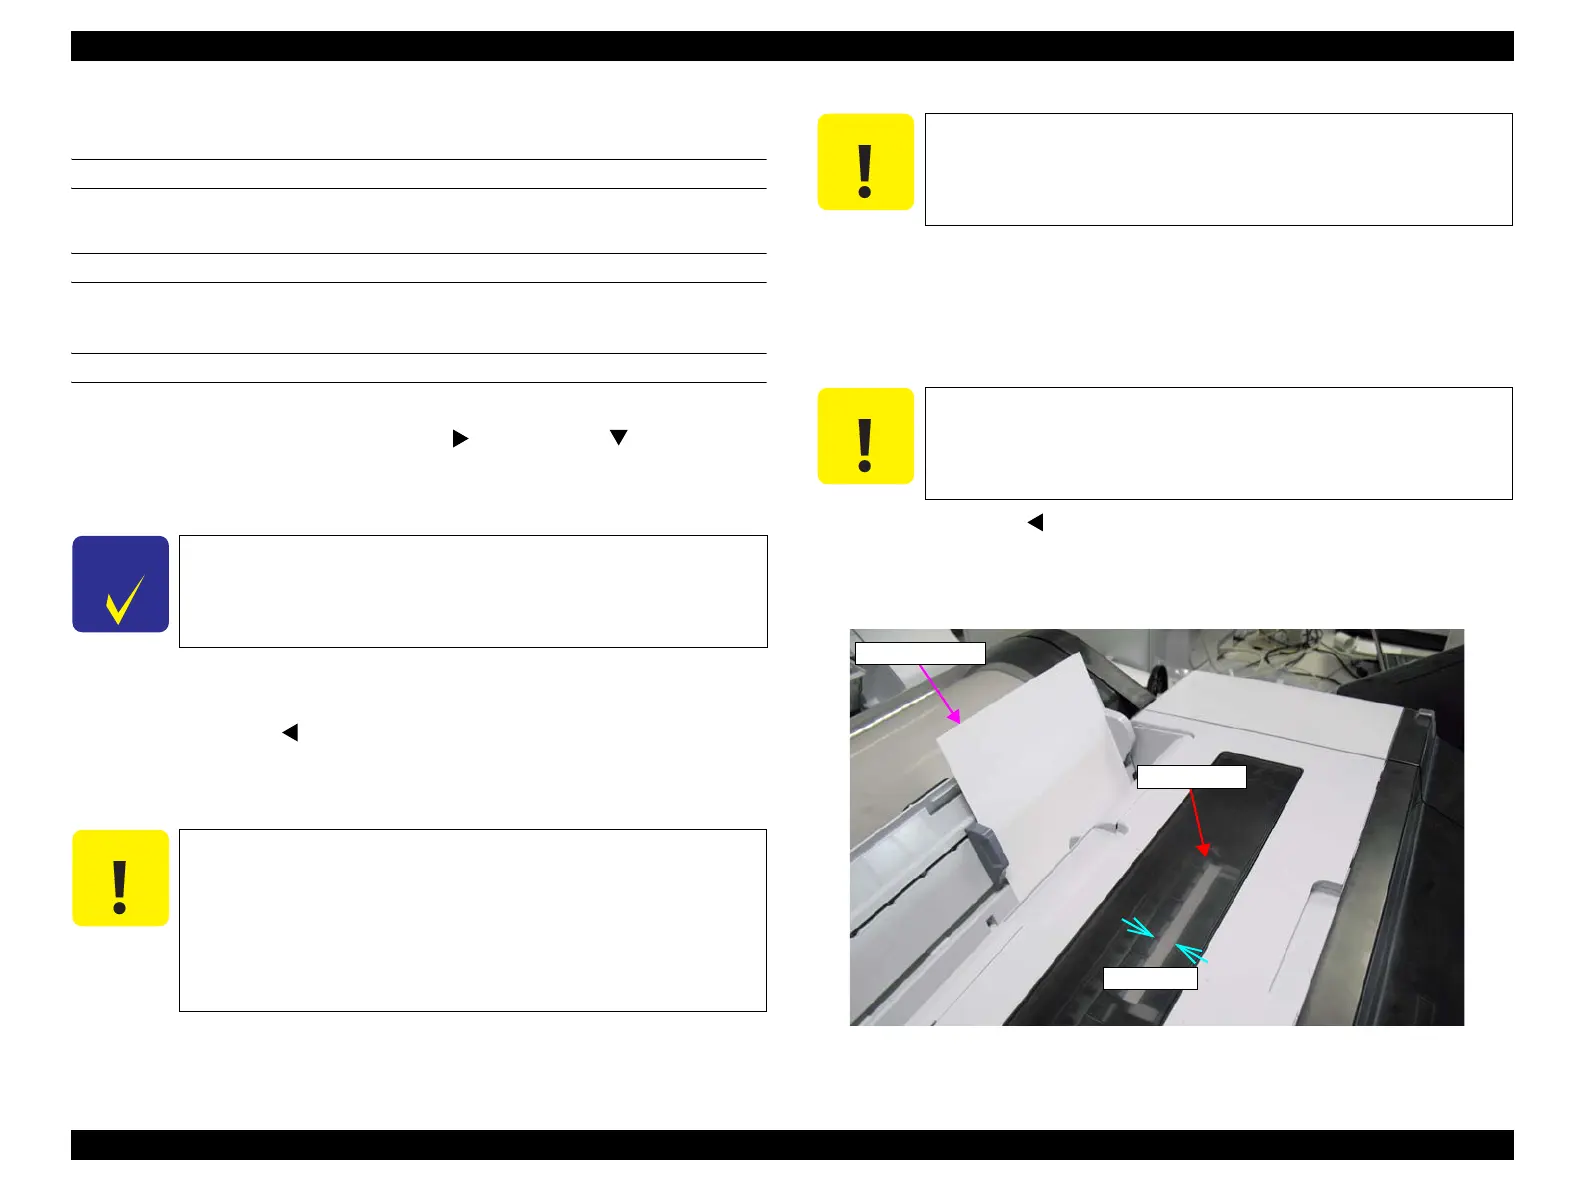
Figure 4-81. Position of the Standard Sheet
C H E C K
P O I N T
Make sure to carry out the following steps without loading the
Standard Sheet.
C A U T I O N
Insert the Standard Sheet to the position shown in Figure 4-81 and
press [Paper Set] to lock the paper presser. Make sure to follow the
points below.
Set the matte side on the front
Set the edge of the sheet 10 to 20 mm out from the driven roller
Align the right edge of the Standard Sheet to the right edge of
the ASF
C A U T I O N
When executing the following step, do not remove the external
parts to acquire proper AD value.
C A U T I O N
If Retry AD Adjust is displayed again, the PE sensor is defective.
Replace the PE sensor with a new one and carry out the adjustment
again.
Standard Sheet
10 to 20 mm
Driven roller
 Loading...


