Epson Stylus Pro 4900/Epson Stylus Pro 4910 Revision A
DISASSEMBLY & ASSEMBLY Disassembly and Assembly Procedure 150
Confidential
3.4.2.16 Mid-Right Cover/Mid-Left Cover
1. Remove the Front Cover. (p142)
2. Remove the Right Upper Cover. (p138)
3. Remove the Control Panel Cover. (p136)
4. Remove the Right Cover. (p139)
5. Remove the Rear Unit. (p145)
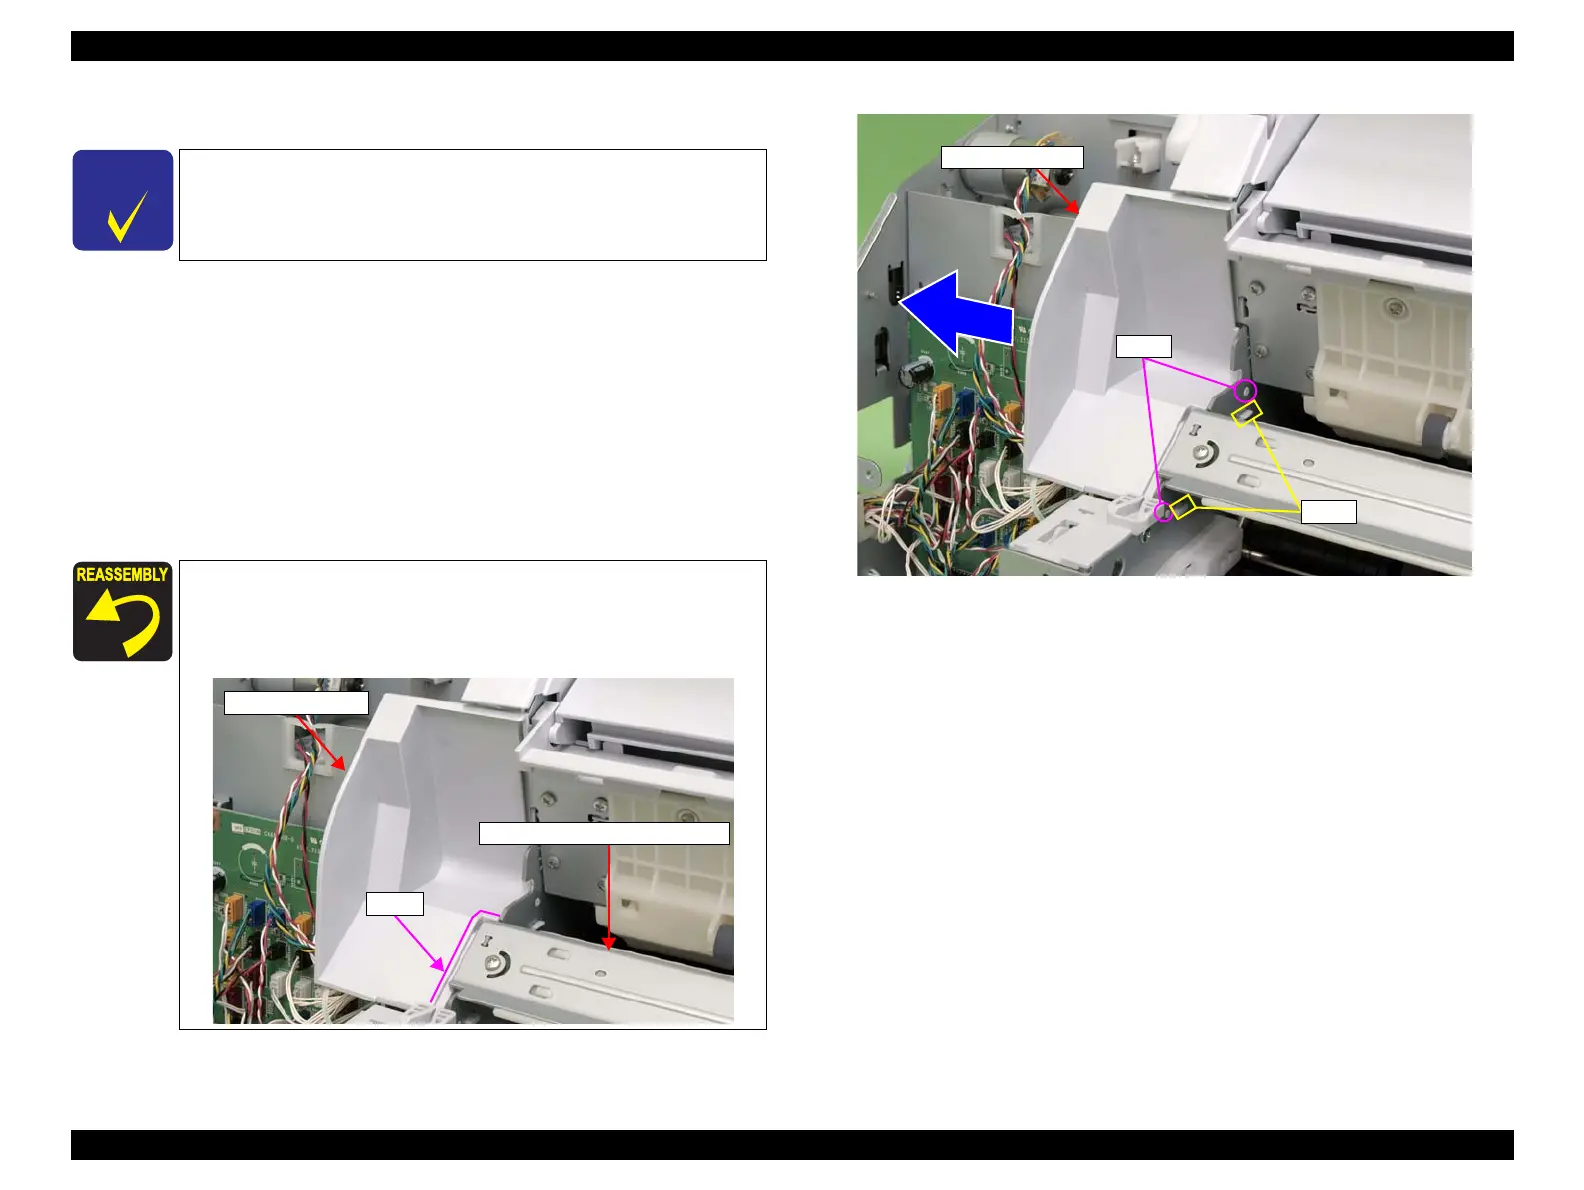
6. Release the two hooks and two dowels that secure the Mid-Right Cover from the
main body frame.
7. Remove the Mid-Right Cover.
Figure 3-52. Removing the Mid-Right Cover
C H E C K
P O I N T
Basically you can remove this part on the left and the one on the
right in the same way. Therefore this section describes the way to
remove the one on the right only.
When installing the Mid-Right Cover, be sure to align the end of
the cover (guide) shown in the figure with the “PAPER
GUIDE,ROLL,UNDER”. After the installation, check that the
hooks and the dowels are set securely.
Mid-Right Cover
Guide
“PAPER GUIDE,ROLL,UNDER”
Mid-Right Cover
Dowels
Hooks
 Loading...


