Epson Stylus Pro 4900/Epson Stylus Pro 4910 Revision A
ADJUSTMENT Media Feed Related Checks and Adjustments 370
Confidential
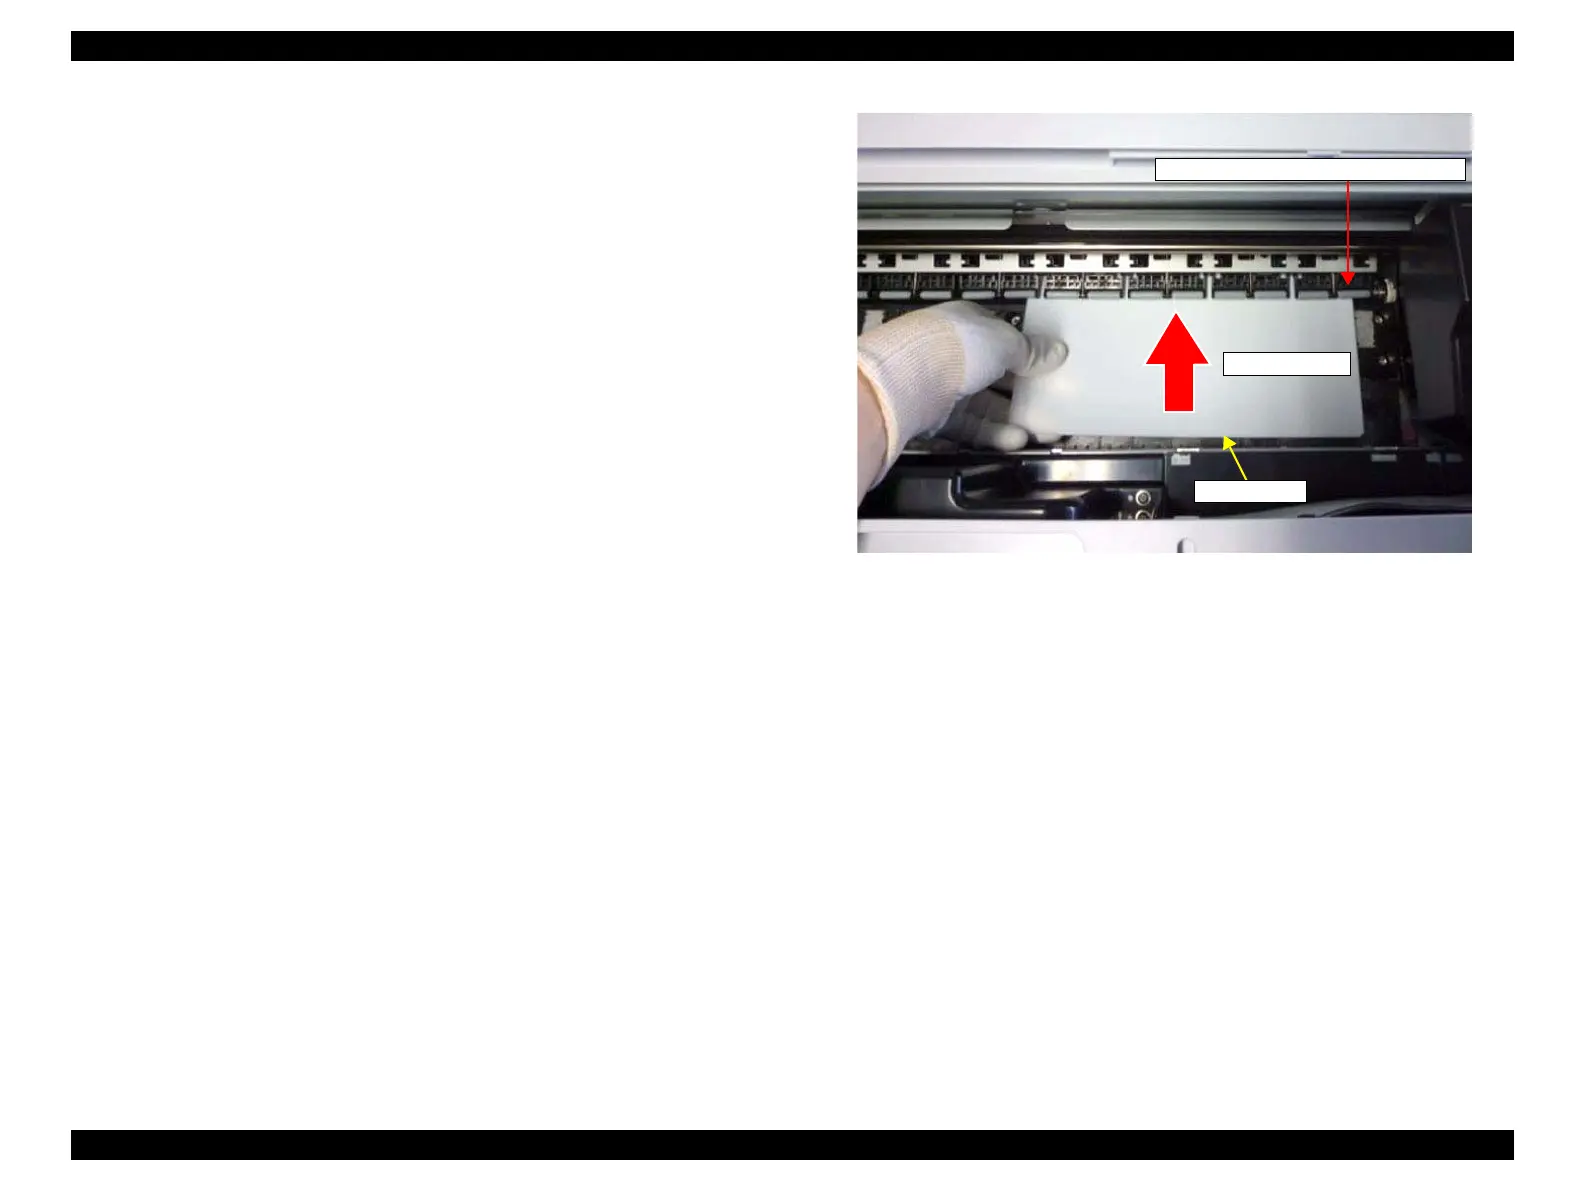
11. Set the adjustment jig (0.5) to the position shown in Figure 4-79, and press [Paper
Set].
12. Check that “01” is displayed on the Control Panel.
Carry out the adjustment if the displayed value is other than “01”.
→ Go to ADJUSTMENT PROCEDURE
13. Press [Paper Set] to release the paper presser.
14. Insert the adjustment jig (0.8) from the paper insertion opening, and set it to the
position shown in Figure 4-79, then press [Paper Set].
15. Check that “01” is displayed on the Control Panel.
Carry out the adjustment if the displayed value is other than “01”.
→ Go to ADJUSTMENT PROCEDURE
16. Press [Paper Set] to release the paper presser.
17. Insert the adjustment jigs (0.4) and (0.8) stacked in pairs from the paper insertion
opening, and set it to the position shown in Figure 4-79, then press [Paper Set].
18. Check that “11” is displayed on the Control Panel.
Carry out the adjustment if the displayed value is other than “11”.
→ Go to ADJUSTMENT PROCEDURE
19. Press [Paper Set] to release the paper presser.
20. Check that “10” is displayed on the Control Panel while releasing the paper set.
Carry out the adjustment if the displayed value is other than “10”.
→ Go to ADJUSTMENT PROCEDURE
21. After all the checking and adjustment, confirm all the values again.
Figure 4-79. Position for the thickness tool
Adjustment jig
Center of the driven roller on the right end
Setting direction
 Loading...


