Epson Stylus Pro 4900/Epson Stylus Pro 4910 Revision A
ADJUSTMENT CR Related Check & Adjustments 323
Confidential
9. Move the CR Unit slowly over the thickness gauge.
10. Check if the height of the CR Unit is within the standard value.
Within the standard value: Go to Step 11
Out of the range: Go to Step 15
11. Move the CR Unit to the Full side.
12. Place the thickness gauge on the position B as shown in Figure 4-28.
Figure 4-28. Position of the thickness gauge B
13. Move the CR Unit slowly over the thickness gauge.
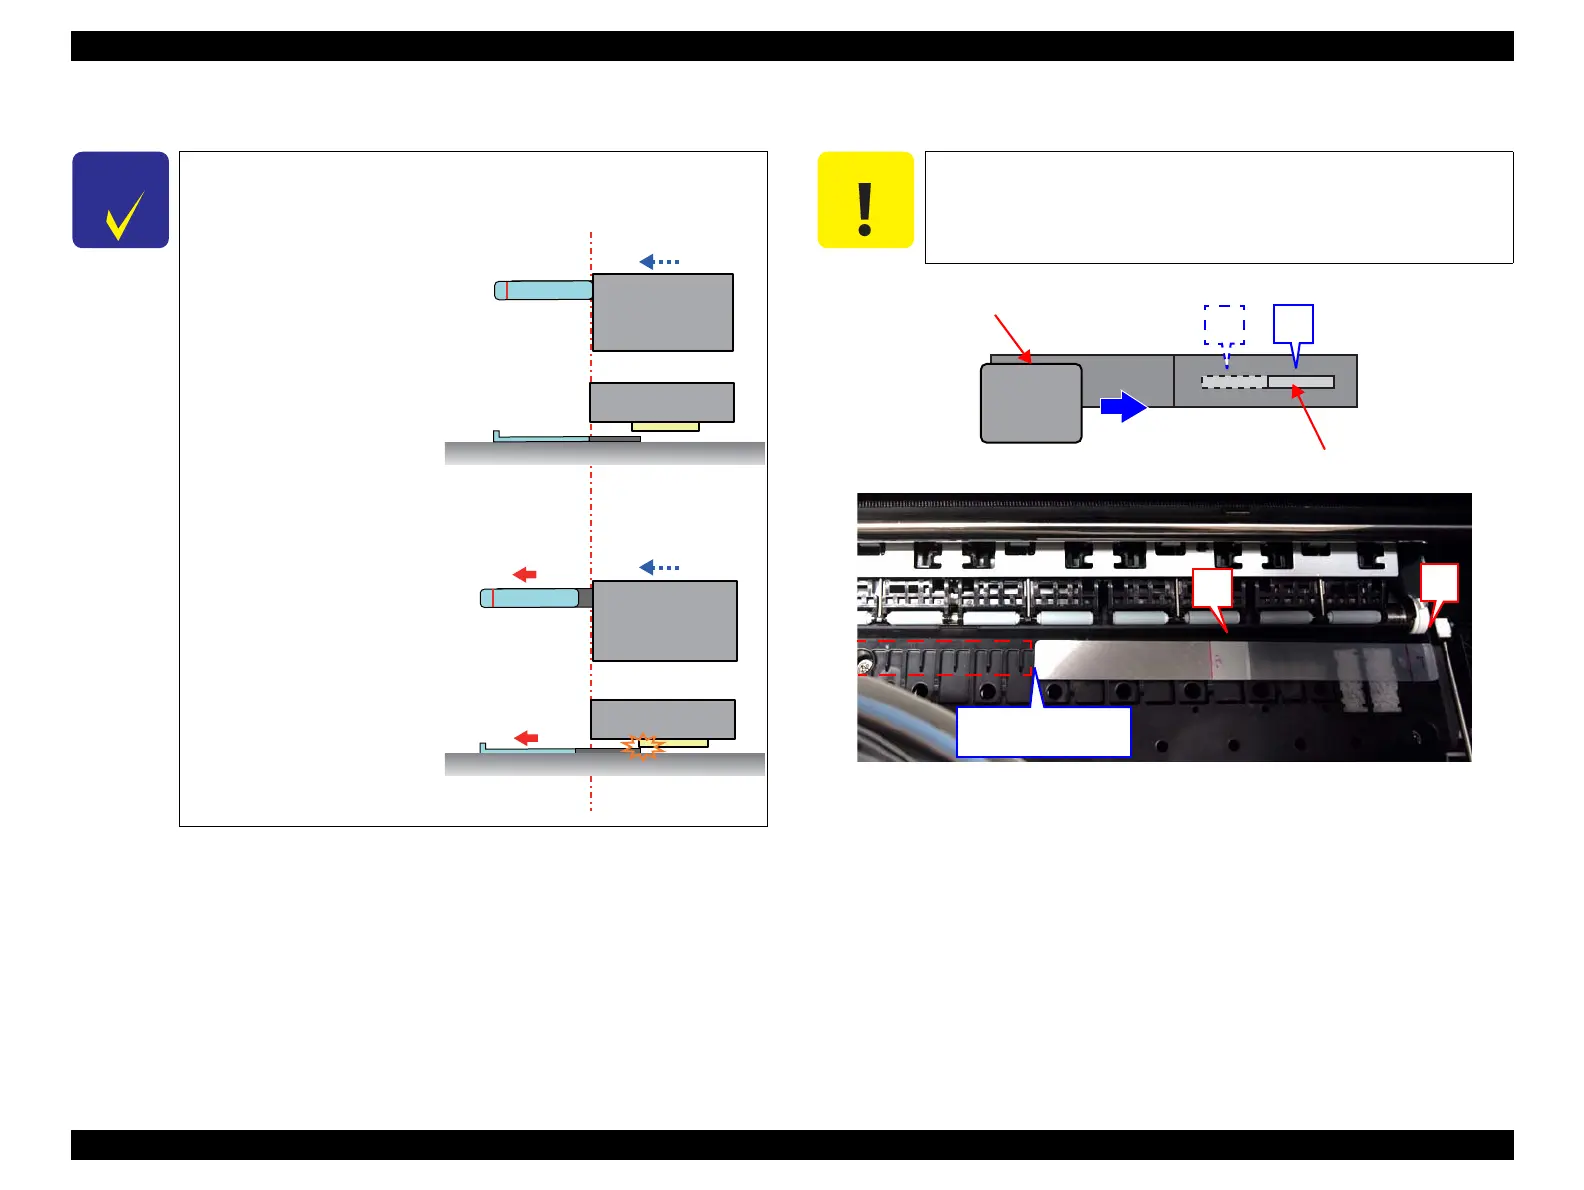
C H E C K
P O I N T
The conditions of the Printhead touching the thickness gauge can
not be seen visually; therefore, refer to the following to verify it.
L
L
CR
CR
CR
CR
<If it does not touch the gauge>
The thickness gauge does not
move even when the edge of the
CR Unit comes to the border
between the metallic part and
the plastic part of the jig.
<If it touches the gauge>
The thickness gauge moves
before the edge of the CR Unit
comes to the border between
the metallic part and the plastic
part of the jig.
<As seen from the top>
<Cross section view>
<As seen from the top>
<Cross section view>
C A U T I O N
Align the edge to the position where the edge of A was placed.
Thickness gauge
CR Unit
Edge of the
thickness gauge
A
B
R
L
 Loading...


