Epson Stylus Pro 4900/Epson Stylus Pro 4910 Revision A
ADJUSTMENT CR Related Check & Adjustments 322
Confidential
<Checks and adjustments on the Home side of the Platen>
7. Move the CR Unit to the Home side.
8. Place the thickness gauge on the position A as shown in Figure 4-27.
Figure 4-27. Position of the thickness gauge A
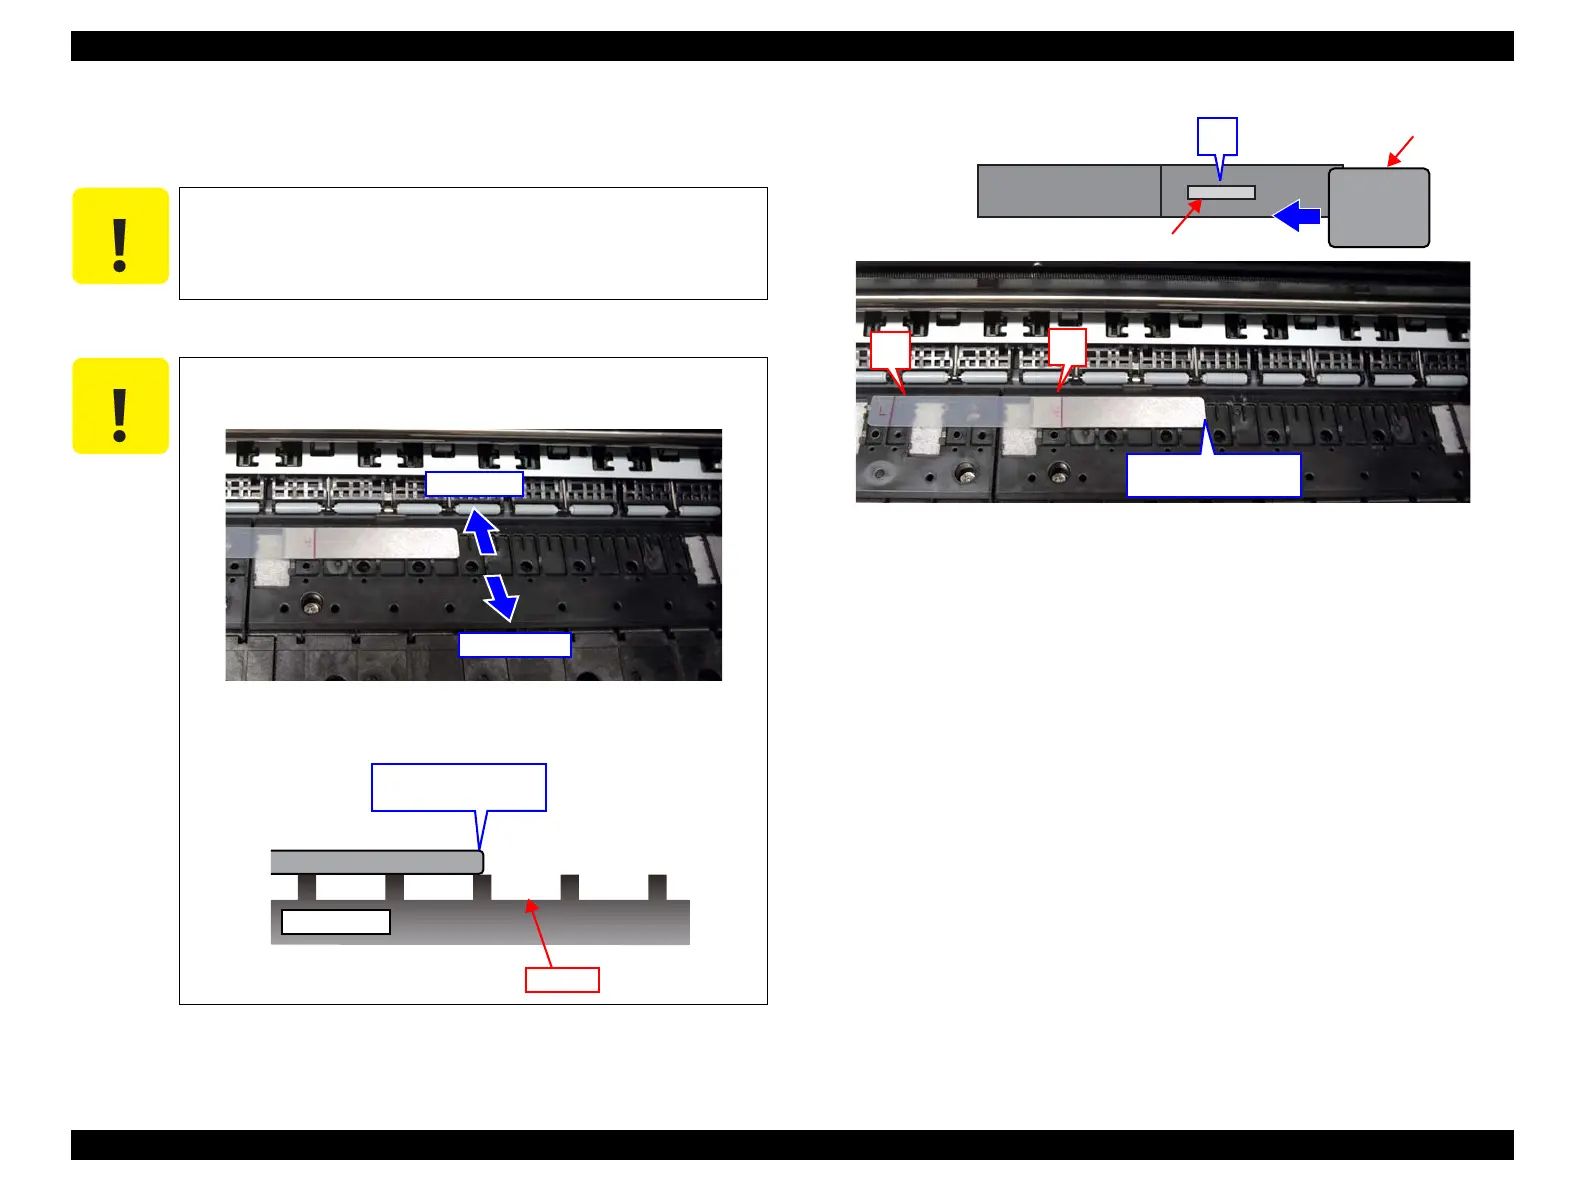
C A U T I O N
When moving the CR Unit, make sure to pull the CR Belt to move
it.
C A U T I O N
Place the thickness gauge on the following position.
Place it on the upstream of the platen.
Place it on the position where the edge of the thickness gauge
does not come on a groove of the platen.
Upstream
Downstream
Platen
Groove
Edge of the
thickness gauge
Thickness gauge
CR Unit
Edge of the
thickness gauge
L
R
A
 Loading...


