Epson Stylus Pro 4900/Epson Stylus Pro 4910 Revision A
DISASSEMBLY & ASSEMBLY Disassembly and Assembly Procedure 169
Confidential
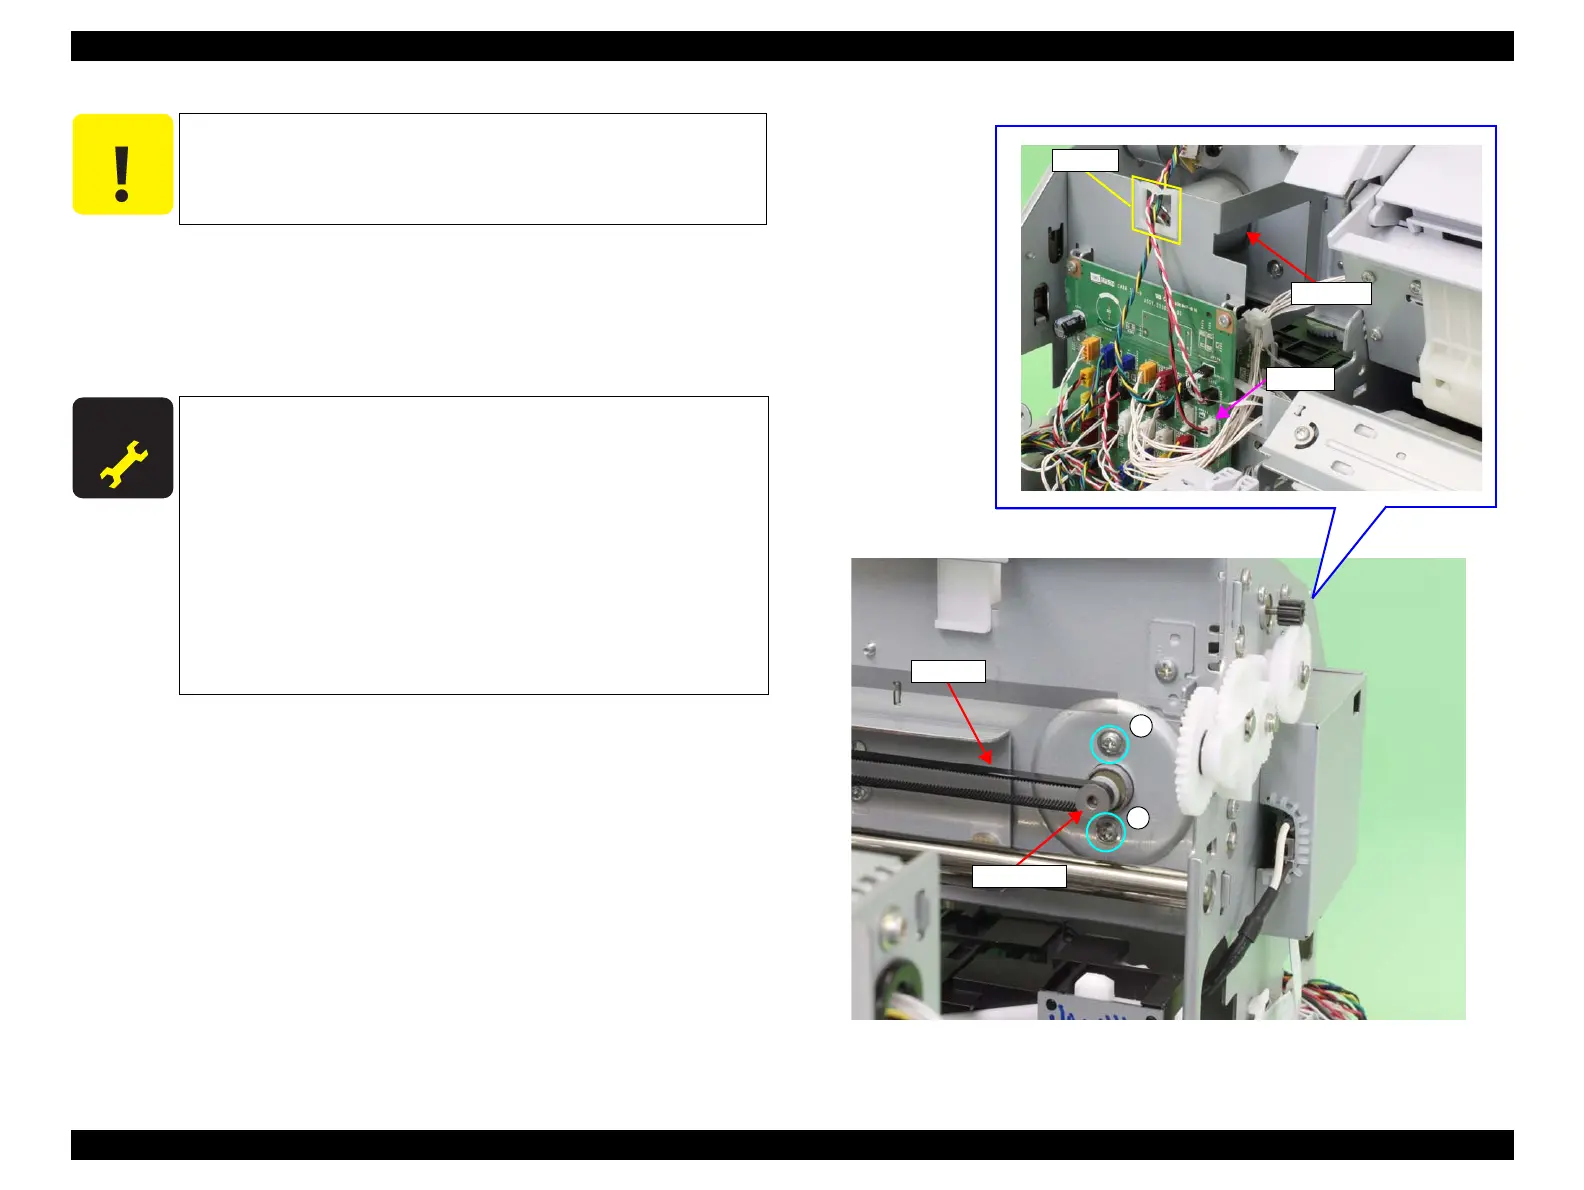
9. Remove the two screws that secure the CR Motor.
A) Silver, Phillips, Round Washer Head S-tite M3x5: two pieces
10. Move the CR Motor to the rear, and detach the CR Belt from the pinion gear.
11. Remove the CR Motor.
Figure 3-79. Removing the CR Motor
C A U T I O N
When removing the CR Motor in the next step, be careful not to
damage the scale of the APG motor.
A D J U S T M E N T
R E Q U I R E D
Be sure to refer to Chapter 4 “Adjustment” (see p277) and perform
specified adjustments after replacing or removing the CR Motor.
<Adjustment items>
1. Counter Reset (CR Motor Counter)
2. CR Belt Adjustment
3. Motor Measurement Adjustment
4. CR Speed Initialize
5. Active Damper Adjustment
6. Nozzle Check
7. Auto Bi-D Adjustment
8. PW + T&B&S Check & Adjustment
A
A
CR Motor
CN204
Saddle
CR Belt
Pinion gear
 Loading...


