Epson Stylus Pro 4900/Epson Stylus Pro 4910 Revision A
ADJUSTMENT Head Related Checks and Adjustments 354
Confidential
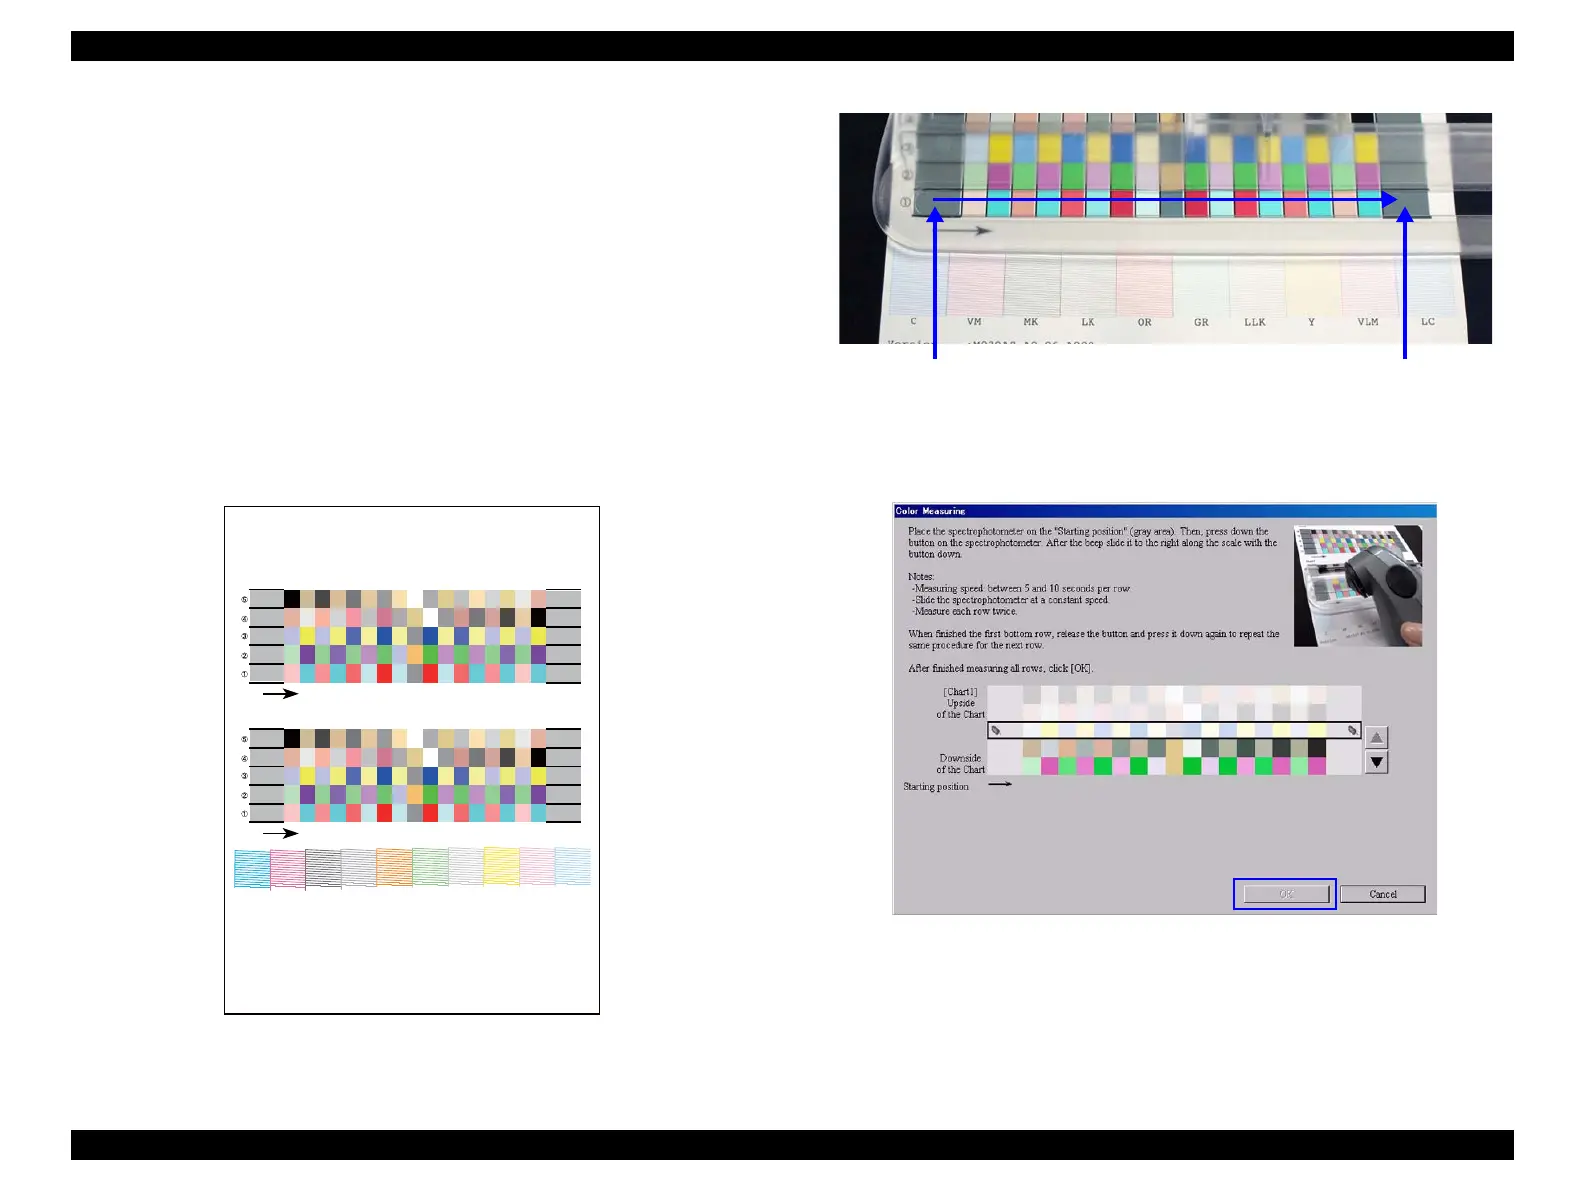
28. Click [OK] and follow the instructions (following procedure) displayed on the
screen to perform color measuring.
1. Set the calibrator with its measuring part matched with measuring start
position (gray part) as shown in Figure 4-58.
2. Press the button on the side of the calibrator.
3. When it beeps, keep holding down the button and scan the patch along the
scanning ruler to measuring end position (gray part).
4. Once the measuring is completed, release the button.
5. Repeat Step 1 through 4 twice for the same patch line.
6. Repeat Step 1 through 5 to measure the bottommost line to the top line. (The
line which needs to be measured is displayed on the screen.)
29. Once all the lines (5 lines) are measured, click [OK].
30. Measure Sheet 2 by following Step 31 through 34.
Figure 4-65. Color Measuring Order
Figure 4-66. Setting the Calibrator/Color Measuring Position
Figure 4-67. Color Measuring Screen
S/N : 0000000000
2010-08-29 10:57 (GMT 2005-08-29 01:57)
2010-09-05 10:52(GMT 2005-09-05 01:52)
Chart2
Chart1
Version : XXXXXXXXXX
CVMMBGYORGRLGYYLVMLC
Start position in the color measuring End position in the color measuring
 Loading...


