88
────────────────────────────────────────────────────
6.3 ST ATUS Settings (RMS)
────────────────────────────────────────────────────
6.3.3 Setting the Frequency
Function
display
Meaning
:
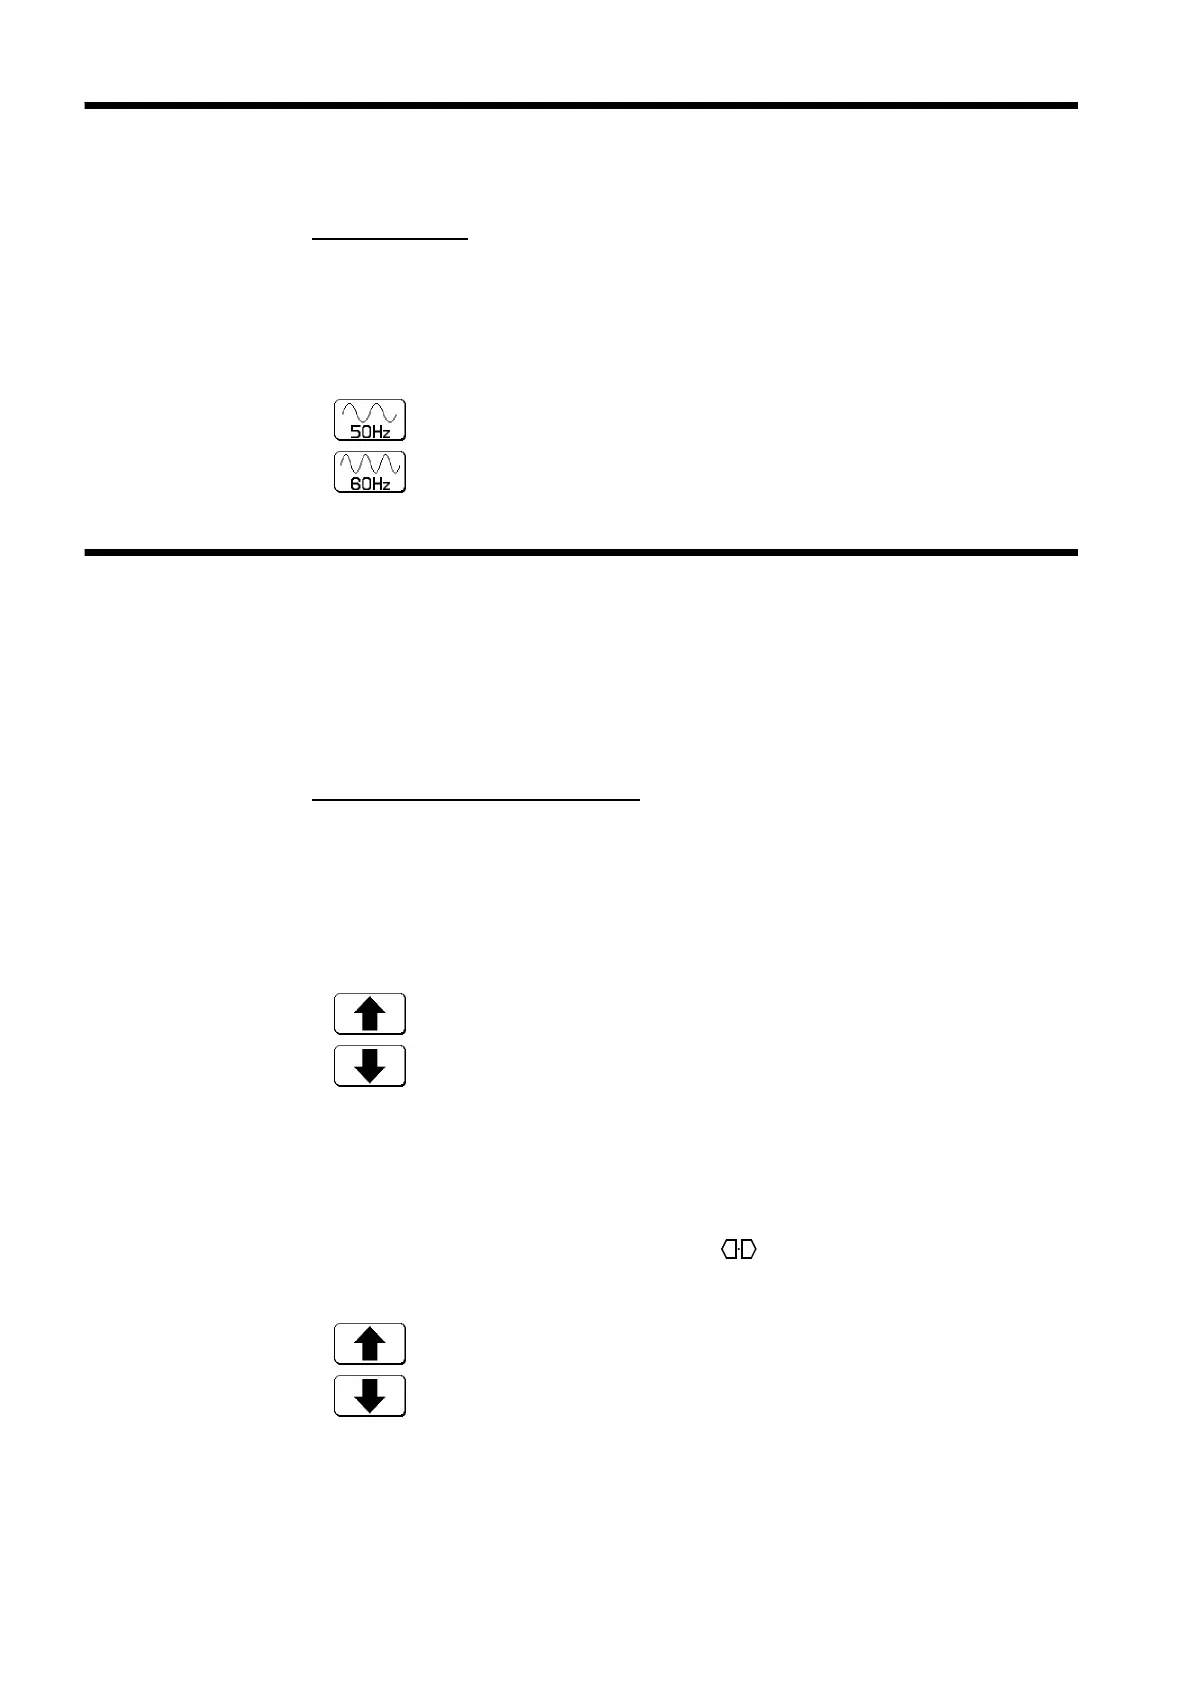
Measurermsvalueof50Hzsignal
:
Measurermsvalueof60Hzsignal
6.3.4 Setting the Recording Length
Function
display Meaning
:
Move the cursor up in the selection window.
:
Move the cursor down in the selection window.
Function
display
Meaning
##F3
:
Increases in number.
:
Decreases in number.
Serves to set the frequency of the signal to be measured.
Procedure
Screen: STATUS
1. Use the Menu keys to display the desired screen.
2. Move the flashing cursor to the frequency item.
3. Use the function keys to make the selection.
The length of recording for one measurement operation (number of DIV) can
be set.
SELECT Select the recording length.
ARBITRARY Variable recording length can be selected by the user.
Screen: STATUS, Waveform display
Procedure 1 Constant recording length mode
1. Use the Menu keys to display the desired screen.
2. Move the flashing cursor to the shot item and select SELECT.
3. Use the Jog/Shuttle control or the function keys to make a setting.
Procedure 2 Variable recording length mode
1. Use the Menu keys to display the desired screen.
2. Move the flashing cursor to the shot
item and select
ARBITRARY
.
3. Use the Jog/Shuttle control or the function keys to make a setting. To
change the column, use the cursor keys (
).