13
────────────────────────────────────────────────────
2.3 Power On/Off
────────────────────────────────────────────────────
1
2
3
4
5
6
7
8
9
10
11
12
13
14
A
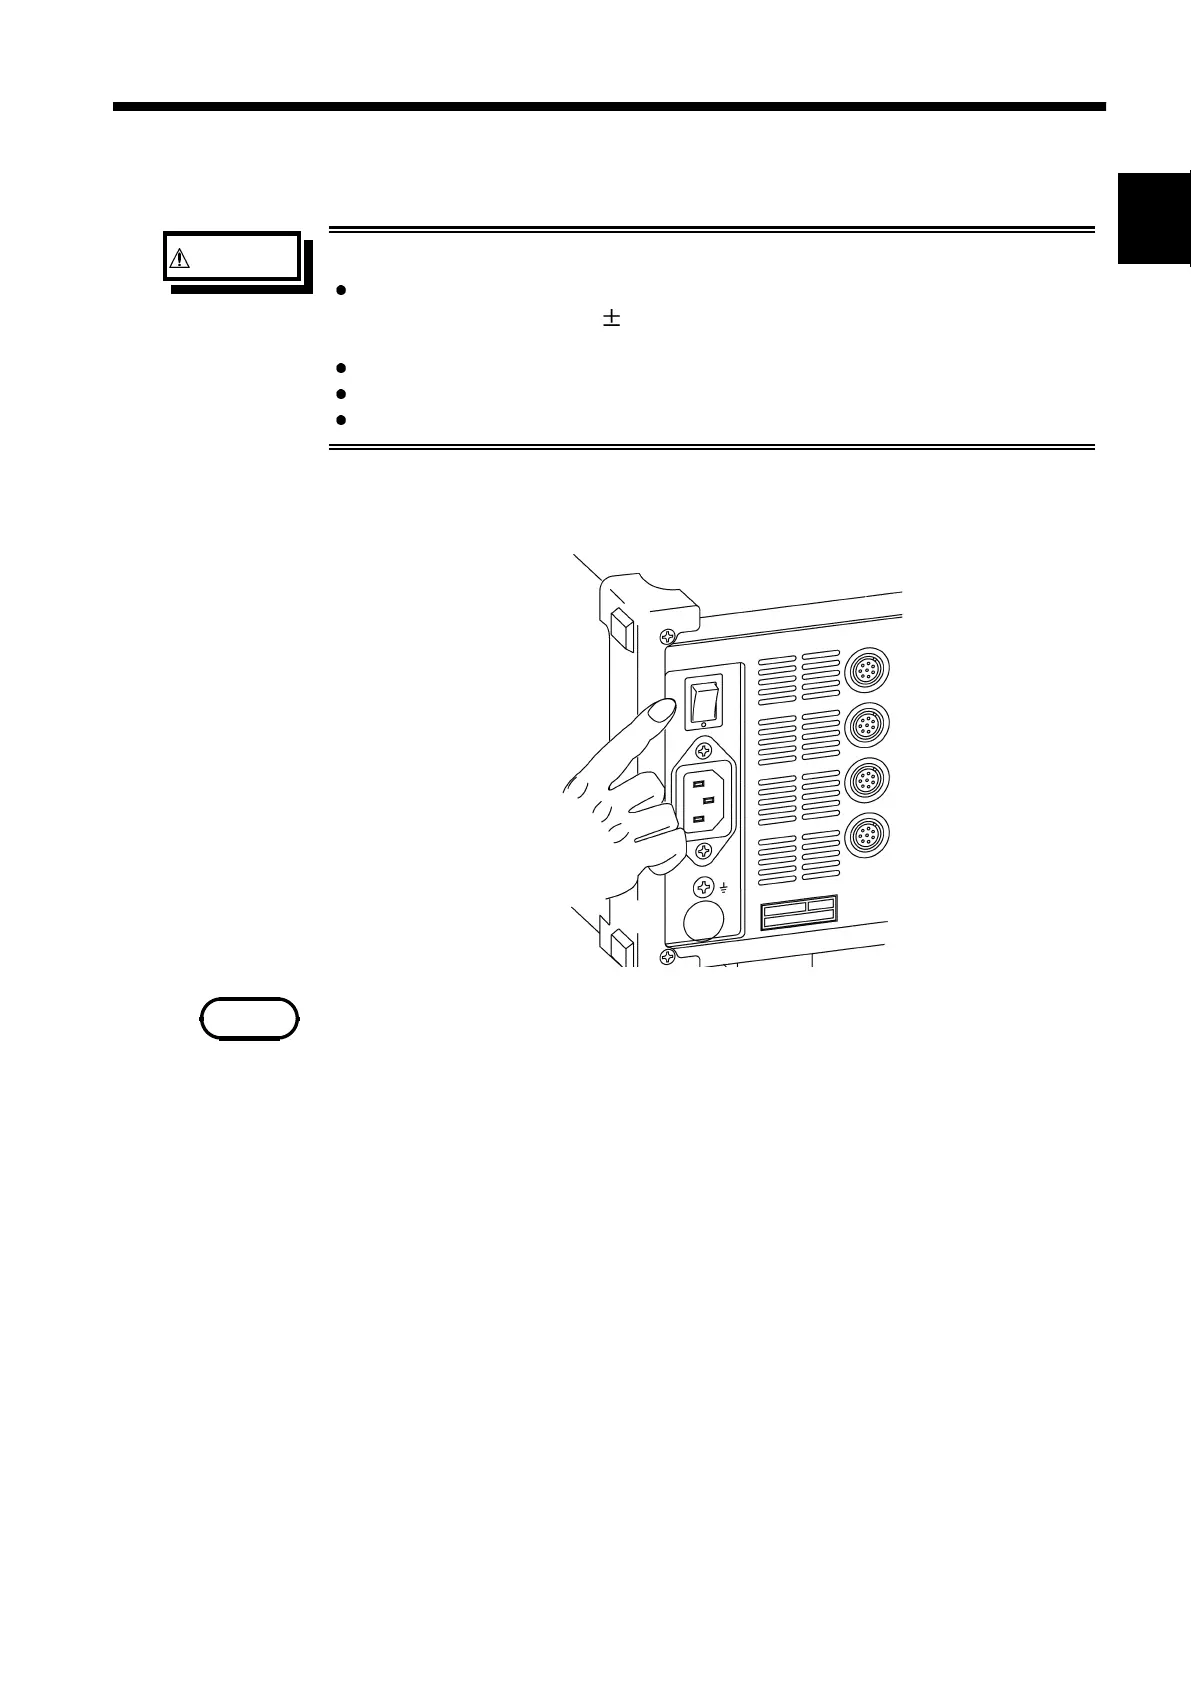
WARNING
Check the following points before the power switch is turned on.
Power supply matches Rated supply voltage (100 to 240 VAC:
Voltage fluctuations of
10% from the rated supply voltage are
taken into account.) and rated supply frequency (50/60 Hz).
The Unit is correctly installed (Section 2.1).
Power cord is correctly connected (Section 2.2).
The unit is properly grounded.
NOTE
2.3 Power On/Off
・
There is no need for the user to manually select AC or DC power.
・
When both AC and DC power are connected, AC power has priority.
・
If both the AC power supply and 9433 DC POWER ADAPTER are
connected to the 8841/8842, the AC power supply has priority. However,
even when the 8841/8842 runs off the AC power supply, the 9433 remains
in standby mode and consumes some power. Keep this in mind when
connecting the 9433 to the battery while the 8841/8842 is connected to an
AC power source.
・
After the power switch is turned on, wait approximately 30 min for the
8936, 8938, 8946 and approximately 1 hour for the 8937, 8939, to stabilize
the inside temperature of the connected input unit in order to obtain accurate
waveforms. Then, make a zero adjustment of the 8936, 8937, 8938, 8946 or
perform an auto balancing of the 8939 prior to measurement.
Zero adjustment
→
see Section 9.5.1.
Auto balancing
→
see Section 9.13.
・
When the unit is turned off, it memorizes the currently used settings and
reestablishes the same settings the next time the unit is turned on again.