288
────────────────────────────────────────────────────
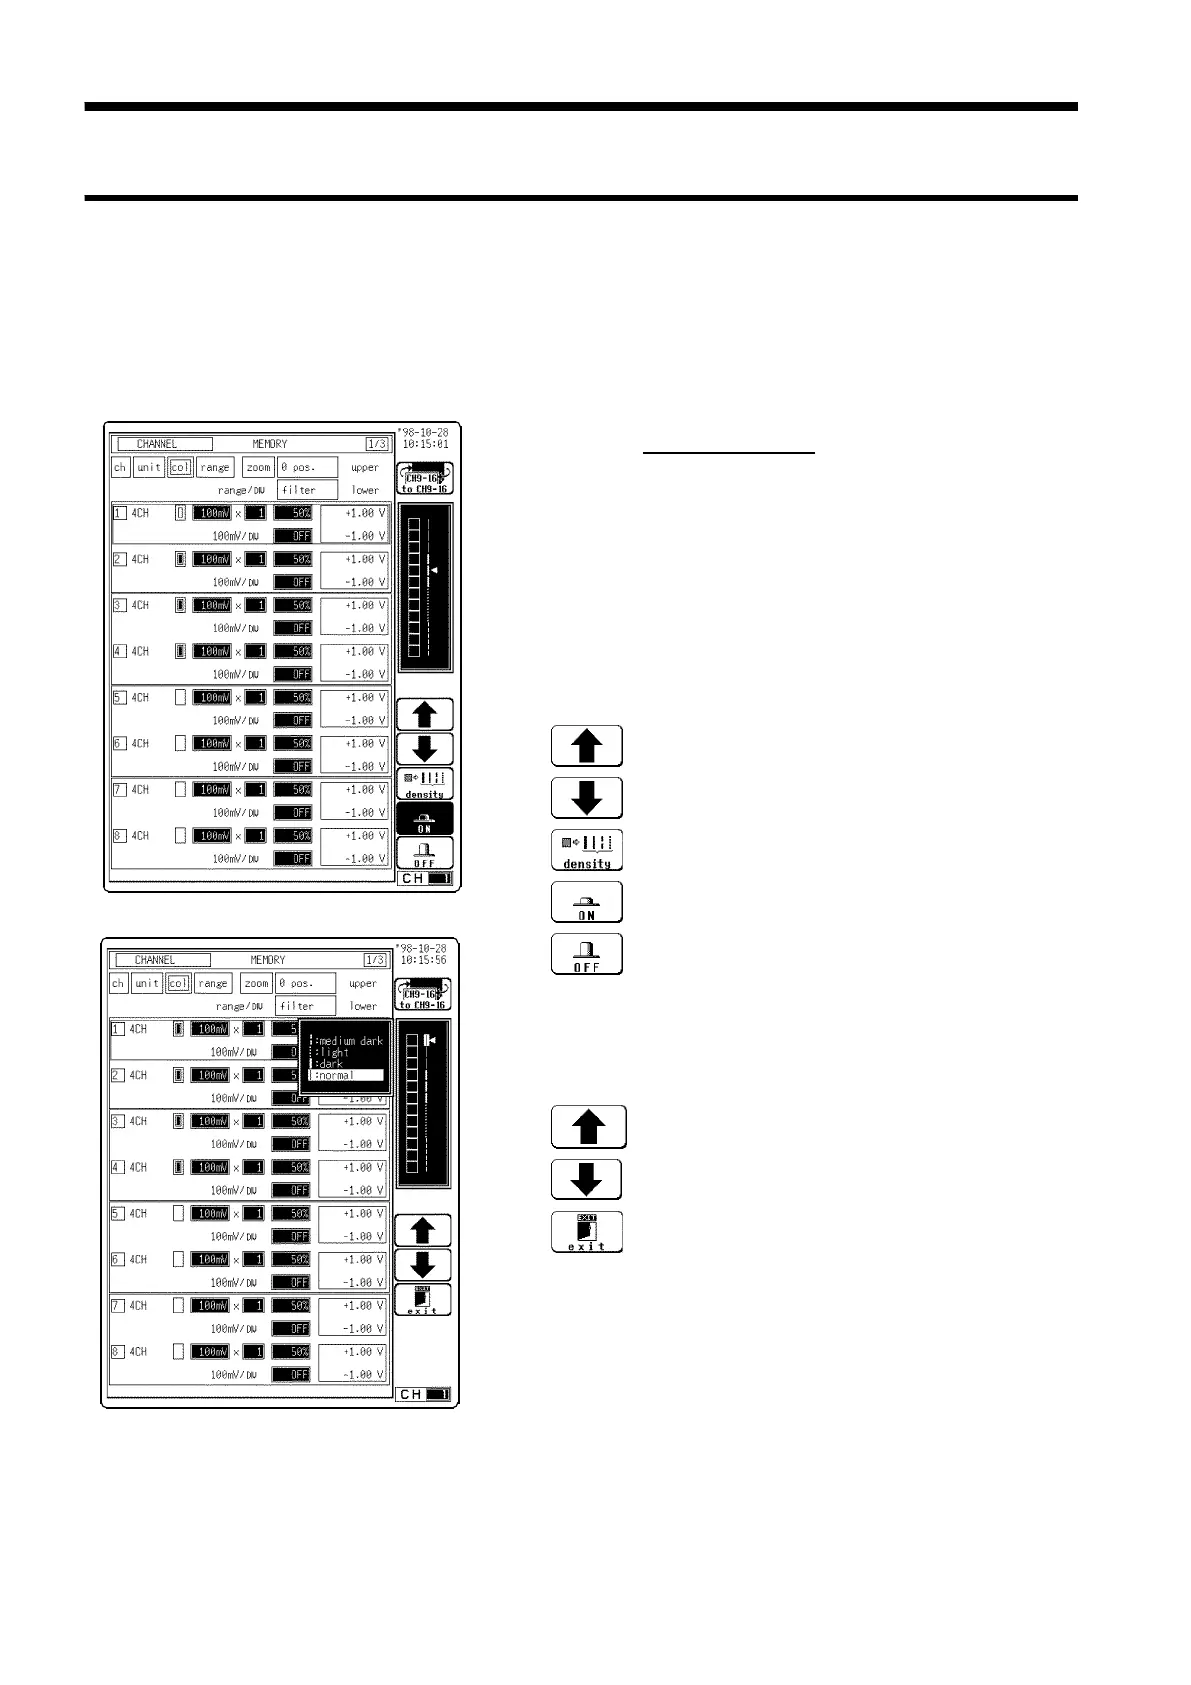
13.3 Setting the CHANNEL Screen (printout)
────────────────────────────────────────────────────
13.3.1 Setting the Print Density
s1131-1, 2
Function
display
Meaning
g-pr1
:
Move the cursor up in the selection window.
:
Move the cursor down in the selection window.
:
Enter the print density setting screen.
:
Waveform is performed.
:
Waveform is not performed.
Function
display Meaning
## gc-ex
:
Select the print density.
:
Exit from the print density mode.
13.3 Setting the CHANNEL Screen (printout)
If the data is to be output on the internal printer, any of four print densities
may be set for twelve waveform display colors. The set print density
determines waveform density on printouts or hard copies.
Procedure
Screen: CHANNEL
1. Press the CHAN key to display the CHANNEL screen.
2. Use the CH.SET key to display desired channel
screen.
3. Move the flashing cursor to the position of color to
be set.
4. Use the function keys to select density.
5. Use the function keys or Jog/Shuttle control, set print
density
6. Set the channels 2 to 16 in the same way.
・ If the system is reset, print density returns to its
previous setting.
・ If the analog channel comment is set to "SETTING"
or "SET & COM," the analog channel print density
(■) is output during printing.