248
────────────────────────────────────────────────────
11.2 Using the A
・
BCursors
────────────────────────────────────────────────────
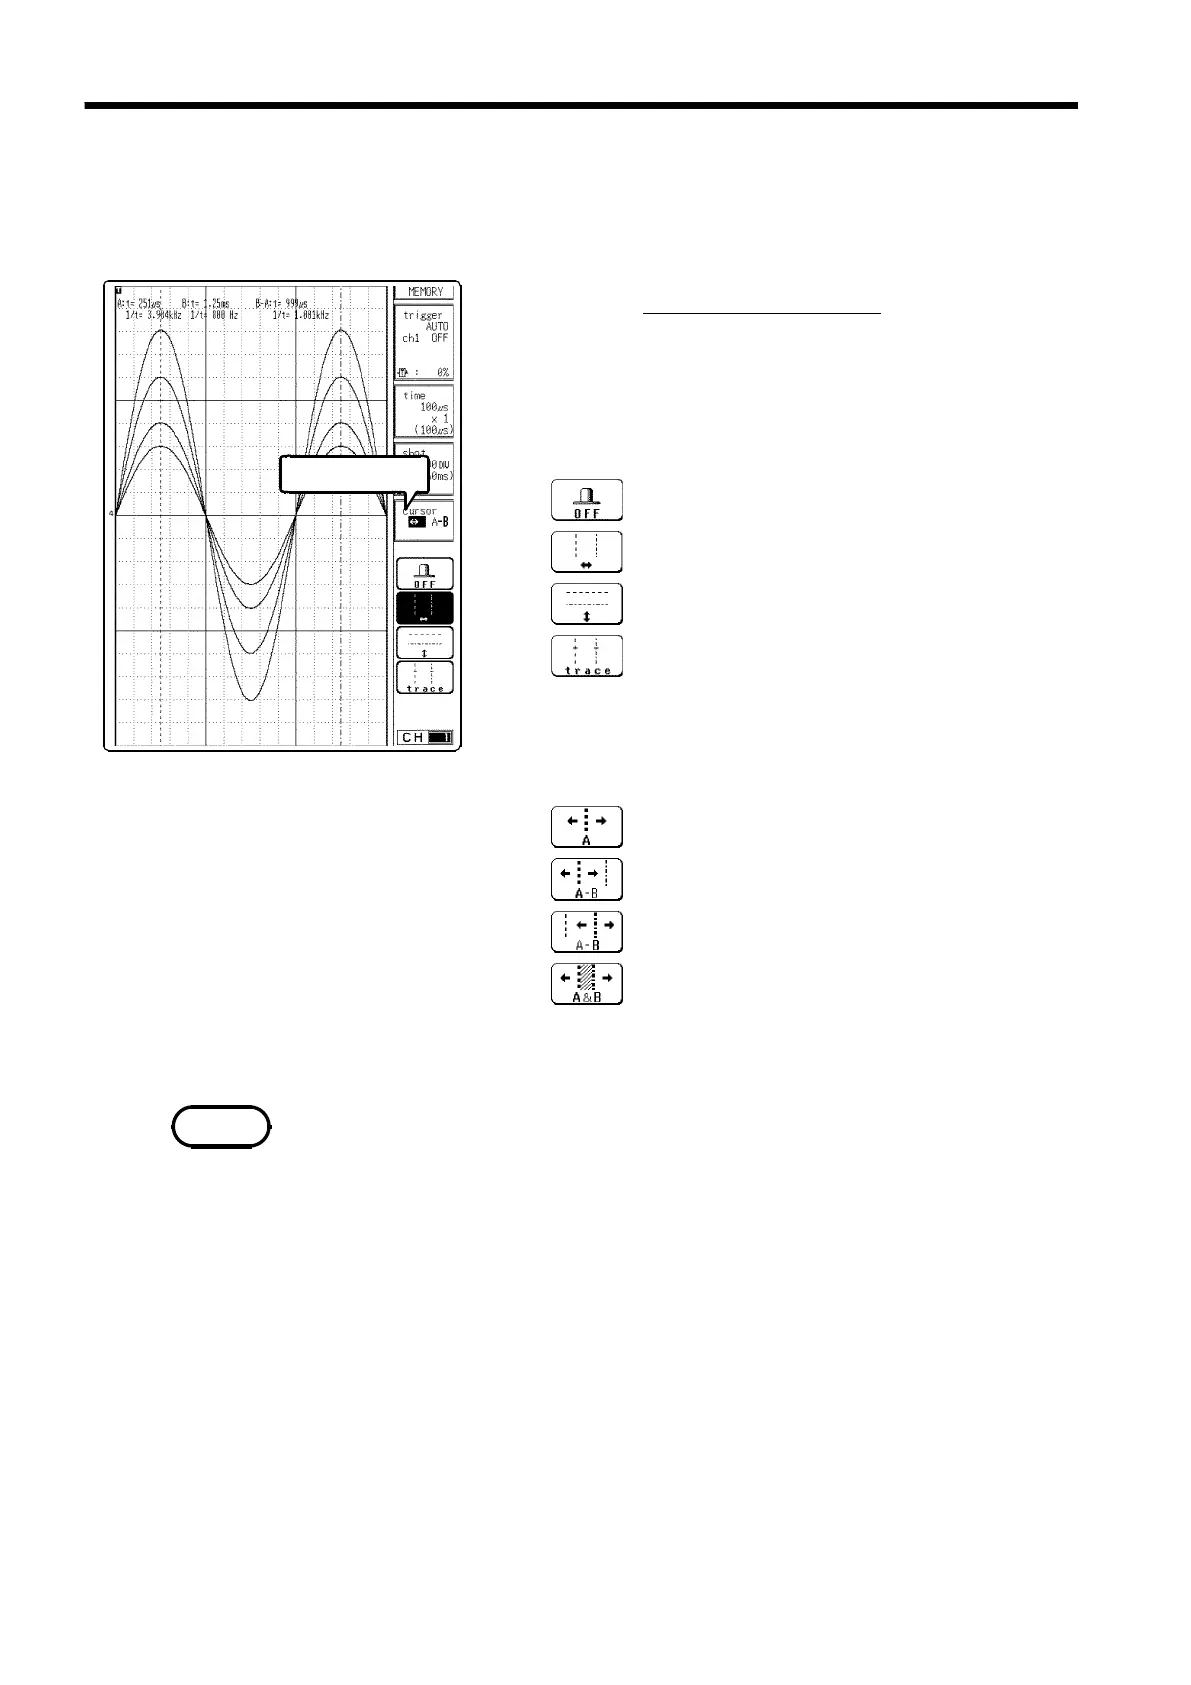
11.2.1 Using the Line Cursors (Vertical)
s921
Flashing cursor
Function
display
Meaning
:
Disable A・Bcursors
:
Line cursor (vertical: t, 1/t)
:
Line cursor (horizontal: v)
:
Trace cursor (the point where the cursor
crosses the waveform)
Function
display
Meaning
:
Use the cursor A only
:
Move the cursor A only
:
Move the cursor B only
:
Move both cursors A and B
NOTE
The line cursor (vertical) displays the time and period starting from the
trigger position. On the recorder, the line cursor (vertical) displays the time
and period starting from the initiation of recording.
Procedure
Screen: Waveform display
1. Move the flashing cursor to the
cursor
item
2. Use the function keys to select the Line cursor
(vertical).
3. Use the function keys to select the cursor to be
moved.
4. Press the A
・
B CSR select key.
5. Rotate the Jog/Shuttle control to move the cursor.
・
When the A
・
B CSR select key is used to activate the A
・
B cursor mode, the
trace cursor (X-Y CONT: line cursor) can be used, also if it was set to OFF.
・
A
・
B cursor measurements are enabled even if the line cursor (vertical) or
trace cursor are off the screen. When the cursor is set to A&B and either the
A or B cursor is moved, both A and B cursors are shifted onto the screen.
The VIEW key can be used to check the cursor position within the total
recording length.
・
When the cursor is moved to the edge of the screen, the waveform is
scrolled.
・
If turning the the Shuttle control fully and holding the control for about five
seconds, the indication "auto scroll" appears on the function key display and
the waveform continues to scroll even if releasing the control. Auto-scroll is
canceled by pressing any key.
・
In additional recording (recorder, rms recorder, recorder waveform in
REC&MEM), the junction between data is invalid data.