233
────────────────────────────────────────────────────
10.8 Analog Trigger
────────────────────────────────────────────────────
10.8.4 Period Trigger
s884-1
1. 2. 3. 4.
Function
display
Meaning
:
Increases in number, large step
:
Increases in number, small step
:
Decreases in number, small step
:
Decreases in number, large step
Function
display
Meaning
:
Enables triggering on the rising period.
:
Enables triggering on the falling period.
This function sets both the period reference voltage and the period range,
and measures the rise (fall) period of the reference voltage. When the
measured period deviates from the specified range, triggering occurs.
Procedure
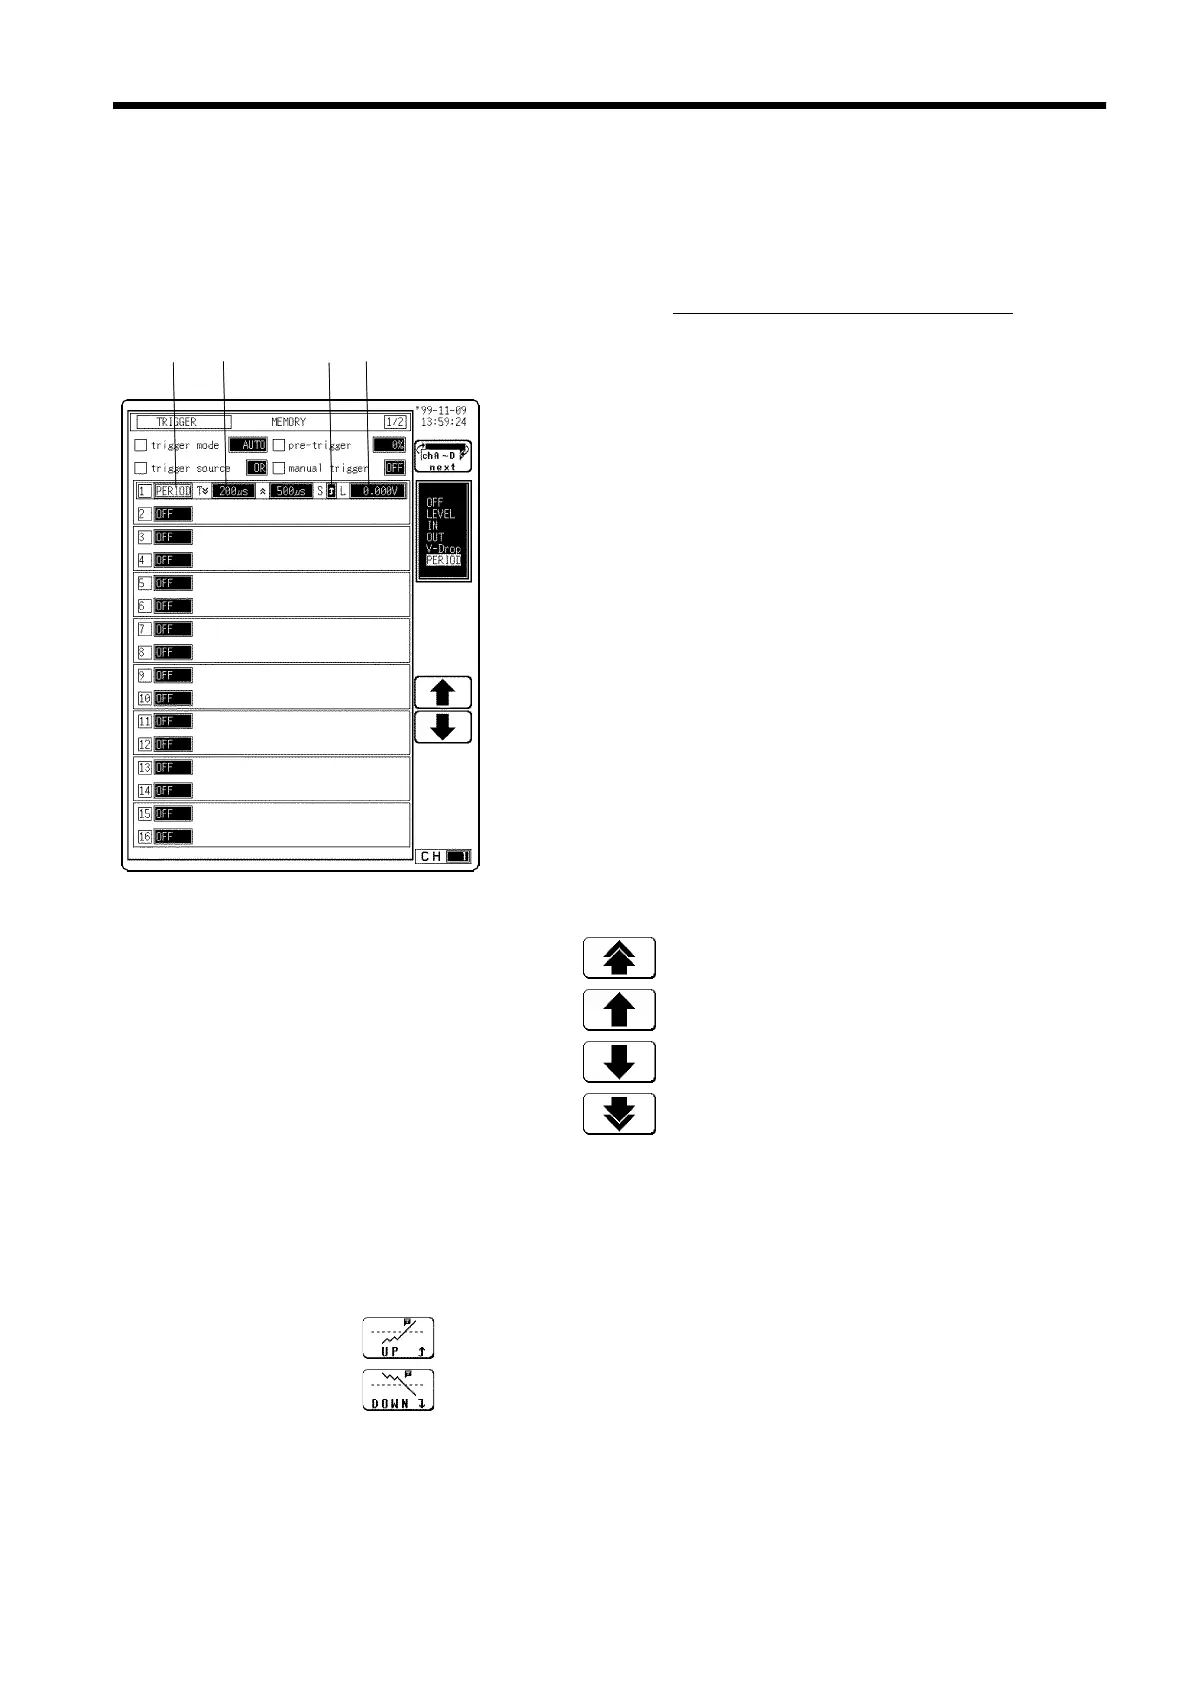
Screen: TRIGGER, Waveform display
(1) Select the period trigger.
1. Display the TRIGGER or Waveform display screen.
2. Move the flashing cursor to position
1.
shown in the
figure.
3. Use the function keys to select PERIOD.
(2) Set the period range
1. Move the flashing cursor to position
2.
.
2. Use the Jog/Shuttle control or the function keys to
make a setting.
The setting for the period range of the period trigger
changes depending on the sampling period.
Lower limit: More than 10 times the sampling period.
Upper limit: Less than 20000 times the sampling
period.
The upper trigger level must not be smaller than the
lower trigger level, or the lower trigger level must not
be larger than the upper trigger level.
(3) Select the trigger direction (slope).
1. Move the flashing cursor to position
3.
shown in the figure.
2. Use the function keys to select the trigger direction (slope).