SHOP MANUAL
Engine
Ch 1 page 46
7. Fit the filter element and cover in the filter housing. Tighten
the cover to 25 Nm (18.4 lbf.ft).
8. Bleed the fuel system after renewing the water separating
filter.
Fit the lter elements in the lter covers before placing them
in the fuel lter housings or the lter elements may be dam-
aged.
The same intervals between changes apply as for those
for an ordinary fuel lter.
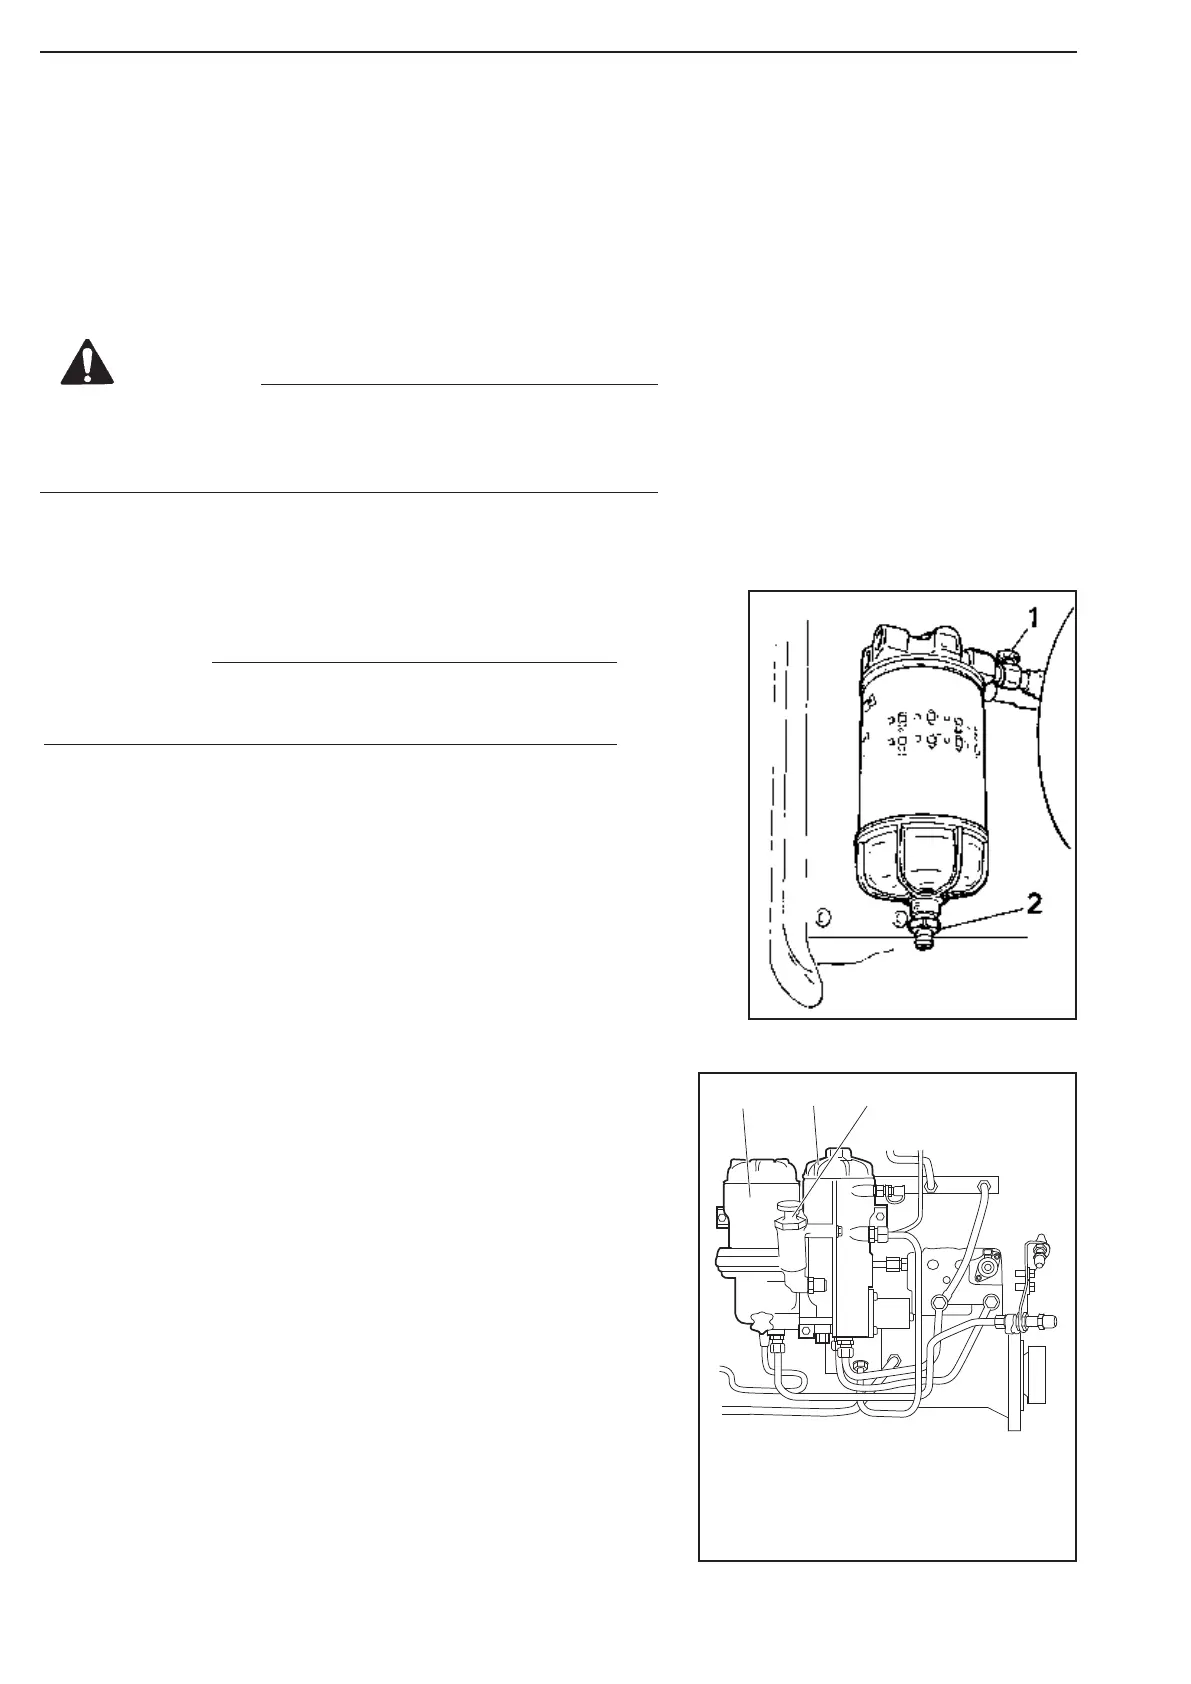
Water separating prefilter XPI
1 Shut-off cock
2 Drain valve
1
2 3
1 Water separating lter
2 Pressure lter
3 Hand pump
NOTE
1. Close the shut-off cock (1) in the fuel pipe and
position a container under the filter.
2. Open the drain tap (2) in the filter cover and let
the fluid run down into the container.
3. Unscrew the filter cover.
4. Unscrew the filter from the filter head.
5. Discard the old filter and use a new filter.
6. Lubricate the O-ring in the filter cover with engine oil.
7. Screw the filter cover onto the new filter by hand. Make
sure that the drain tap is fully closed.
8. Lubricate the O-ring on the filter with engine oil.
9. Fill the width of the filter with clean fuel.
10. Screw the filter into position until the O-ring rests against
the filter head. Tighten the filter another 1/2-3/4 turn by
hand.
11. Open the shut-off cock and check the system for leaks.
12. Bleed the fuel system.
changing the water separating fuel filter
CAUTION
Figure 73
Figure 74