CHAPTER23 Digital PSTN
Mediant 1000 Gateway & E-SBC | User's Manual
On the top of the page, a bar with Trunk number icons displays the status of each trunk
according to the following color codes:
● Grey: Disabled
● Green: Active
● Yellow: RAI alarm (also appears when you deactivate a Trunk by clicking the Deactivate
button)
● Red: LOS/LOF alarm
● Blue: AIS alarm
● Orange: D-channel alarm (ISDN only)
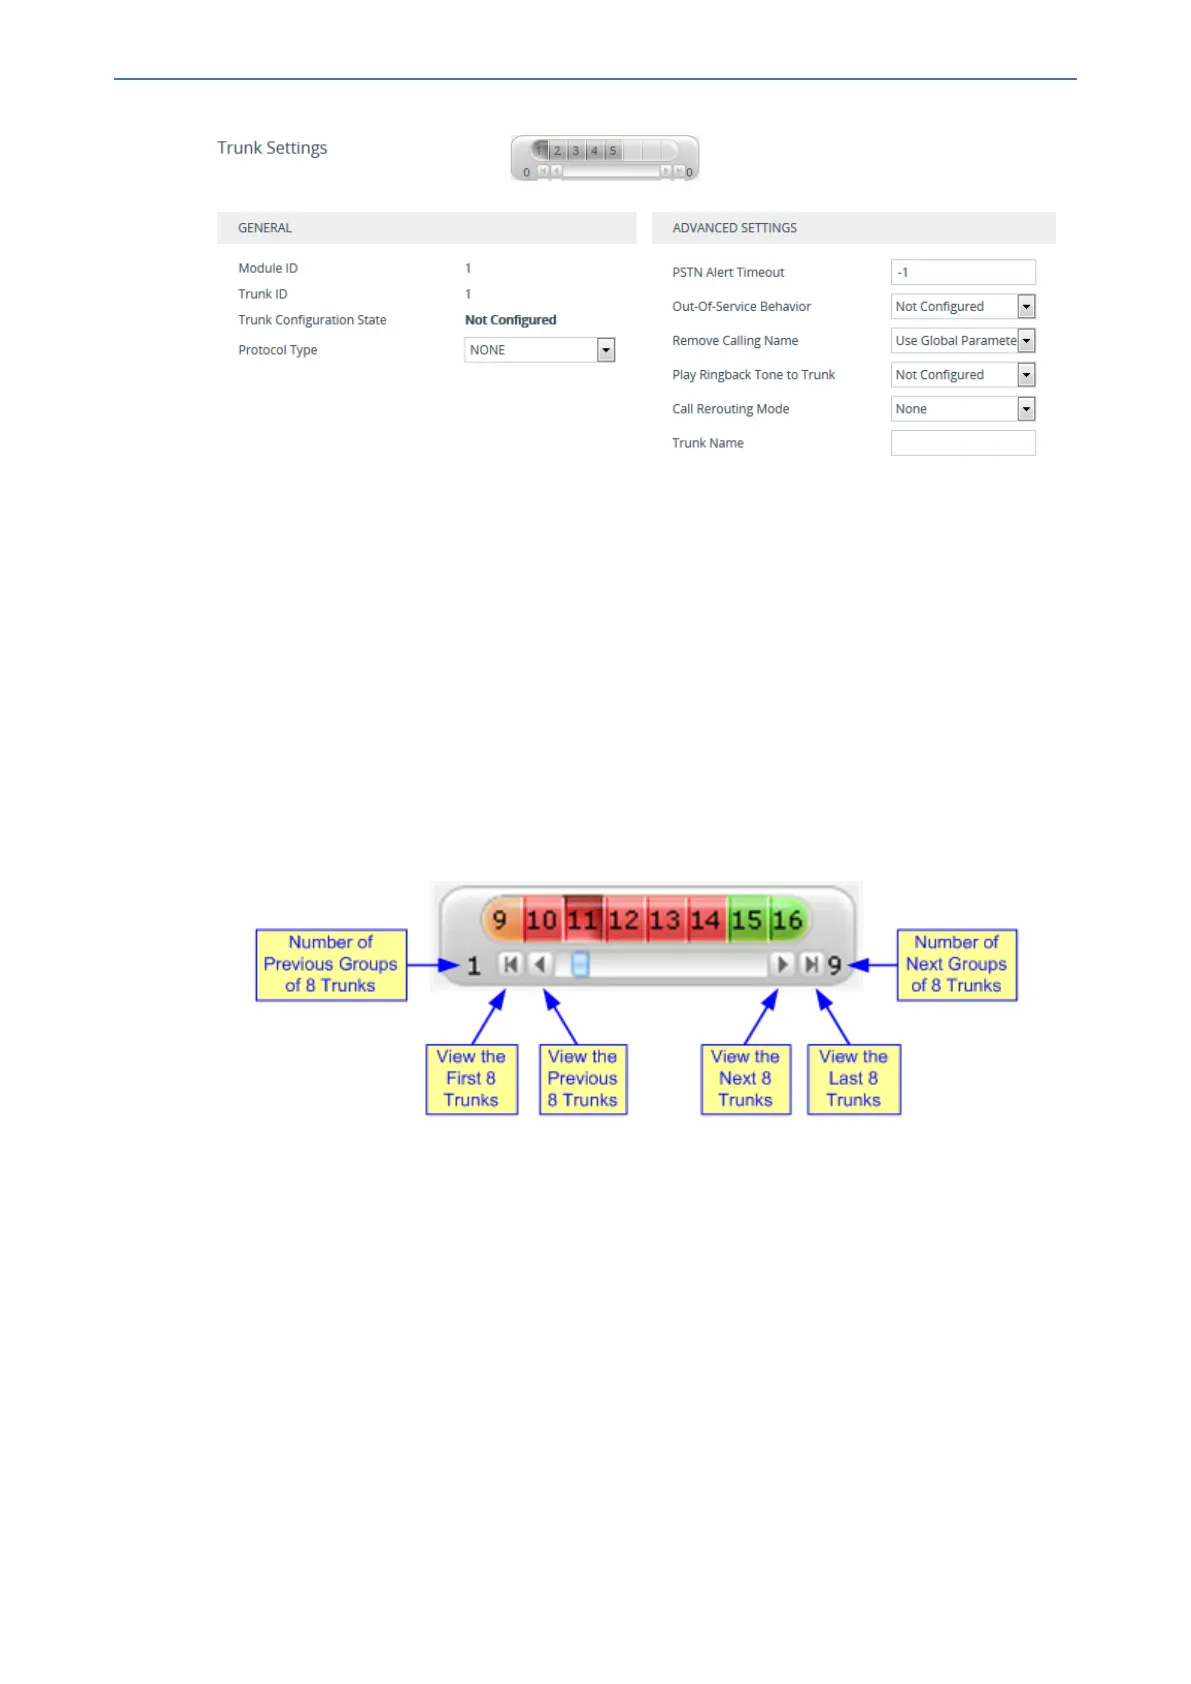
2. Select the trunk that you want to configure, by clicking the desired Trunk number icon. The bar
initially displays the first eight trunk number icons (i.e., trunks 1 through 8), if they exist. To
scroll through the trunk number icons (i.e., view the next/last or previous/first group of eight
trunks), see the figure below. If the scroll bar displays all available trunks, the scroll bar buttons
are unavailable.
3. To configure a new trunk:
a. Configure the trunk parameters as required (see following table for parameter
descriptions).
b. Click the Apply Trunk Settings button.
4. To modify an existing trunk configuration:
● If you only need to modify parameters that don't require the trunk to be stopped (see
previous note), simply modify their values, and then click Submit.
● If you need to modify parameters that require the trunk to be stopped (see previous note),
click the Stop Trunk button, modify their values, and then click the Apply Trunk
Settings button to apply the changes to the selected trunk (or click Apply to All Trunks
to apply the changes to all trunks); the Stop Trunk button replaces Apply Trunk
Settings and the ‘Trunk Configuration State’ displays "Active".
5. Reset the device with a save-to-flash for your settings to take effect.
- 529 -