Phaser 6180MFP Multifunction Printer Service Manual 8-87
Service Parts Disassembly
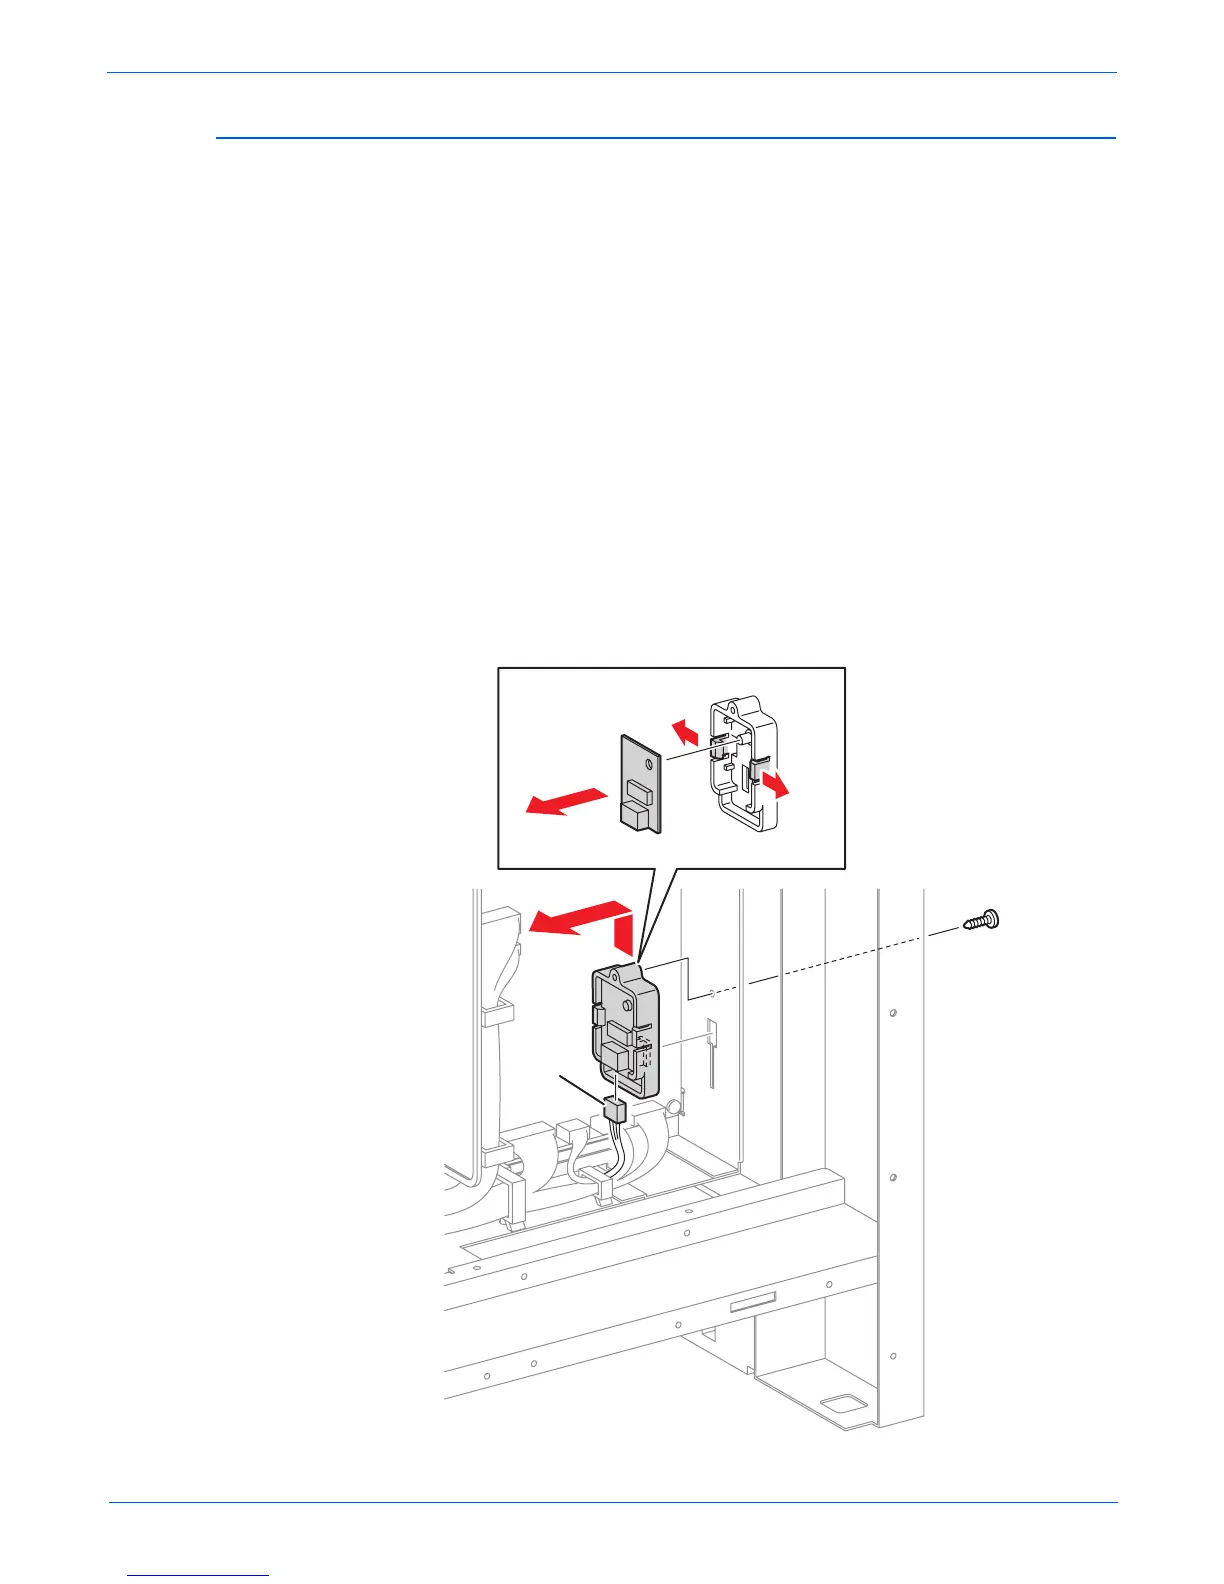
Humidity/Temperature Sensor (PL9.2.11)
1. Open the Front Cover.
2. Remove the Fuser (page 8-12).
3. Remove the Rear Cover (page 8-18).
4. Remove the Bottom Cover (page 8-19).
5. Remove the Left Pole Inner Cover (page 8-24).
6. Remove the Left Pole Cover (page 8-25).
7. Remove the Left Cover (page 8-26).
8. Remove the Controller Shield Box Assembly (page 8-92).
9. Remove the Fax Shield Box Assembly (page 8-96).
10. Remove 1 screw (10 mm) securing the Humidity/Temperature Sensor to
the printer.
11. Slide the Humidity/Temperature Sensor Bracket upward to release the
hooks and remove the Humidity/Temperature Sensor Bracket together
with the Humidity/Temperature Sensor.
12. Disconnect the Humidity/Temperature Sensor connector P/J261.
13. Release the hooks on the Humidity/Temperature Sensor Bracket and
remove the Humidity/Temperature Sensor.
s6180mfp-316
P/J261
 Loading...


