CHAPTER18 Core Entities
Mediant 1000 Gateway & E-SBC | User's Manual
To use a configured Proxy Set, you need to assign it to an IP Group in the IP Groups table (see
Configuring IP Groups). When the device sends INVITE messages to an IP Group, it sends it to the
address configured for the Proxy Set. You can assign the same Proxy Set to multiple IP Groups
(belonging to the same SRD).
● It is recommended to classify incoming SIP dialogs to IP Groups based on
Classification rules (see Configuring Classification Rules on page761) instead of
based on Proxy Sets.
● For the Gateway application, you can view the device's connectivity status with
proxy servers in the Tel-to-IP Routing table for Tel-to-IP routing rules whose
destination is an IP Group that is associated with a Proxy Set. The status is only
displayed for Proxy Sets enabled with the Proxy Keep-Alive feature.
● To view the connectivity status of Proxy Sets, see Viewing Proxy Set Status on
page953.
The Proxy Set is configured using two tables, one a "child" of the other:
■ Proxy Sets table: Defines the attributes of the Proxy Set such as associated SIP Interface and
redundancy features - ini file parameter [ProxySet] or CLI command, configure voip >
proxy-set
■ Proxy Set Address table ("child"): Defines the addresses of the Proxy Set - table ini file
parameter [ProxyIP] or CLI command, configure voip > proxy-ip > proxy-set-
id
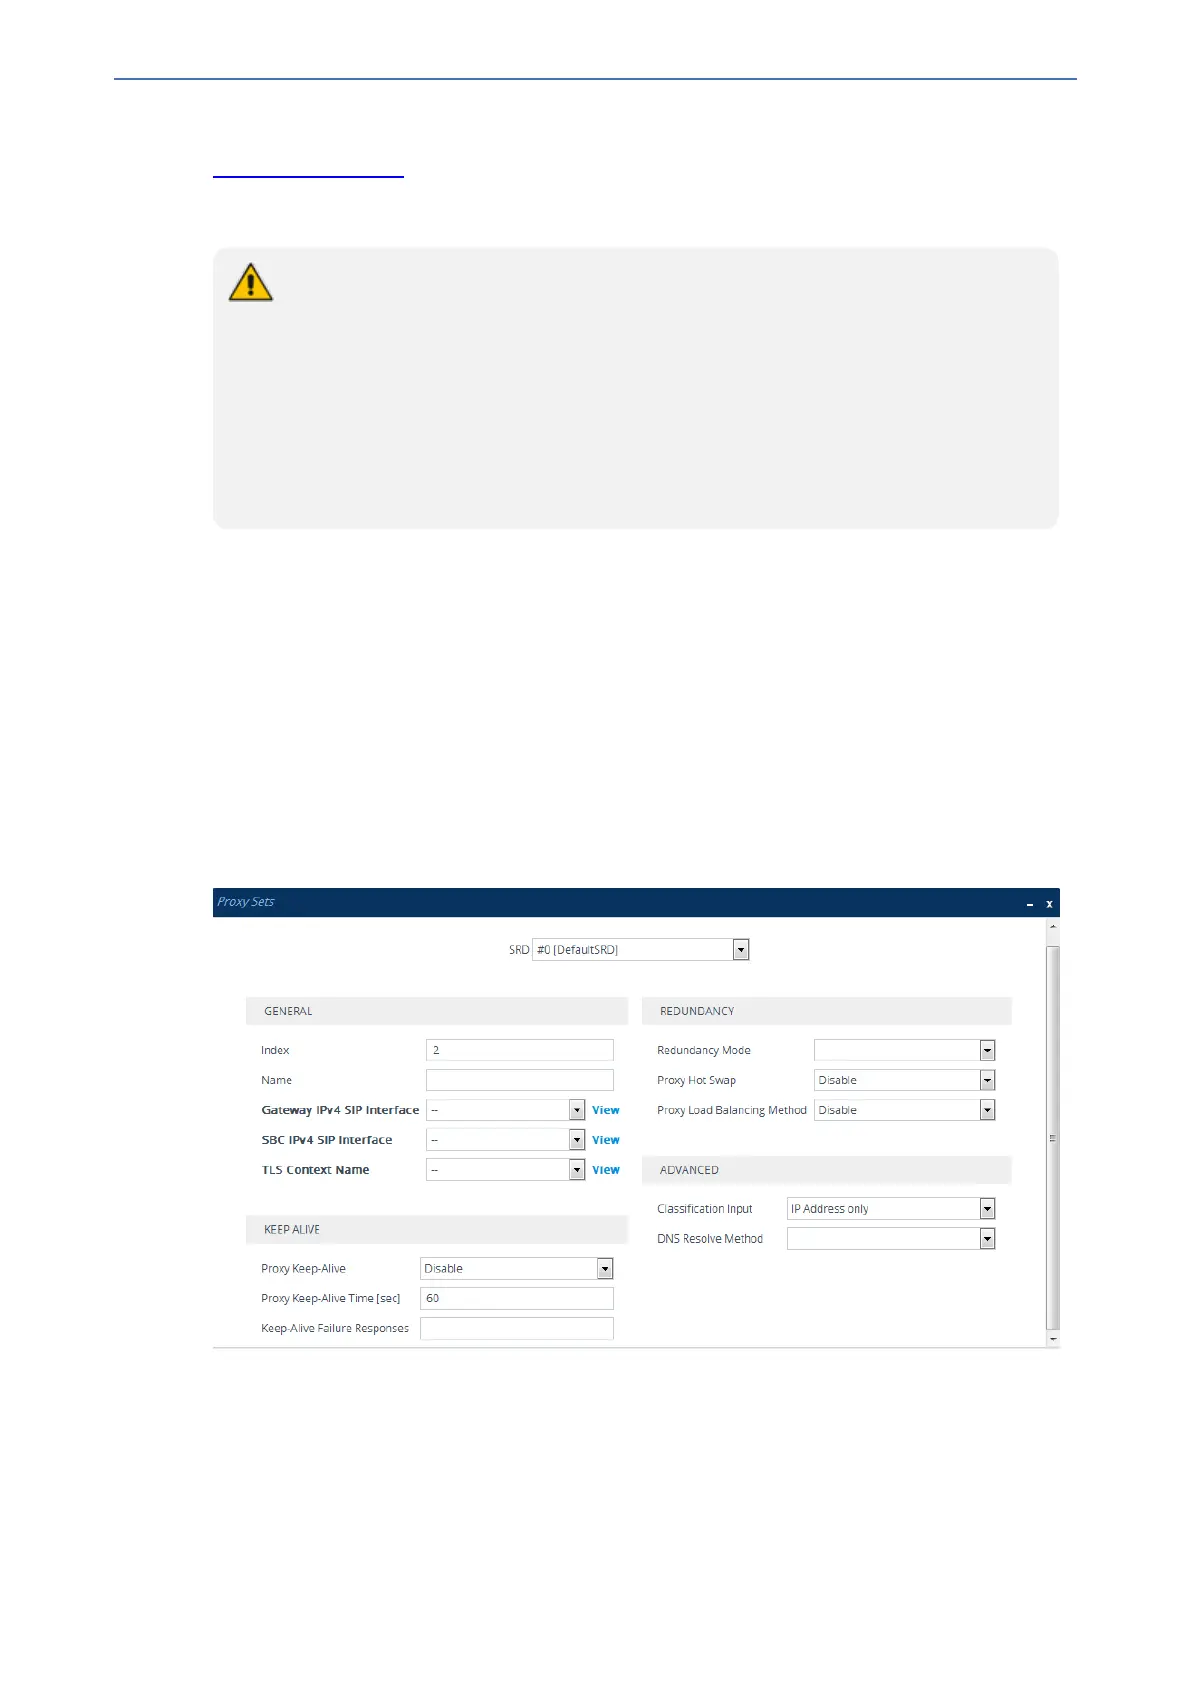
➢ To configure a Proxy Set:
1. Open the Proxy Sets table (Setup menu > Signaling & Media tab > Core Entities folder
>Proxy Sets).
2. Click New; the following dialog box appears:
3. Configure a Proxy Set according to the parameters described in the table below.
4. Click Apply.
5. Select the index row of the Proxy Set that you added, and then click the Proxy Address link
located below the table; the Proxy Address table opens.
6. Click New; the following dialog box appears:
- 367 -