Installation & Operation Manual 452 Document # LTRT-92224
Mediant 8000
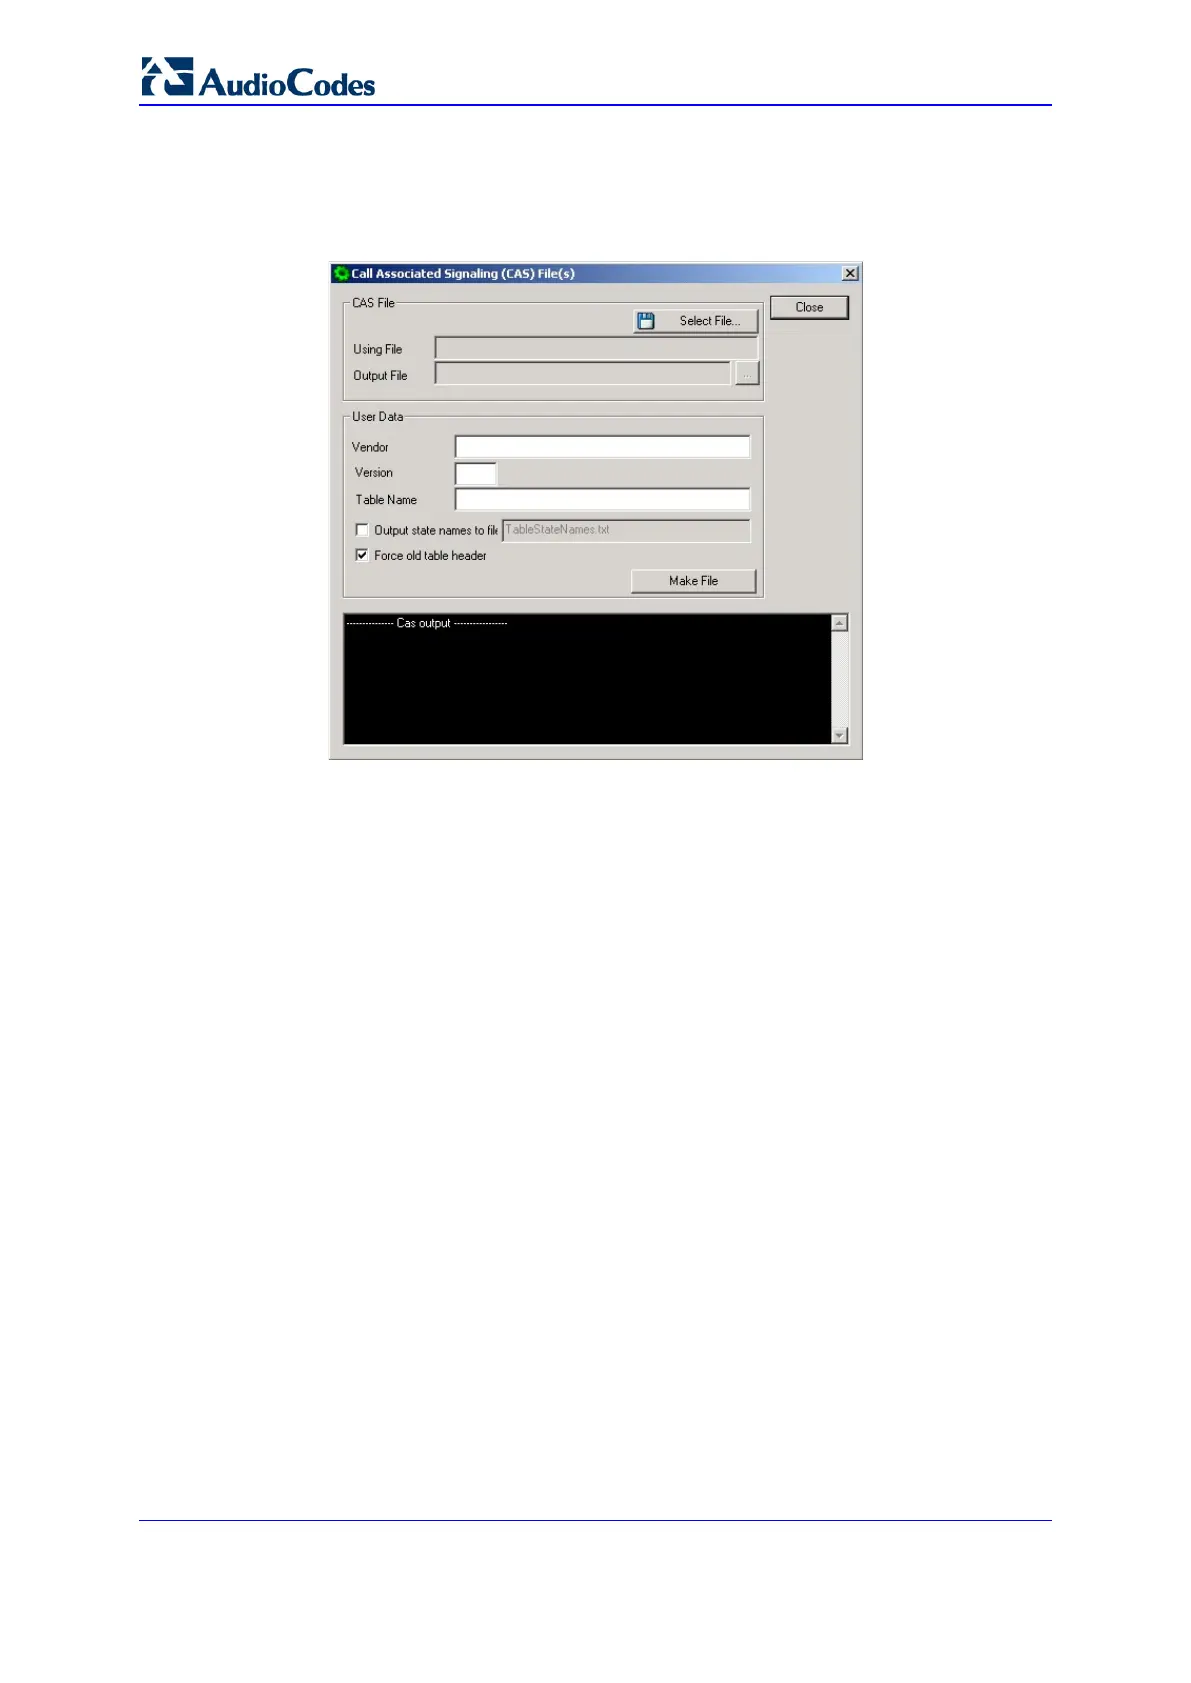
3. Execute DConvert.exe and click the Process CAS Tables button. The Call
Associated Signaling (CAS) Window appears.
Figure
37-8: Call Associated Signaling (CAS) Screen
4. Click the Select File button. A Browse window appears.
5. Navigate to the desired location and select the file to be converted. (This
automatically designates the output file as the same name and path, but with the
dat extension. The Table Name is also automatically designated.)
6. Fill in the Vendor and Version fields.
• Vendor Field - 32 characters maximum
• Version Field - must be made up an integer, followed by a period “.”, then
followed by another integer (e.g., 1.2, 23.4, 5.22)
7. Modify the Table Name if desired.
8. For troubleshooting purposes, you can click a check into the Output state
names to file checkbox. This activates the file name field in which the default file
name, TableState Names.txt appears. You can modify the file name if desired.
The file is located in the same directory as the Using file and Output file
designated above.
9. If the file to be converted uses the new table header, un-check the Force old
table header checkbox.
10. Click the Make File button. The dat file is generated and placed in the same
directory as shown in the Output File field. A message box informing you that the
operation was successful indicates that the process is completed.
On the bottom of the Call Assisted Signaling (CAS) Files(s) window, the Cas output
log box displays the log generated by the process. It can be copied as needed. The
information in it is NOT retained after the window is closed.
 Loading...
