Routine Maintenance Procedures
555-233-123
5-18 Issue 4 May 2002
Fans
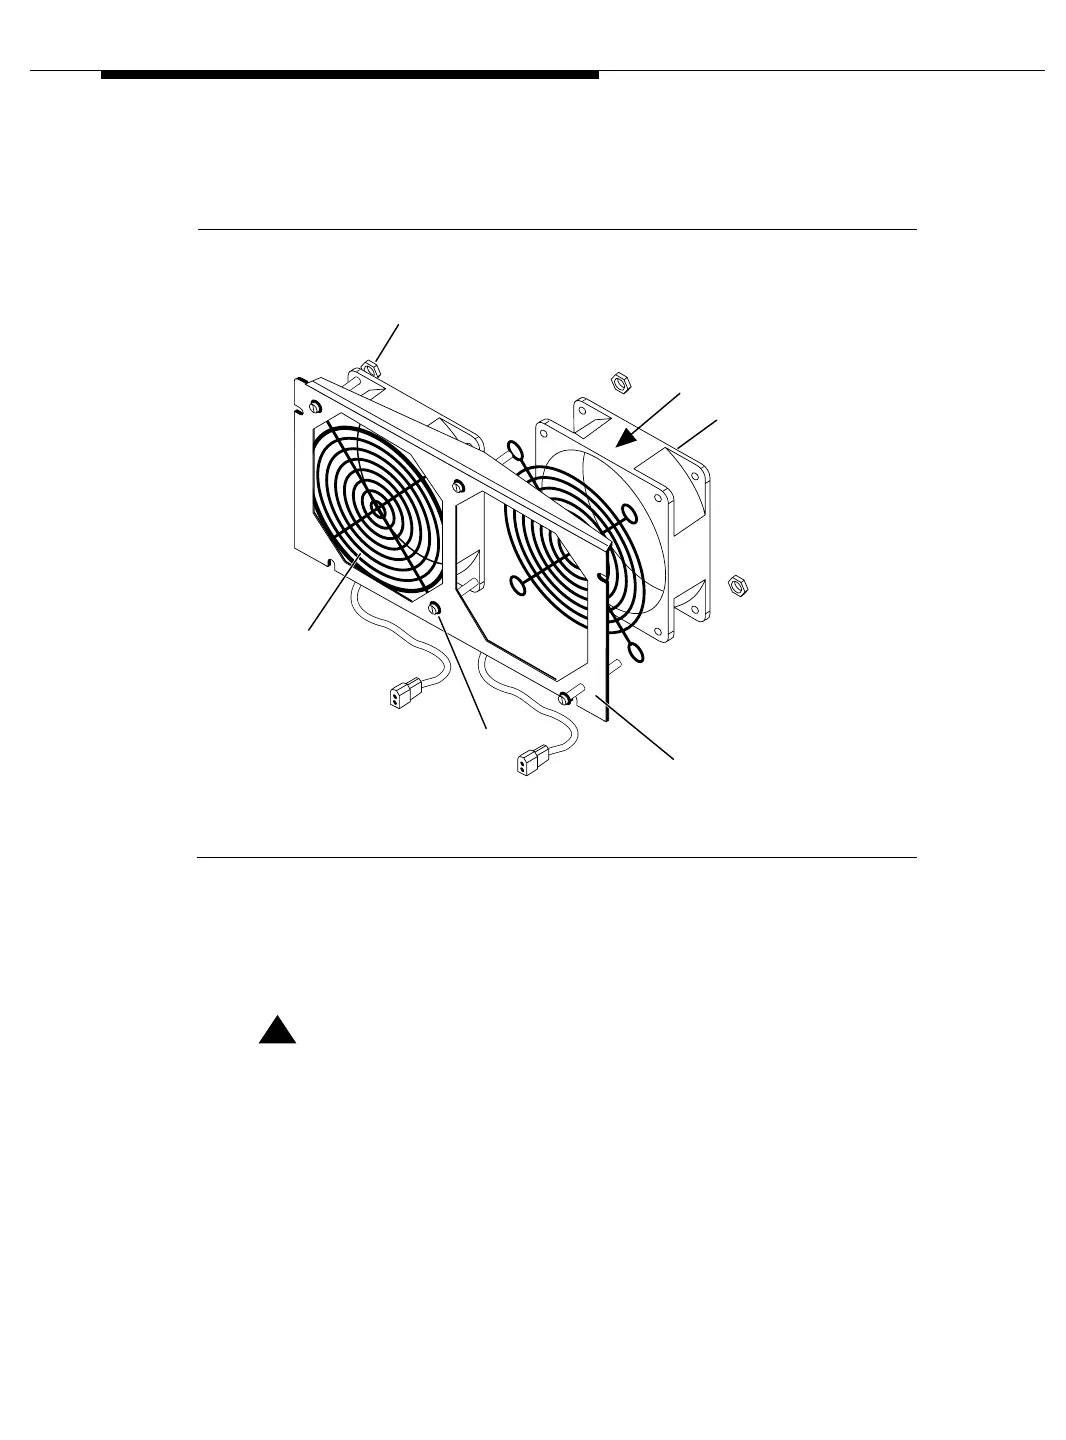
See Figure 5-5 while performing the following steps to replace the fan assembly.
Figure 5-5. Fan sub-assembly
1. At the back of the unit, remove the four screws from the fan panel. Then
remove the panel.
2. If the unit is attached to the wall, disconnect the entire fan panel.
!
CAUTION:
The power cord for each fan extends from a plug on the backplane.
Do not tug on any of these cords. Otherwise, the corresponding plug
on the backplane might come off.
3. Each fan has a power cord with a plug and receptacle at each end.
Disconnect the plug for each fan that is to be replaced. Then remove the
appropriate fan(s).
4. Install the new fan(s), reconnect the fan plug(s), reconnect the fan panel (if
disconnected), and screw the fan panel back onto the back of the unit.
Hex Nut
Flow
Direction
Fan
Fan
Panel
Screw
Fan
uard
 Loading...