460 Upgrade and Maintenance Manual RX2540 M4
14.4.3.6 Concluding steps
Ê "Installing the fan holder" on page 234
Ê "Reassembling" on page 63
Ê "Connecting the power cord" on page 67
Ê "Switching on the server" on page 70
Ê "Resuming BitLocker functionality" on page 112
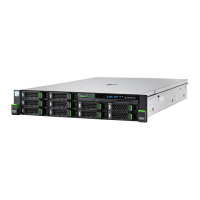
14.5 Front panel on QRL (24 x 2.5-inch HDD
configuration)
14.5.1 Replacing the front panel on QRL
Note on system information backup/restore
The front panel (front panel module, front panel board or front panel on QRL)
contains the Chassis ID EPROM that contains system information like server
name and model, housing type, serial number and manufacturing data.
To avoid the loss of non-default settings when replacing the system board, a
backup copy of important system configuration data is automatically stored from
the system board NVRAM to the Chassis ID EPROM.
V CAUTION!
For that reason the front panel and system board must not be replaced
simultaneously! In this case, restoring the system configuration data on
the system board would fail.
When replacing the front panel, the system information like server name and
model, housing type, serial number and manufacturing data are not restored
automatically. So never forget to restore it manually by Chassis ID Prom Tool.
Field Replaceable Unit
(FRU)
Hardware: 10 minutes
Software: 5 minutes
Tools: Phillips PH1 / (+) No. 1 screw driver
Phillips PZ2 / (+) No.2 screw driver (for the fan holder)
 Loading...

