Replacing the Dry Ink/Toner Waste Bottle
The Dry Ink/Toner Waste Bottle collects dry ink/toner that accumulates during the printing process. When the bottle
is full, a message displays on the press UI informing you to exchange the full bottle with an empty one.
The press contains one waste bottle located at the front of the press behind the Dry Ink/Toner Waste Bottle Door.
When removing a full Dry Ink/Toner Waste bottle, SLOWLY pull it out of the press. This will prevent any dry ink/toner
from spilling out of the bottle.
Note: After you replace the Dry Ink/Toner Waste Bottle, the system automatically resets the usage counter
to zero (0) for this CRU component. Check the Consumables Supply screen to verify the reset.
1. Ensure that the press is stopped (not running any jobs).
2. Open the front door of the press.
3. Open the Dry Ink/Toner Waste Bottle Door.
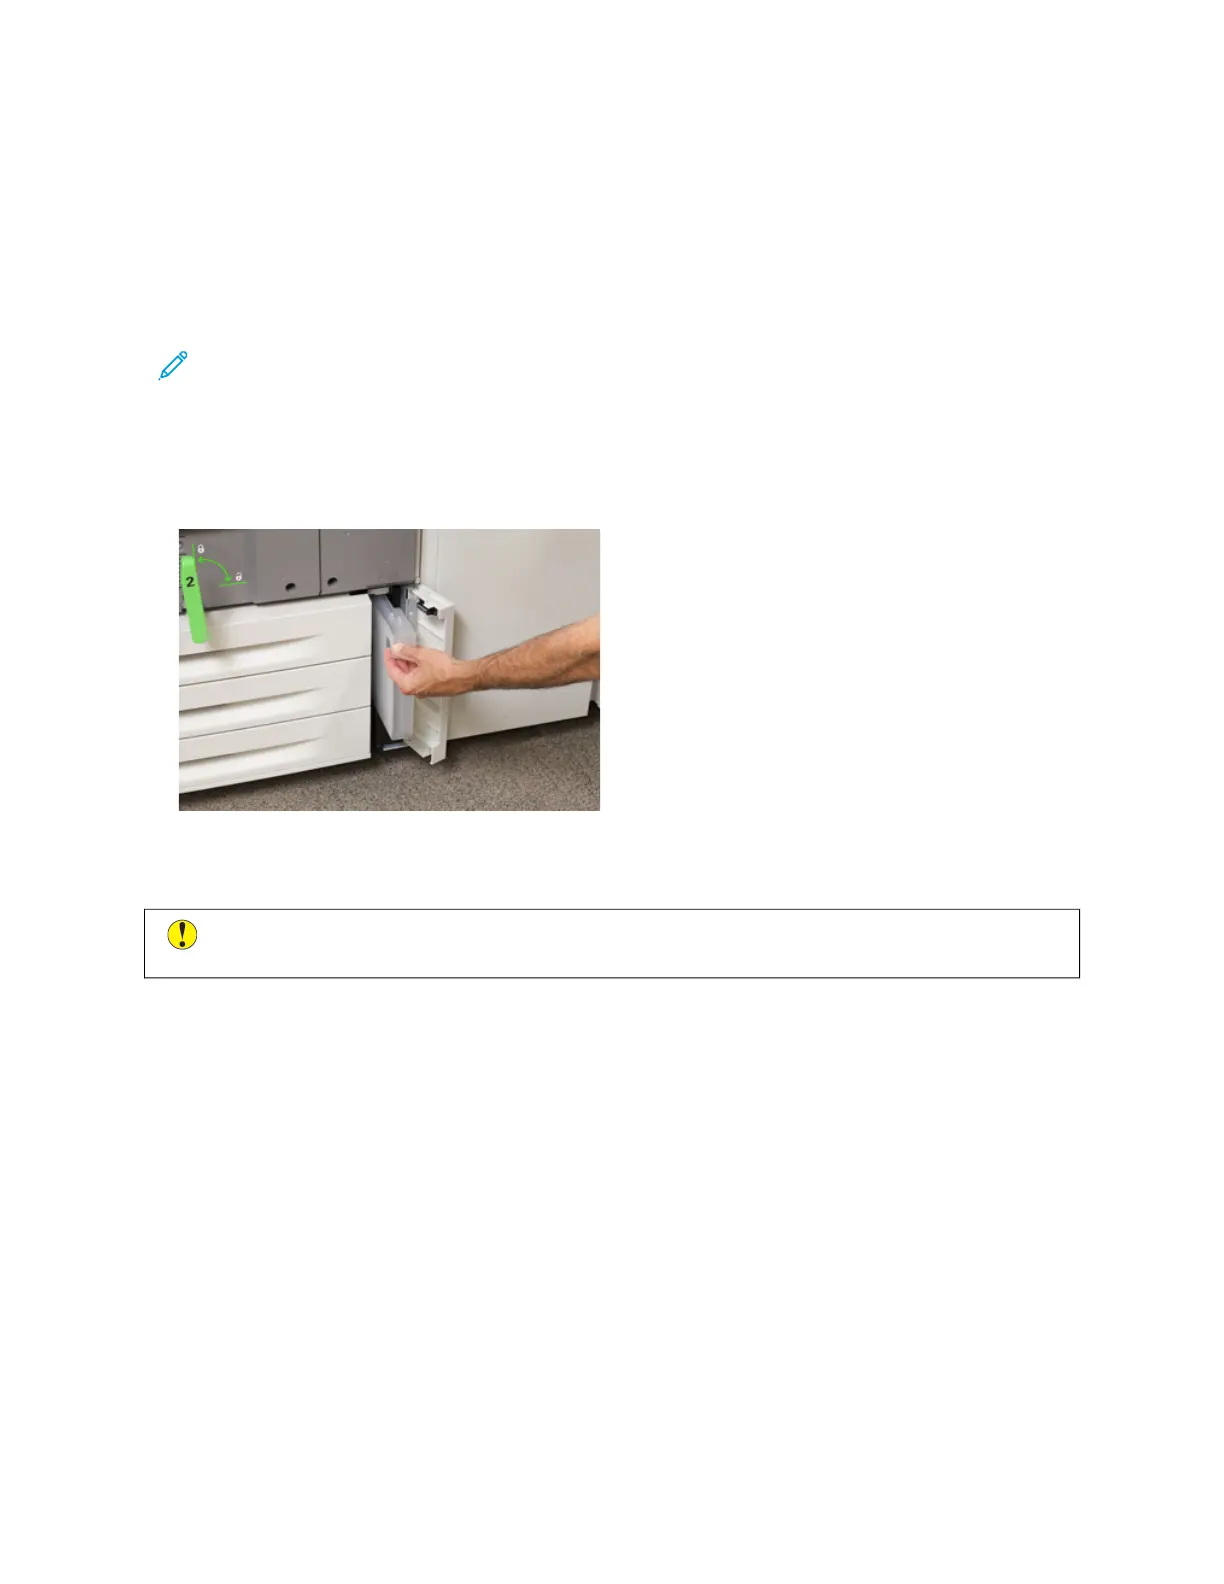
4. Grasp the handle of the Dry Ink/Toner Waste bottle and pull it halfway out of the press.
5. Support the underside of the bottle with your other hand and continue pulling it out from the press.
Caution: Never use a vacuum cleaner when cleaning up spilled dry ink/toner. Use a broom or a cloth
moistened with a neutral detergent.
6. Use both hands to place the old used Dry Ink/Toner Waste Bottle into the provided plastic bag.
7. Remove a new, empty waste bottle from the packaging.
8. Hold the center part on the top of a new bottle and insert it evenly and gently into the press until it comes to a
stop.
9. Close the waste bottle door.
10. Close the press front door.
Xerox
®
Versant
®
280 Press User Documentation 237
Working With
 Loading...


