• Paper jams may occur in multiple areas of the press and any optional devices connected to the press. When this
happens, the graphical illustration changes to show the multiple locations and the required corrective actions.
• Additionally, if a fault occurs with an optional device, an indicator lights on that device control panel and shows
the corresponding area on the device where the fault occurred.
Always refer to the following information when clearing paper jams:
• Do not power off the press when removing paper jams.
• Paper jams can be removed with the press still powered on. When the power is turned off, all information stored
to the system memory will be erased.
• Clear all paper jams before resuming print jobs.
• Do not touch components inside the press. This can cause print defects.
• Ensure that all paper jams, including any small ripped pieces of paper, are cleared before proceeding with print
jobs.
• Gently remove the paper taking care not to tear it. If paper is torn, be sure to remove all torn pieces.
• After removing paper jams, close all doors and covers. The press cannot print when doors or covers are open.
• After clearing a paper jam, printing automatically resumes from the state before the paper jam occurred.
• If all paper jams are not cleared, an error message continues to display on the press touch screen. To clear any
remaining jams, refer to the press touch screen for instructions and information.
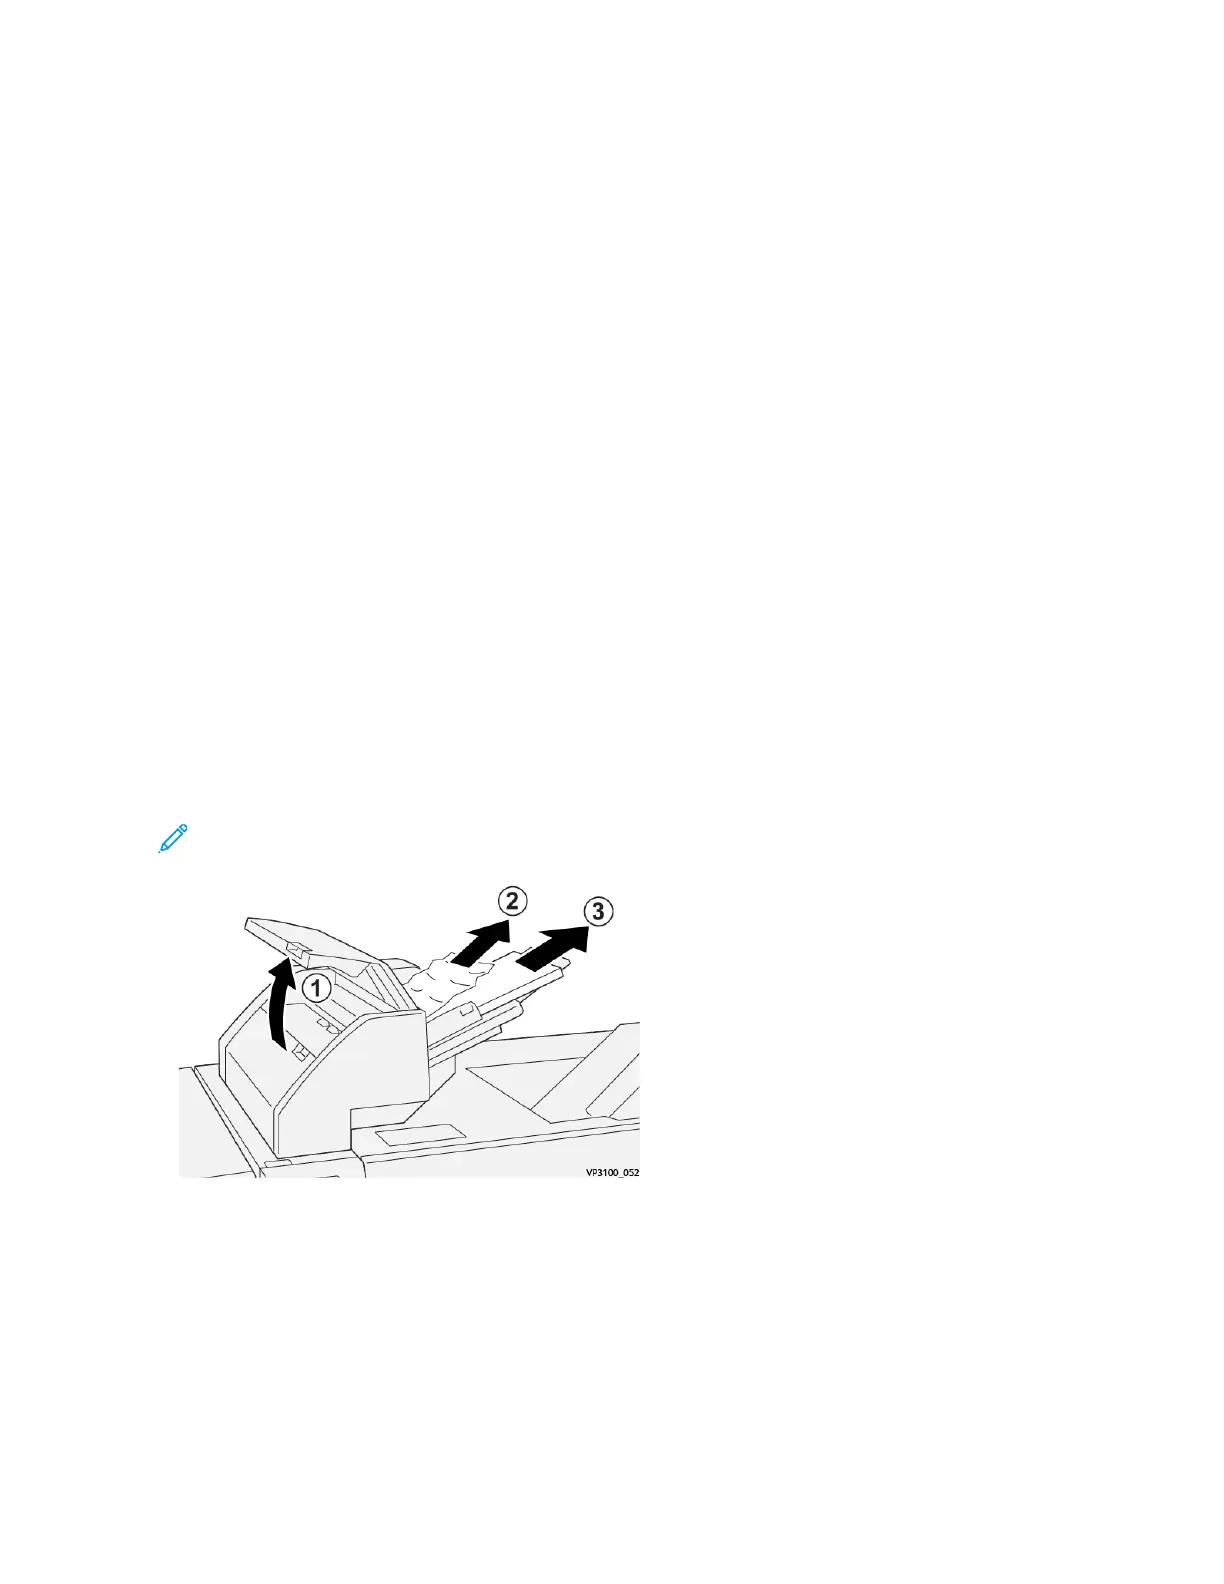
Clearing Paper Jams from Inserter E1 Area
1. Open the T1 cover (1), then remove the jammed papers (2) as well as all of the paper loaded in the tray (3).
Note: When two or more sheets of paper are loaded, remove all sheets.
Fan the paper you removed and make sure all four corners are aligned correctly.
2. Reload the paper into the tray.
3. Close the T1 cover.
358
Xerox
®
Versant
®
280 Press User Documentation
Troubleshooting
 Loading...


