April 2017
4-234
Xerox® VersaLink® B7025/B7030/B7035 Multifunction Printer
ADJ 60.1
Launch Issue
Repairs and Adjustments
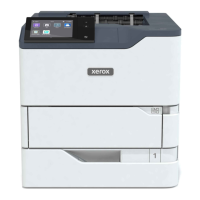
6. Position the half rate carriage, Figure 4:
a. Move the half rate carriage (1) to the alignment pin insertion position (the slots in the
lower guide rails).
b. Install the two alignment pins (2).
c. Tighten the two screws (3).
Figure 4 Half rate carriage positioning
7. Tighten one of the rear set screws, Figure 5.
NOTE: The second set screw will not be accessible at this time.
Figure 5 First rear set screw
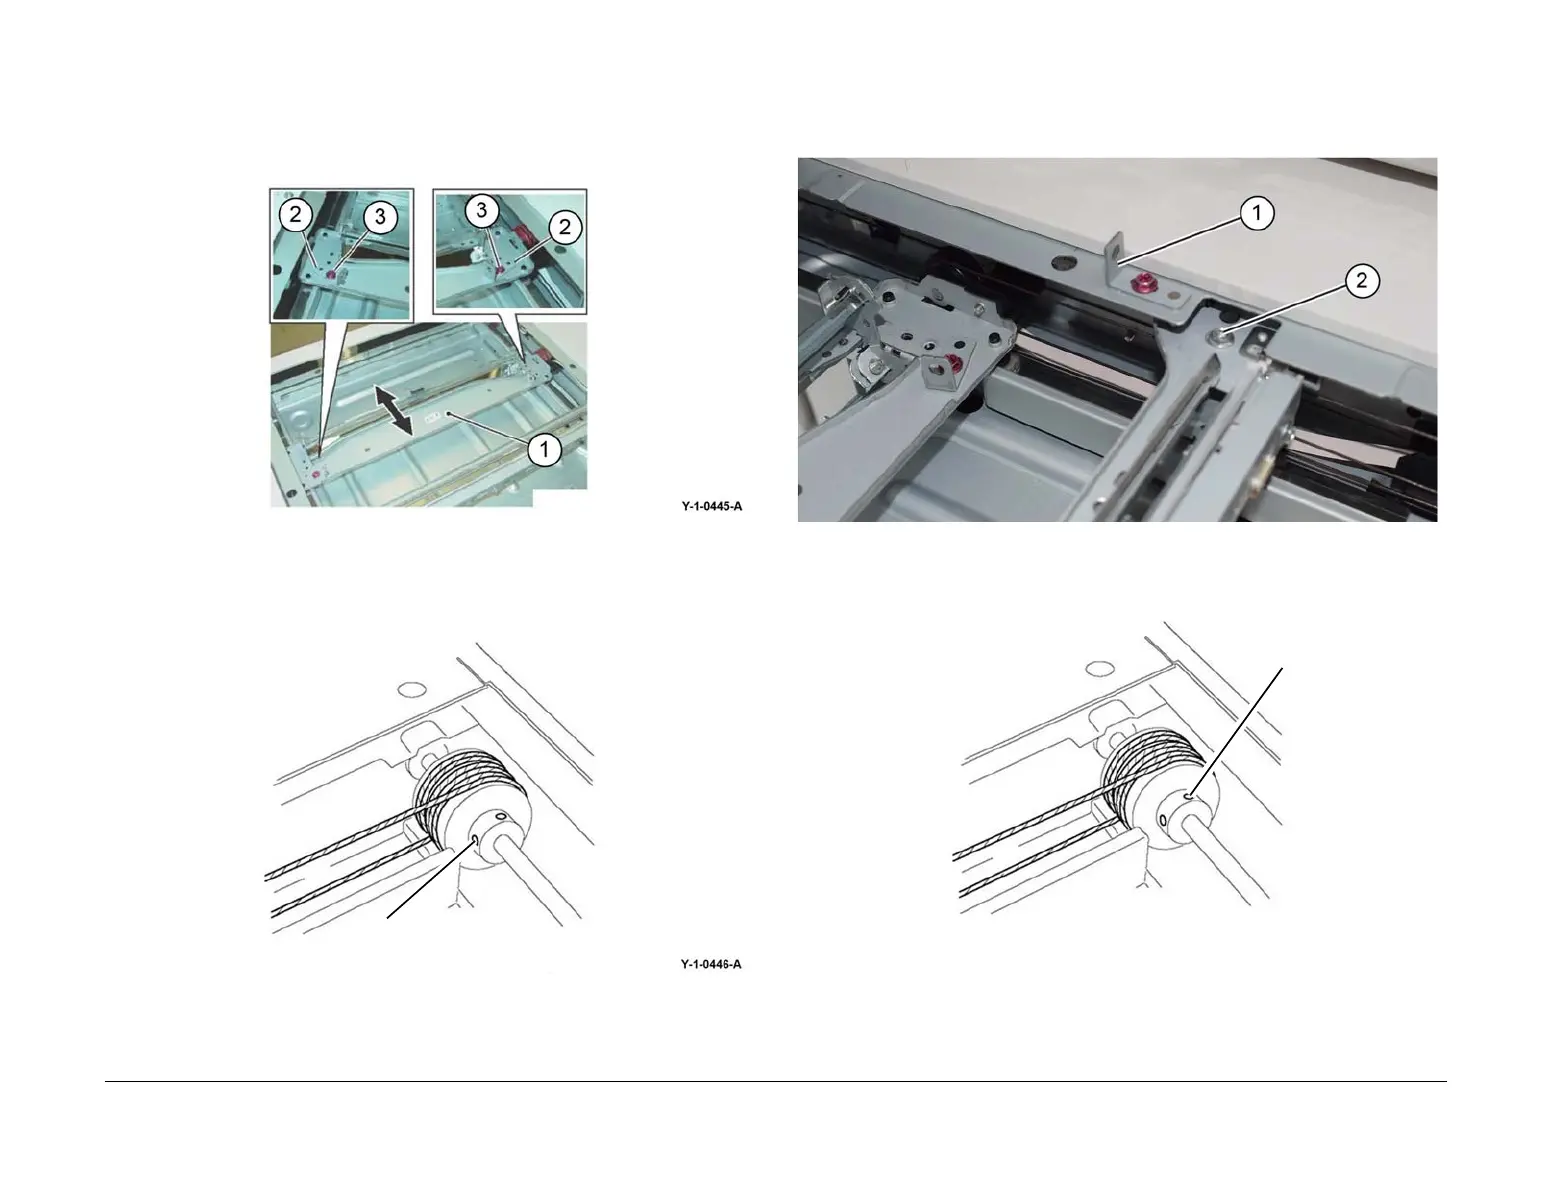
8. Secure the rear cable to the full rate carriage, Figure 6:
a. Remove the alignment pin from the front of the half rate carriage. Install the align-
ment pin (1) to the rear of the full rate carriage.
b. Tighten the rear cable securing screw (5).
Figure 6 Carriage setting
9. Remove both alignment pins.
10. Tighten the other rear set screw, Figure 7.
Figure 7 Second rear set screw
11. Manually move the full rate carriage to ensure that it moves smoothly.
12. Adjust the front of the carriages.
13. Restore the tool pins to their original positions.
14. Reinstall the lens cover assembly.
Set screw
Rear
Set screw
Rear
 Loading...