6
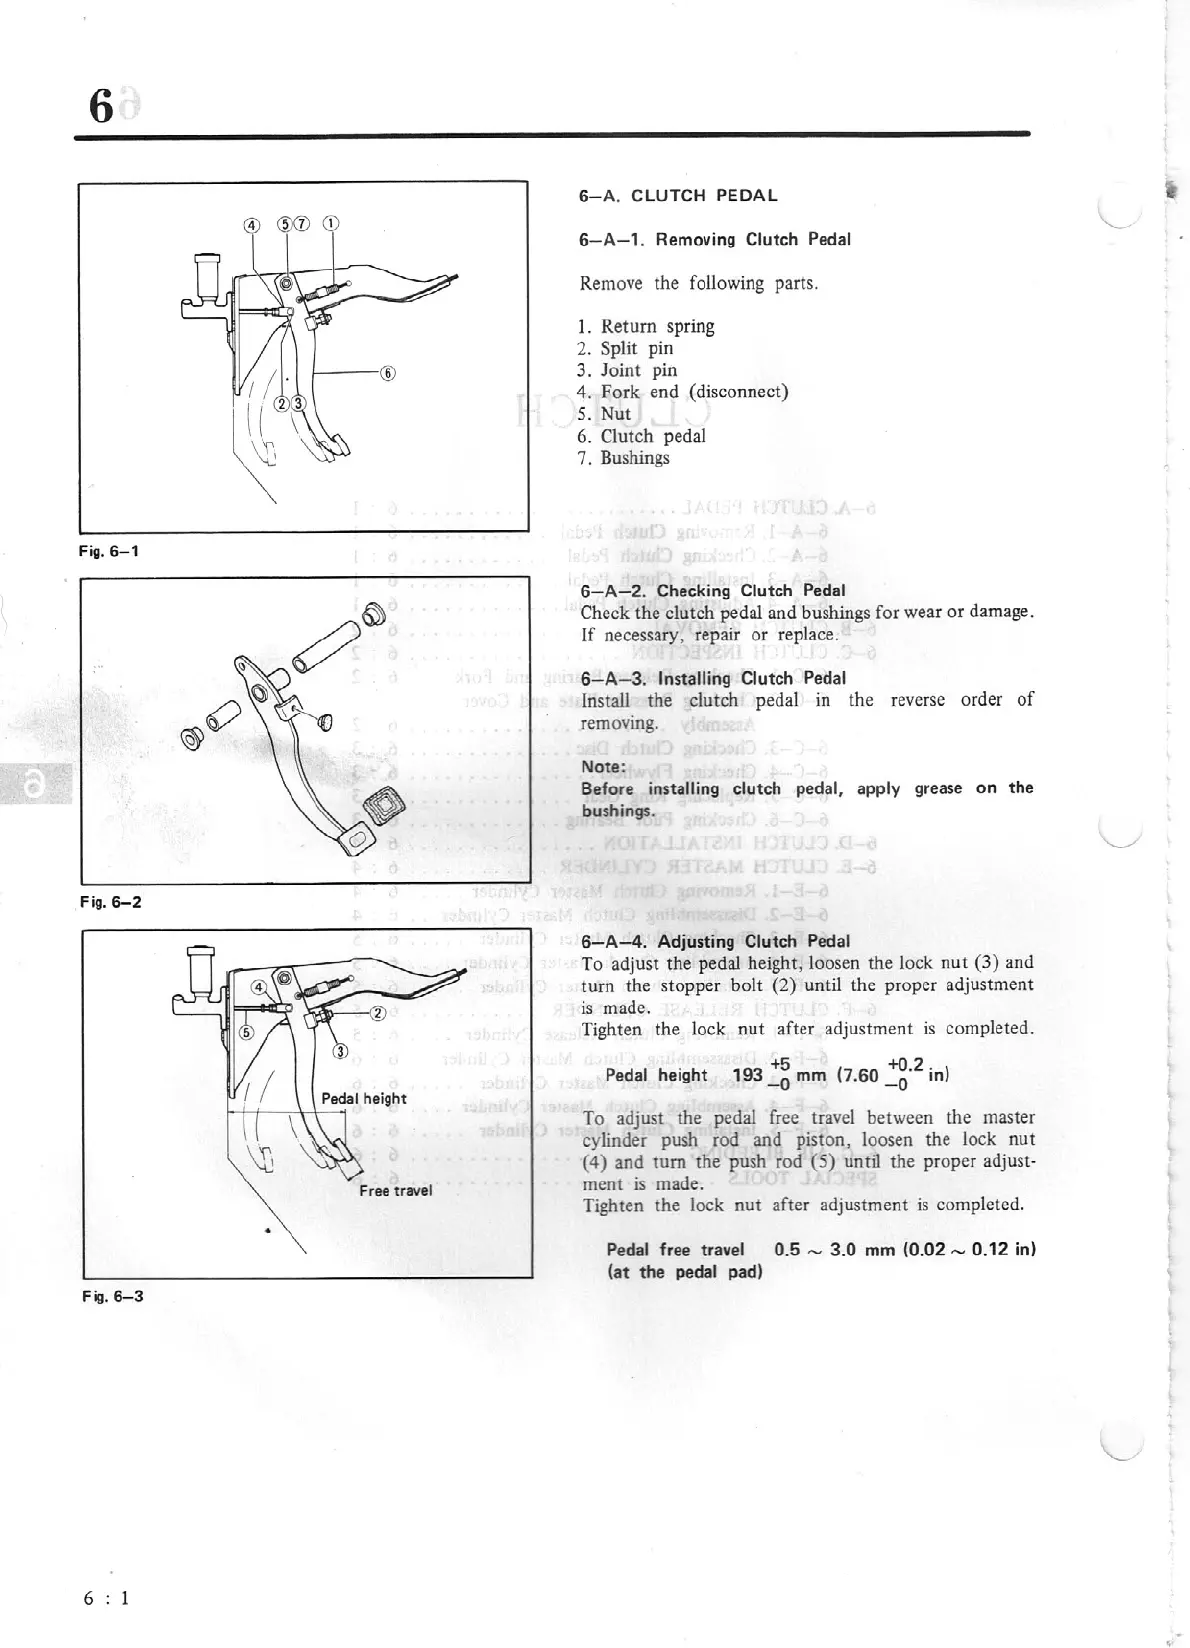
Fig.
6-
1
Fig.
6-2
Free travel
•
Fig
.
6-3
6
6-A.
CLUTCH PEDAL
6
-A-
1. Removing
Clutch Pedal
Remove
the
foUowing
parts.
l.
Return spring
2.
Split pin
3.
Joint pin
4. Fork
end (disconnect)
S.
Nut
6. Clutch pedal
7. Bushings
6
-A-
2. Checking
Clutch Pedal
Check the clutch pedal and bushings for wear or damage.
Jf necessary, repair or replace.
6- A-
3.
Installing Clutch Pedal
JnstaU
the clutch pedal
in
the
reverse
order
of
removing.
Note:
Before installing
cl
utch pedal, apply grease
on
the
bushings.
6-A-4.
Adjusting Clutch Pedal
To
adjust the pedal height, loosen the
Jock
nut (3)
and
turn the stopper bolt (2) until the proper adjustment
is
made.
Tighten the lock nut after adjustment
is
completed.
Pedal
height
+5
+(),2 .
19
3
_
0
mm
(7.60 _
0
m)
To
adjust the pedal
free
travel between the master
cylinder push
rod
and piston, loosen the lock nut
(4) and
tum
the push rod
(5)
until the proper
adjust·
ment
is
made.
Tighten the lock nut after adjustment is completed .
Pedal
free travel
0.5
-
3.0
mm
(0.
02
-
0.12
in)
{at
the
pedal
pad)