Flg.14
-
69
Fig.
14-70
Fig.14-71
•
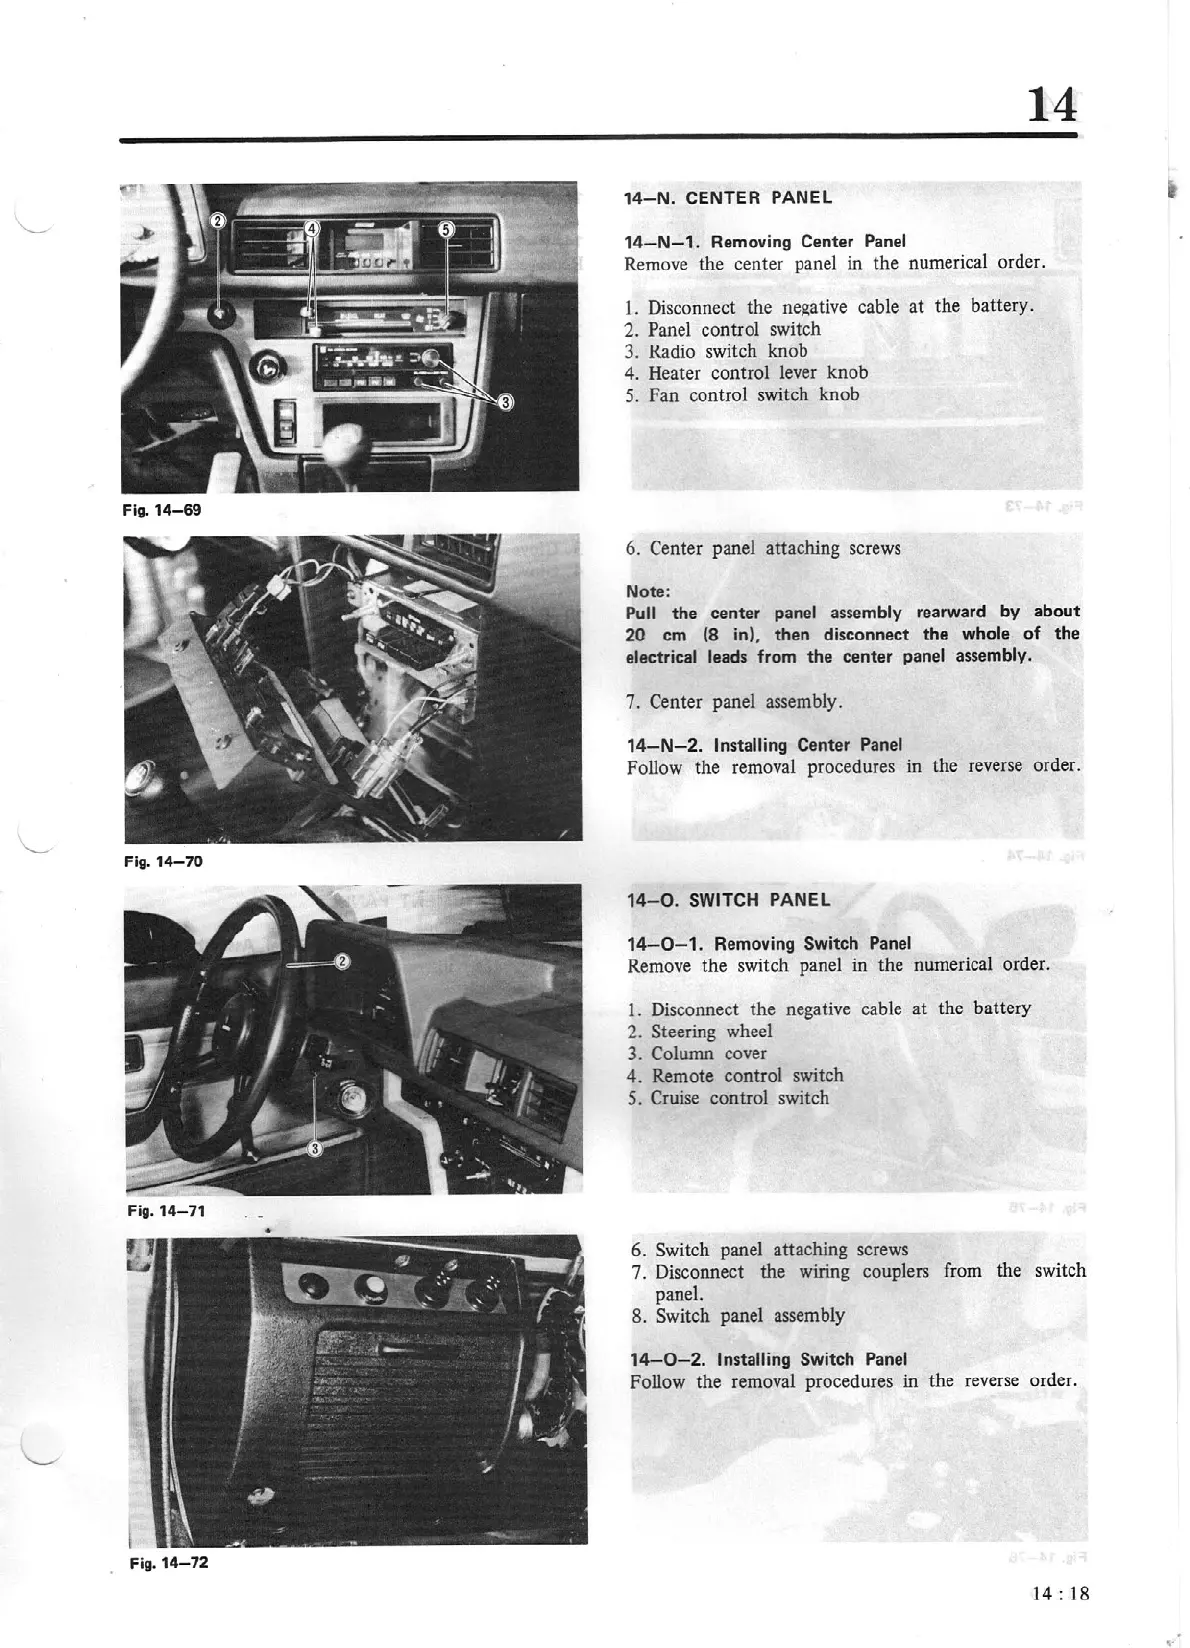
Fig.14-72
14
14-N.
CENTER PANEL
14-N-1
. Removing Center
Panel
Remove the center panel in the numerical order.
1.
Di
sconnect the
ne,l(ative
cable at the battery.
2. Panel co
nt
rol switch
3. Radio
switch knob
4.
Heater control lever knob
5.
Fan control switch knob
6.
Center
panel attaching screws
Note:
Pull
the center panel
as
sembly rearward by
about
20
cm
(8
in)
,
then
disconnect
the
whole
of
the
electrical leads from
the
center panel
assembly.
7.
Center panel assembly.
14-N-2.
Installing
Center Panel
Follow the removal procedures in
th
e reverse order.
14-0
.
SWITCH
PANEL
14-0
- 1. Removing Switch Panel
Remove the switch panel in the n
ume
rical order.
1.
Disconnect the negative cable
at
the battery
2.
Steering wheel
3. Column
cover
4.
Remote control switch
5.
Cruise
control switch
6.
Switch
panel attaching screws
7. Disconnect the wiring couplers
fr
om the switch
panel.
8. Switch panel
asse
mbly
1
4-0-2
.
Installing
Switch Panel
Follow the removal procedures in the reverse
or
der.
14:
18
 Loading...


