Spacer (Left side on
ly)
Fig.
14
-
13
Fig,
14-14
Fig.
14
- 16
3 4
450
- 5
10
mm
(1
7.72- 20.0Sm)
7770'777777
777~
I
I
6
14
14-
D- 2. Checking Shock Absorber
Check the shock absorber referring to Par.
14-C-2.
14- D- 3. Installing Rear Bumper
Follow the removal procedures in the reverse order
and align the bumper for good
fit
and appearan
ce
.
14-
E. W
IND
SHIELD GLASS
1
4-
E- 1.
Rem
oving
Wi
nds
hi
eld Gl
as
s
For remove the windshield
glass,
use
the tool set (49
0305 870A)
as
shown in Fig.
14-16.
Remove the windshield
glass
in the numerical order.
l.
Rear
view
mirror and front pillar trims
2. Wiper arms and wiper blades
3. Cowl grille attaching screws and fasteners.
4.
Disconnect the washer hoses from the washer nozzle.
5. Cowl grille
When
removing the lower mould, remove the cowl
grille and lower mould screws.
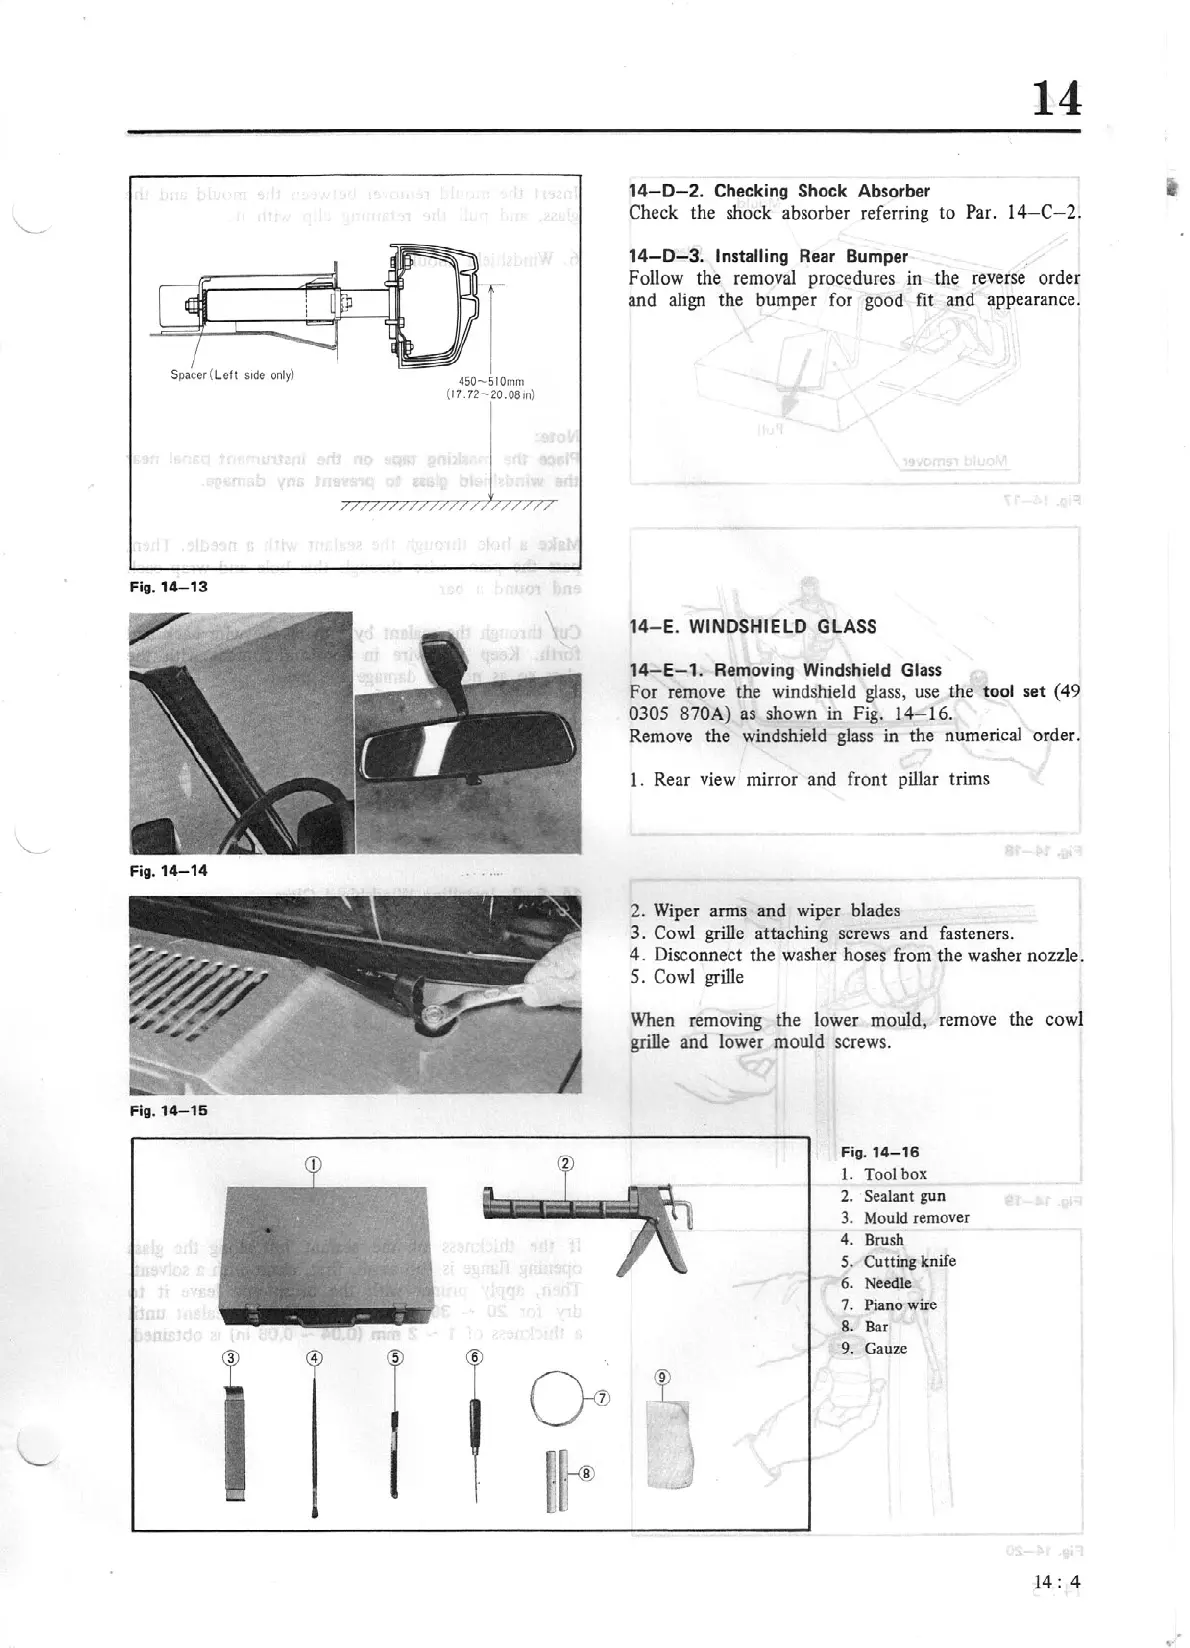
Fi
g.
14-16
1.
Toolbox
2. Sealant
gun
3. Mould remover
4.
Brush
s.
Cutting knife
6.
Needle
7. Piano wire
8.
Bar
9. Gauze
14: 4