Fig.
6-12
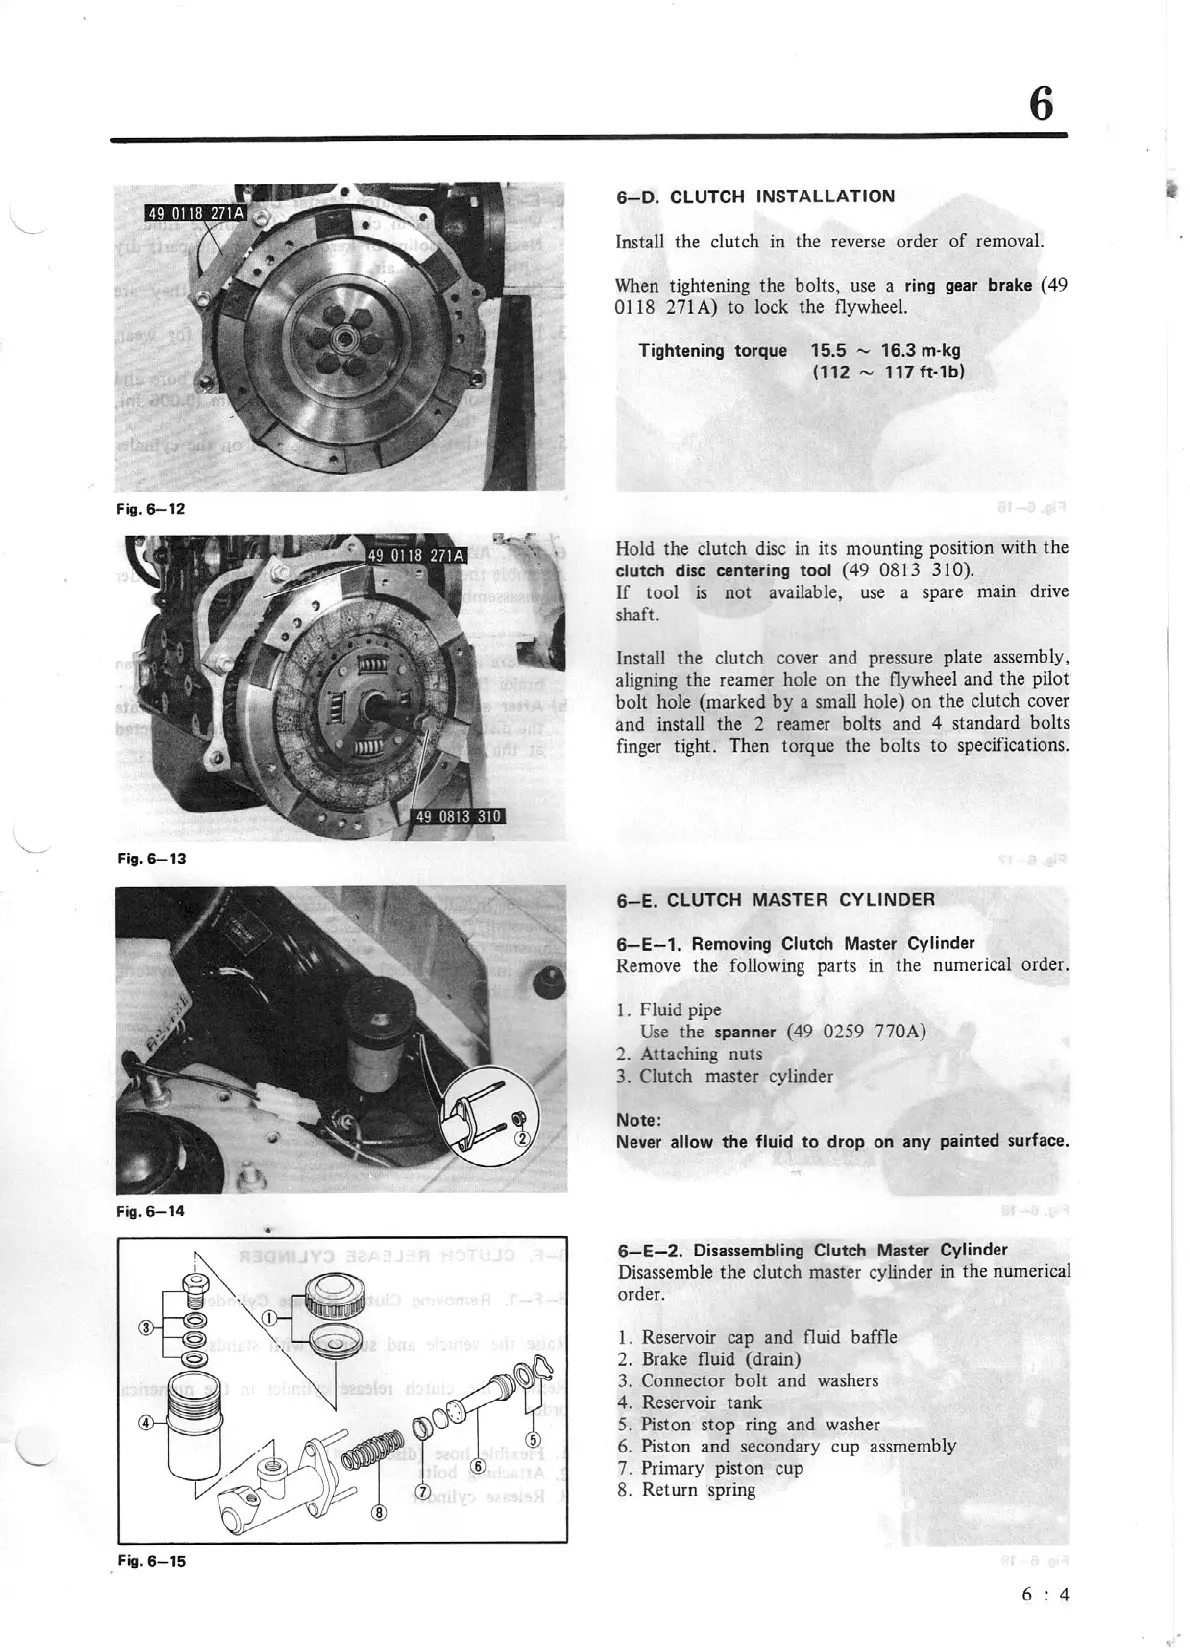
Fig.
6-13
Fig.6-14
•
Fig.
8-
15
6
6-0.
CLUTCH INSTALLATION
Install t
he
clutch in the reverse order
of
removal.
When tightening
the
bolts
, use a
ri
ng gear brake (
49
0118
271
A)
to
lock
the
flywheel.
Tightening
to
r
que
15
.5
-
16.3 m-kg
(112
-
117
ft-lb)
Hold
the
clutch disc in
its
mounting position with
the
clutch disc centering
tool
(
49 0813 310).
If
tool
is
not
available, use a spare main drive
shaft.
Install
the
clutch cover and pressure plate assembly,
aligning the reamer hole on the flywheel and the pilot
bo
lt hole (marked
by
a small hole)
on
the
clutch
co
ver
and install
the
2 reamer bolts and 4 standard bolts
finger tight.
Th
en
torque the
bolts
to
specifications.
6-E
.
CLUTCH MASTER CYLINDER
6-E-1.
R
em
oving
Clutch
Master
Cylinder
Remove the following
parts
in
the
numerical
or
der.
1.
Fluid
pipe
Use
the spanner
(49
02
59
770A)
2.
Attaching
nuts
3.
Clutch
mast
er
cylinder
Note:
Never
allow
the
fluid
to
drop
on
any
painted surface.
6-E
-
2.
Disassembling Clutch
Master
Cylinder
Disassemble
the
clutch master cylinder in the numerical
order.
1. Reservoir cap and
fluid baff1e
2.
Brake
fluid
(drain)
3.
Connector
bolt
and washers
4.
Reservoir
tank
S. Piston
stop
ring and washer
6. Piston
and
secondary cup assmembly
7.
Primary
pist
on
cup
8.
Return
spring
6 4
 Loading...


