Fig
.
18-28
Fig.
18-29
Fig.
18-30
•
Fig.
18-31
IB
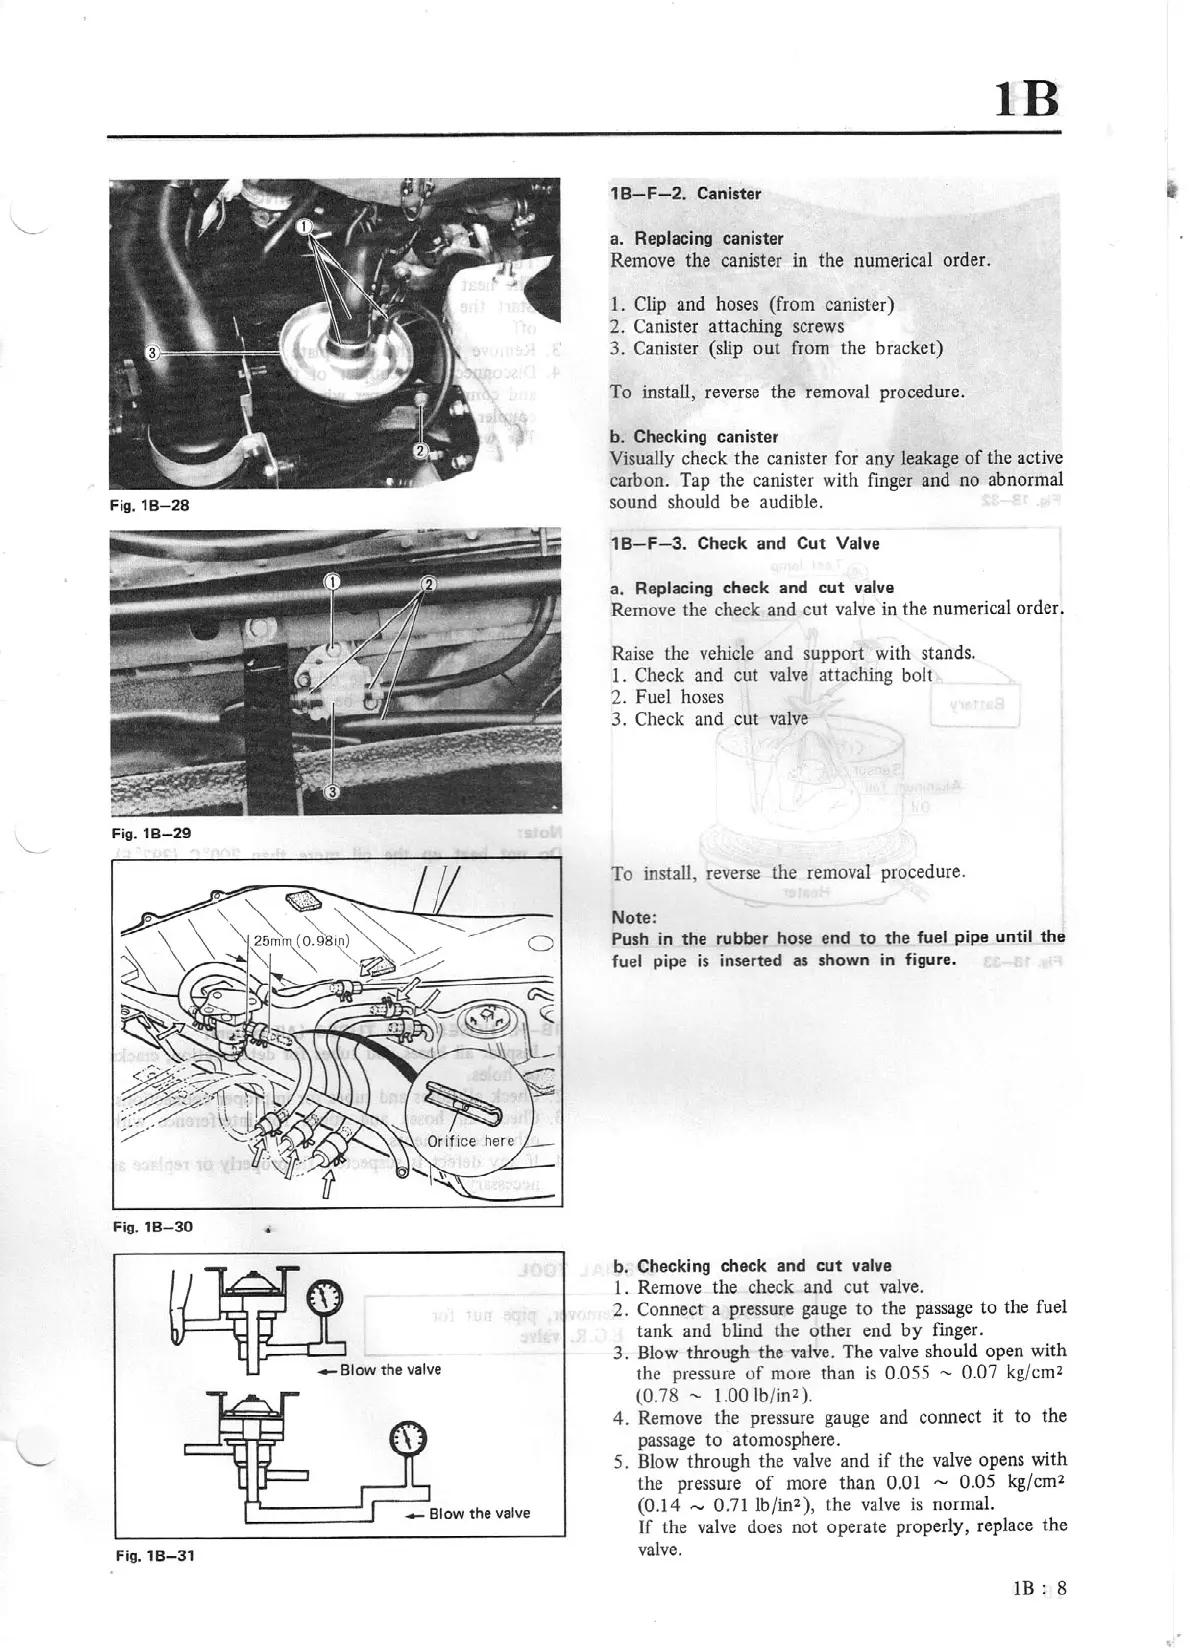
18-F-2.
Canister
a.
Replacing canister
Remove the canister
in
the
numerical order.
1. Clip and hoses (from canister)
2.
Canister attaching screws
3.
Canister (slip
out
from the bracket)
To install, reverse the removal procedure.
b. Checking canister
VisualJy check the canister for any leakage
of
the active
carbon. Tap the canister with finger and no abnormal
sound should be audible.
1
B-F-3
.
Check
and
Cut
Valve
a. Replacing check and
cut
valve
Remove the check and cut valve in the numerical order.
Raise the vehicle and support with stands.
1. Check and
cut
valve attaching bolt
2.
Fuel hoses
3. Check and
cut
valve
To
install, rever
se
the removal procedure.
Note:
Push in
the
rubber hose end
to
the
fuel
pipe until
the
fuel pipe
is
inserted
as
shown in figure.
b. Checking check and
cut
va
lve
I. Remove the check and
cut
valve.
2. Connect a pressure gauge to the passage
to
the fuel
tank
and blind the
other
end
by
finger.
3.
Blow through
the
valve. The valve should open
with
the pressure
of
more than
is
0.055
~
0.07
kg/c
m2
(0.
78
-
1.00
lb/
in2
).
4.
Remove the pressure gauge and connect it
to
the
passage to atomosphere.
5. Blow through the valve and
if
the valve opens with
the pressure
of
more
than
0.01 - 0.05
kg/crnl
(0.14
-
0.71
lb/in2),
the
valve
is
normal.
If
the valve does
not
operate properly, replace
the
valve.
lB:
8


 To Next Page