11
F
ig
. 11-
47
Fig. 11
-48
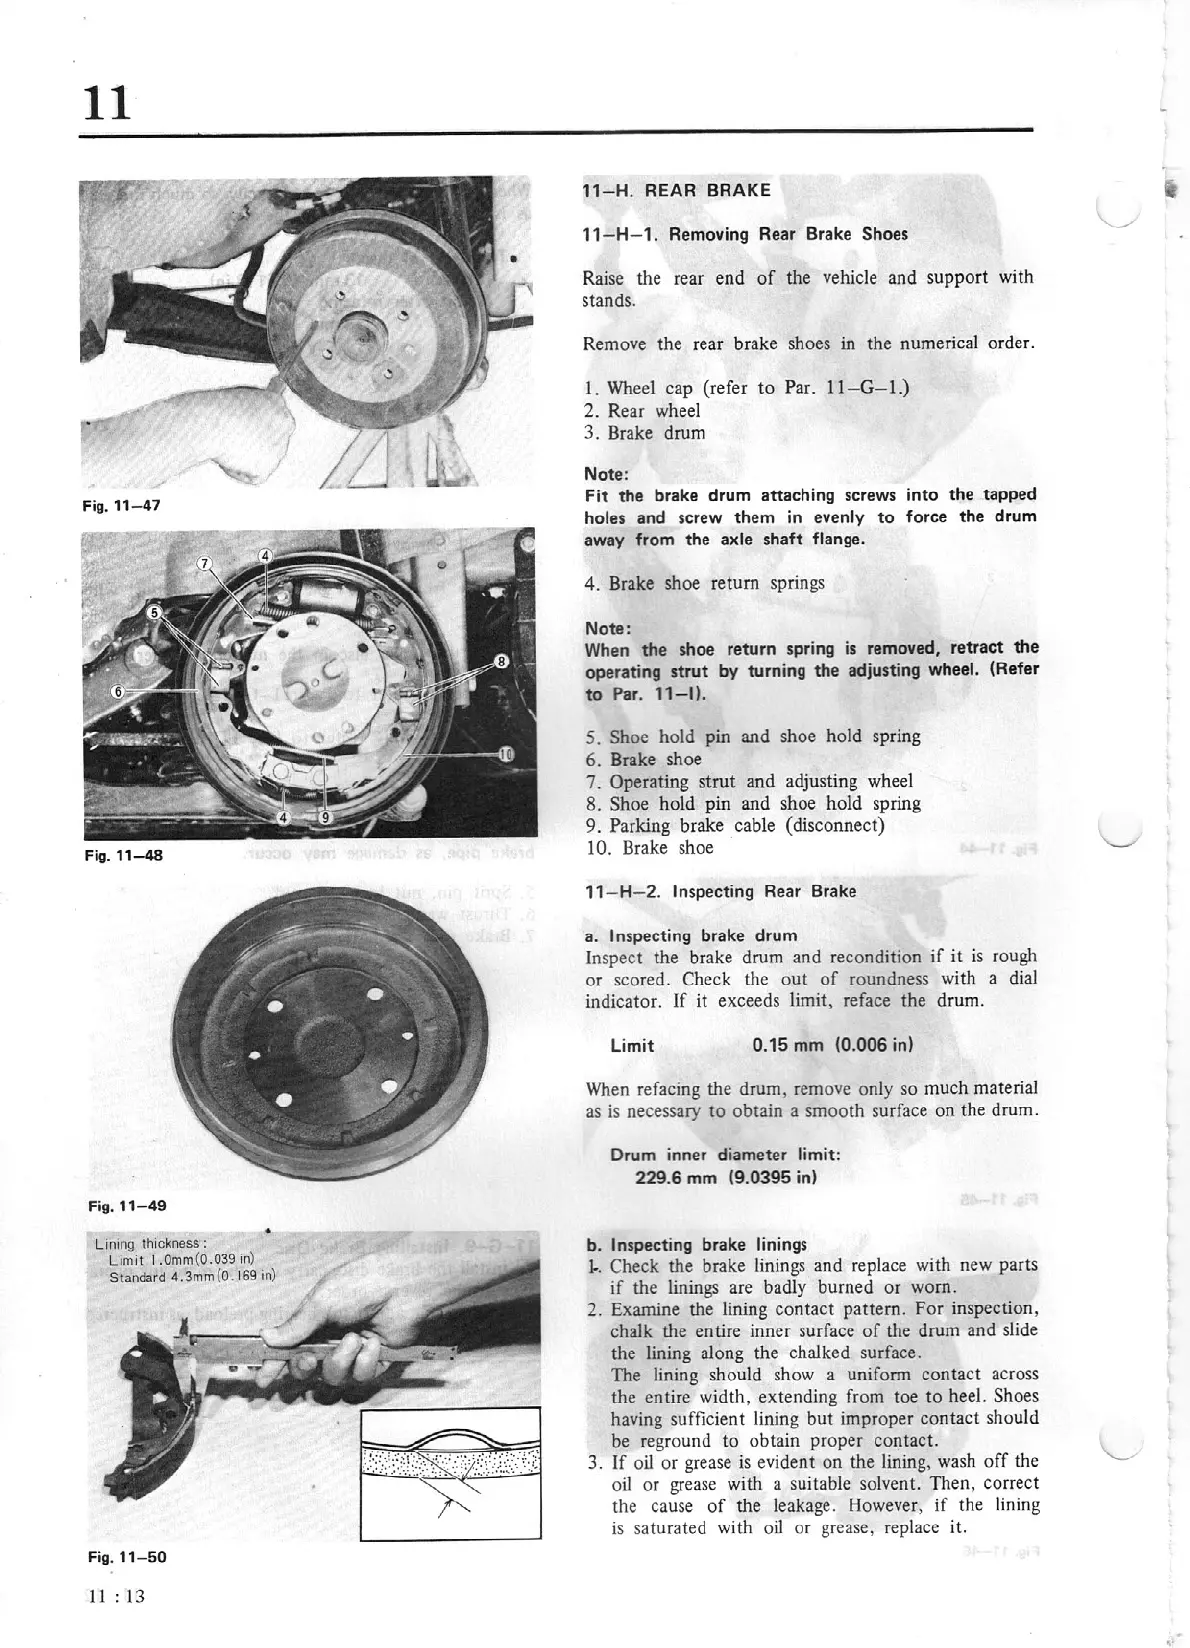
Fig.
11-49
·
~-----
L1111
ng thickness :
Limit I .
Omm
(0
.039
in)
Standard
4.3mm
(0 . 1
69
in)
Fig.
1
1-50
11
:
13
11
-
H.
REA
R
BRAKE
11
- H- 1.
Removing Rear Brake
Shoes
Raise
the rear end
of
the vehicle and support with
stands.
Remove the rear brake shoes
in
the numerical order.
l.
Wheel
cap (refer to
Par.
11-G
-
1.
)
2.
Rear wheel
3.
Brake drum
Note:
Flt
the brake drum attaching scr
ews
into the tapped
holes and screw them in evenly
to
force
th
e dr
um
away from the axle shaft flan
ge.
4.
Brake shoe return springs
Note:
When
the shoe return spring
is
re
moved, retract the
operating str
ut
by turning the adjusting whe
el
. (Refer
to
Par.
11-1
).
5.
Shoe hold pin and shoe hold spring
6.
Bra
ke shoe
7.
Operating strut and
ad
ju
sting wheel
8.
Shoe
hold
pin and shoe hold spring
9.
Parking
brake cable (disconnect)
10.
Brake shoe
11
- H- 2.
In
specti
ng
Rear Brake
a.
Ins
pecting
br
ake drum
Inspect the brake drum and recondition if it
is
rough
or scored. Check the out
of
roundness
wi
th a dial
indicator.
If
it exceeds
limit,
reface the drum.
Limit
0.15
mm
10.006
in
)
When
refacing the drum, remove only so much materiaJ
as
is
necessary
to
obtain a smooth surface on the d
ru
m.
Dru
m
in
ne
r dia
me
ter limit:
2.
29
.6
mm
(9.0395
in)
b. Inspecti
ng
brake
lin
i
ng
s
J..
Check
the brake linings and replace with
new
parts
if
the linings are badly burned or worn.
2.
Examjne the lining contact pattern. For inspec
ti
on,
chaJk
the entire inner sur
face
of
the drum and s
li
de
the lining along the chalked surface.
The lining should show a unifonn contact acr
oss
the entire width, extending from toe
to
he
el.
Shoes
having sufficient lining but improper contact should
be
reground to obtain proper contact.
3.
If
oil
or grease is evident on the
li
ning,
was
h off
th
e
oil
or
grease
with a suitable solvent. Then, correct
the cause
of
the leakage. However,
if
the l
in
i
ng
is
saturated with o
il
or grease, replace
it.