13
Fig.
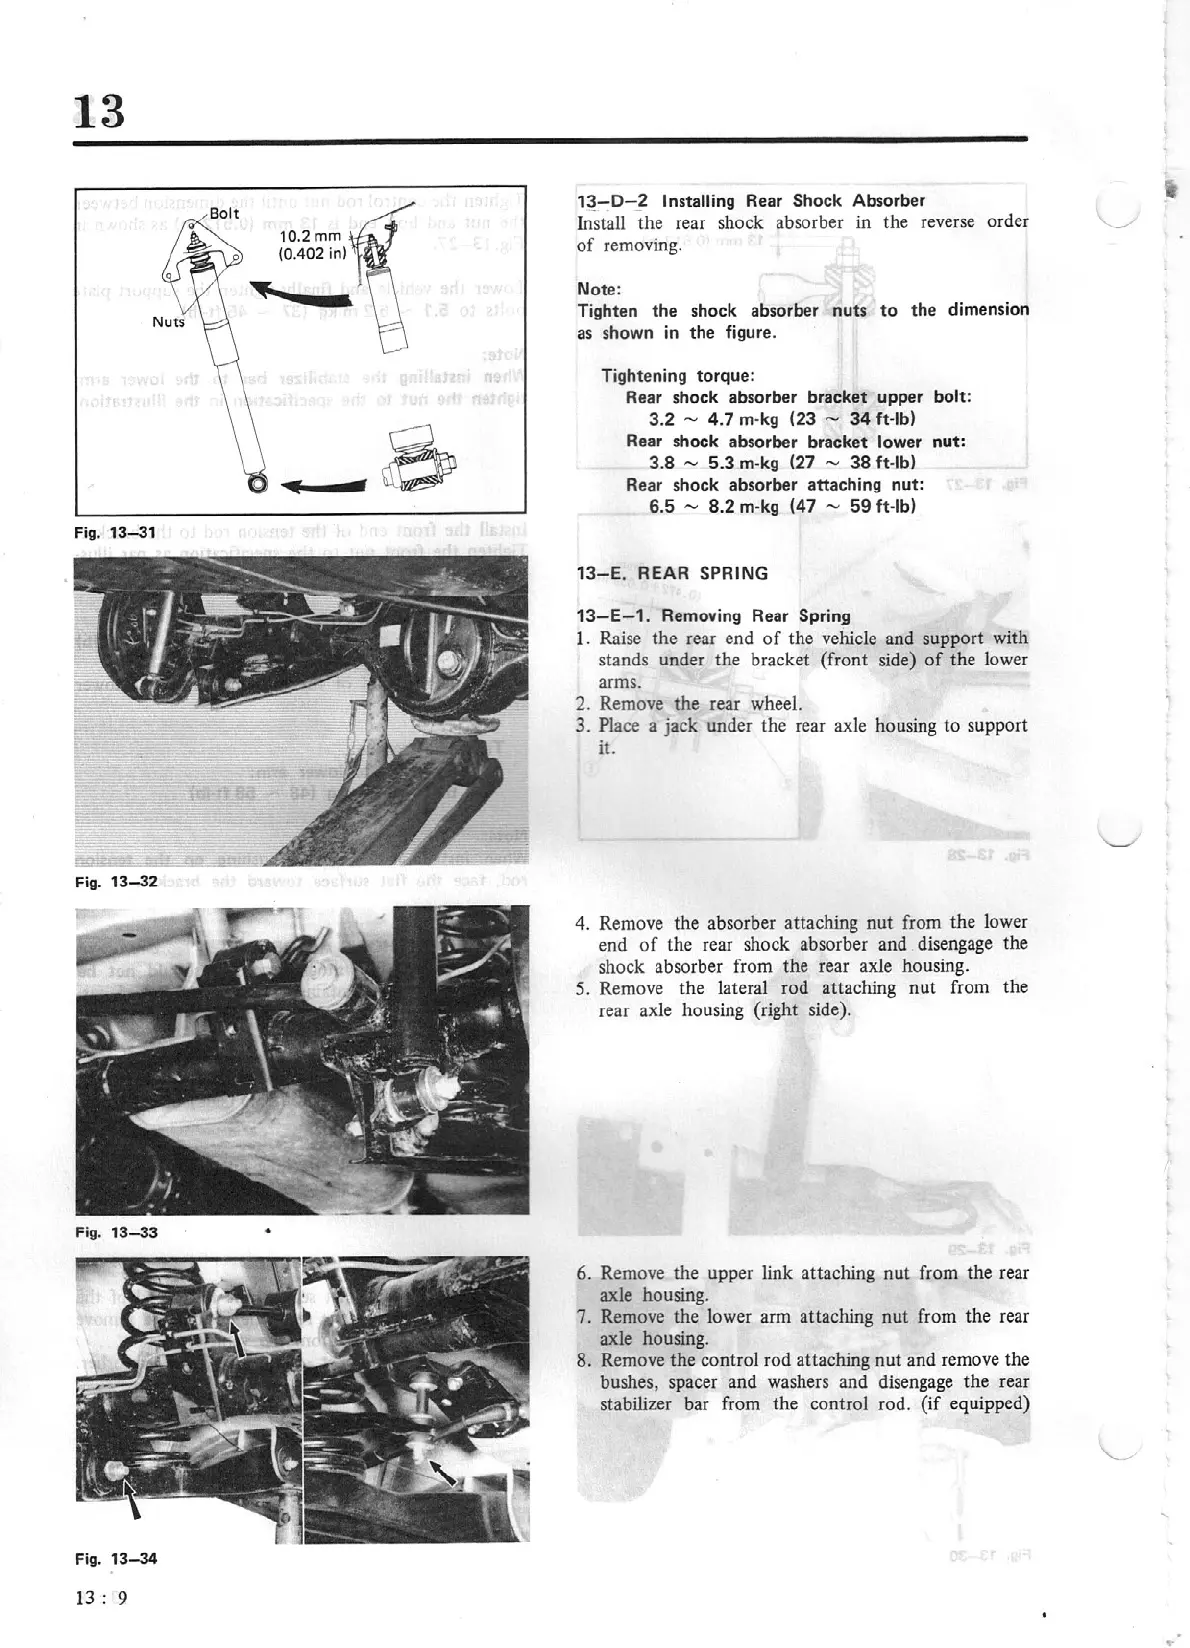
13-31
Fig.
13-32
Fig.
13-33
Fig.
13-34
1
3:
9
•
10.2
mm
(0.402
in)
1
~
-D-_2
Installing
Rear
Shock
Absorber
Install
the
rear shock absorber in the reverse order
of
removing.
Not
e:
Tighten
the
shock absorber
nut
s
to
the
dimension
as shown in
th
e figure.
T
ig
ht
ening torqu
e:
Rear shock absorber bracket upper
bolt:
3.2
-
4.7
m-
kg (23
-
34
ft-lb)
Rear shock absorber bracket lower
nut:
3.8
"'
5.3
m-kg (27
-
38
ft
-lb)
Re
ar shock absorber attaching nut:
6.5
"'
8.2
m·kg
(47
-
59
f
t-
lb)
13
-E
.
REAR
SPRING
1
3-
E-1.
Remo
vi
ng Rear
Spring
1. Raise
the
rear
end
of
the vehicle and
su
pp
ort
with
stands under the bracket
(front
side) of the lower
arms.
2. Remove
the
rear wheel.
3.
Pla
ce
a jack under the rear axle housing to support
it.
4. Remove the absorber attaching
nut
from
the
lower
end
of
the rear shock absorber and disengage
the
shock absorber from the rear axle housing.
5.
Remove the lateral rod attaching
nut
fr
om
the
rear axle housing (right side).
6. Remove the upper link attaching
nut
from
th
e rear
axle housing.
7. Remove the low
er
arm attaching nut from
the
rear
axle housing.
8.
Remove
the
control rod attaching
nut
and remove the
bushes, spacer and washers and disengage
th
e rear
stabilizer bar from the control rod.
(if
equipped)
..