Det1ll
of
A
Fig.
14-21
Fig.
14-22
-:r-
•
40
mm
(
1.57
in)'.
Fig.
14-23
Cross section
A-A
Fig.
14-24
14
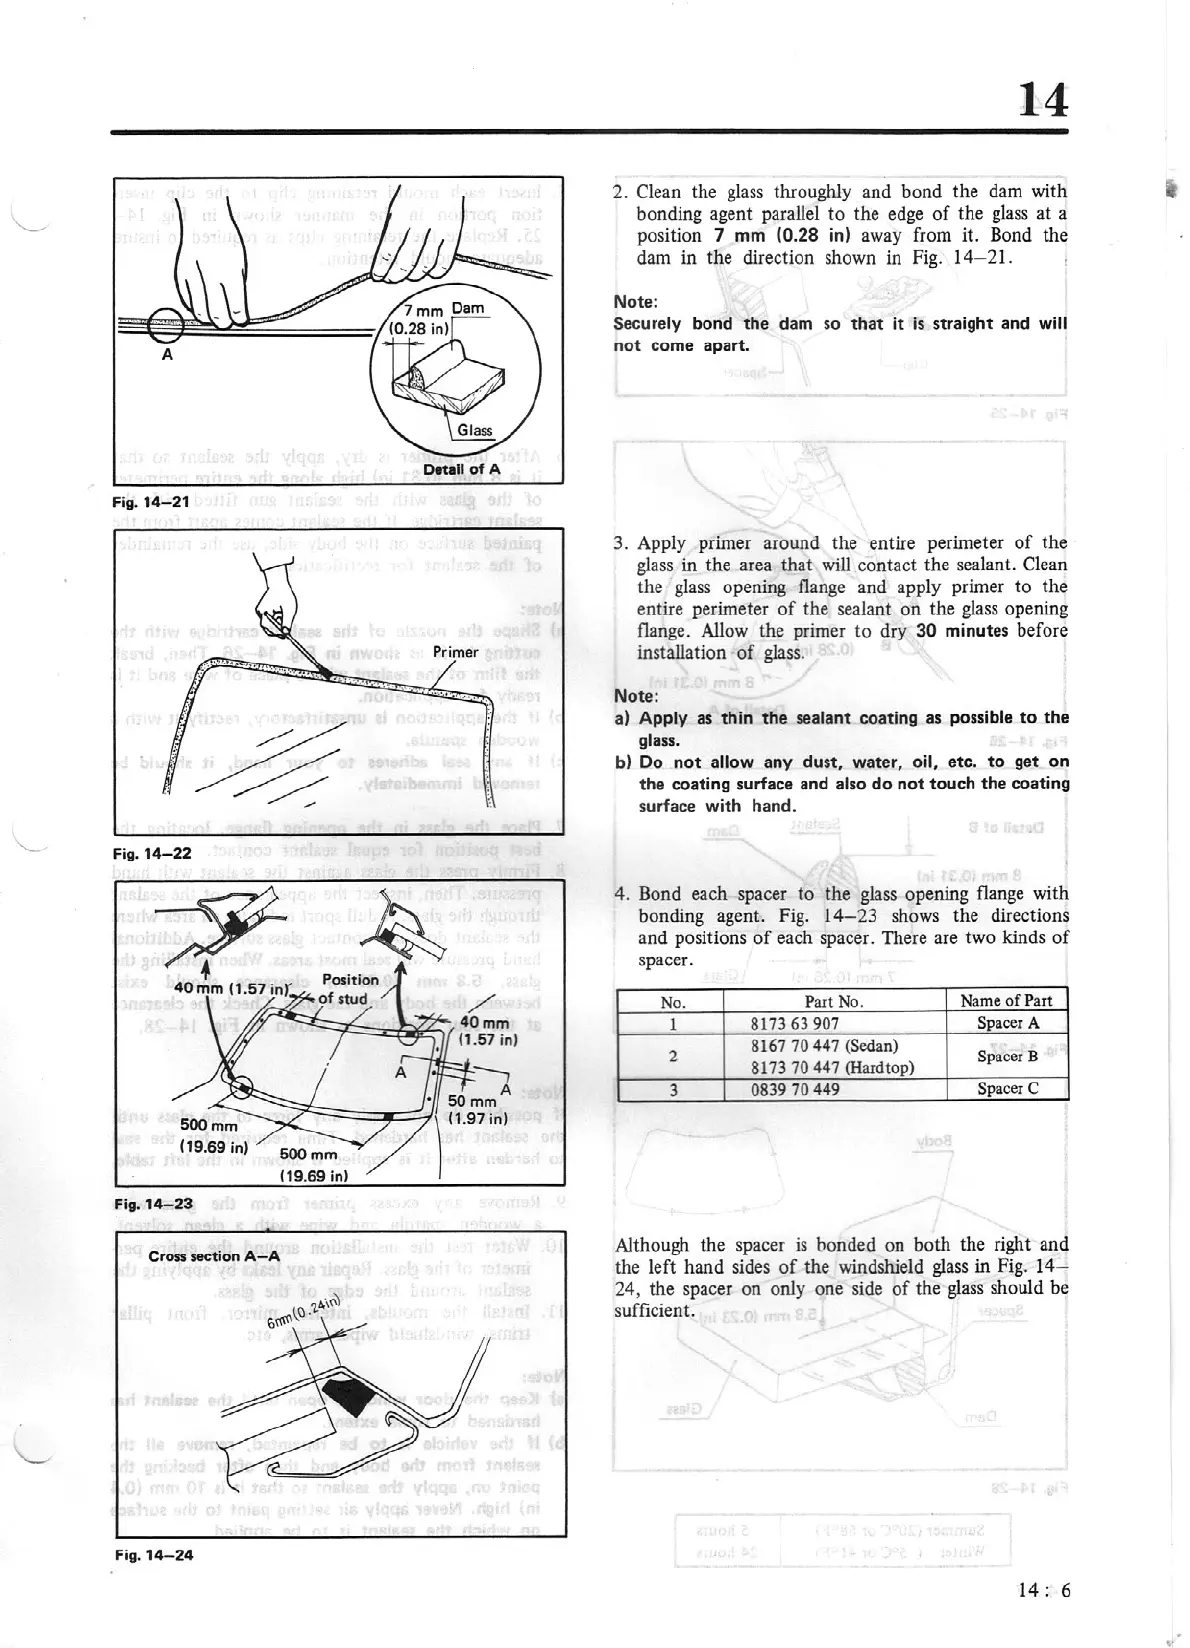
2. Clean the glass tluoughly and bond the dam with
bonding agent parallel
to
the edge
of
the
glass
at
a
position
7
mm
(0.
28
in) away from it. Bond the
dam in the direction shown in Fig.
14-21.
Note:
Securely bond the
dam
so that it
is
straight
and
will
not
co
me apart.
3. Apply primer around the entire perimeter
of
the
glass
in the area that will contact the sealant. Clean
the
glass
opening flange and apply primer
to
the
entire perimeter
of
the sealant
on
the
glass
opening
flange. Allow the primer to dry
30
minutes before
installation
of
glass.
Note:
a) Apply
as
thin the sealant coating
as
possible
to
the
glass.
bl Do not allow any dust, water, o
il
, etc.
to
get
on
the coating surface
and
also
do
not touch the coating
surface with hand.
4. Bond each spacer
to
the glass opening flange with
bonding agent. Fig.
14-23
shows the directions
and positions
of
each spacer. There are two kinds
of
spacer .
No.
Part No.
Name
of
Part
1
8173 63 907
Spacer A
2
8167
70
447 (Sedan)
Spacer B
8173
70
447 (Hardtop)
3
0839
70
449
Spacer C
Although the spacer
is
bonded
on
both the right and
the left hand sides
of
the windshield
glass
in Fig. 14-
24, the spacer
on
only one side
of
the
glass
should
be
sufficient.
14:
6
•
,.