Fig.
14
-
117
Fig.
14-11
8
Fro
nt
<=>
~
c
=-
--;J~J?-1~~
=
r
,.--
_
:_-:_'
__
tf
Cu1de
roller
Fig.
14
-119
•
Guide
rail
cover
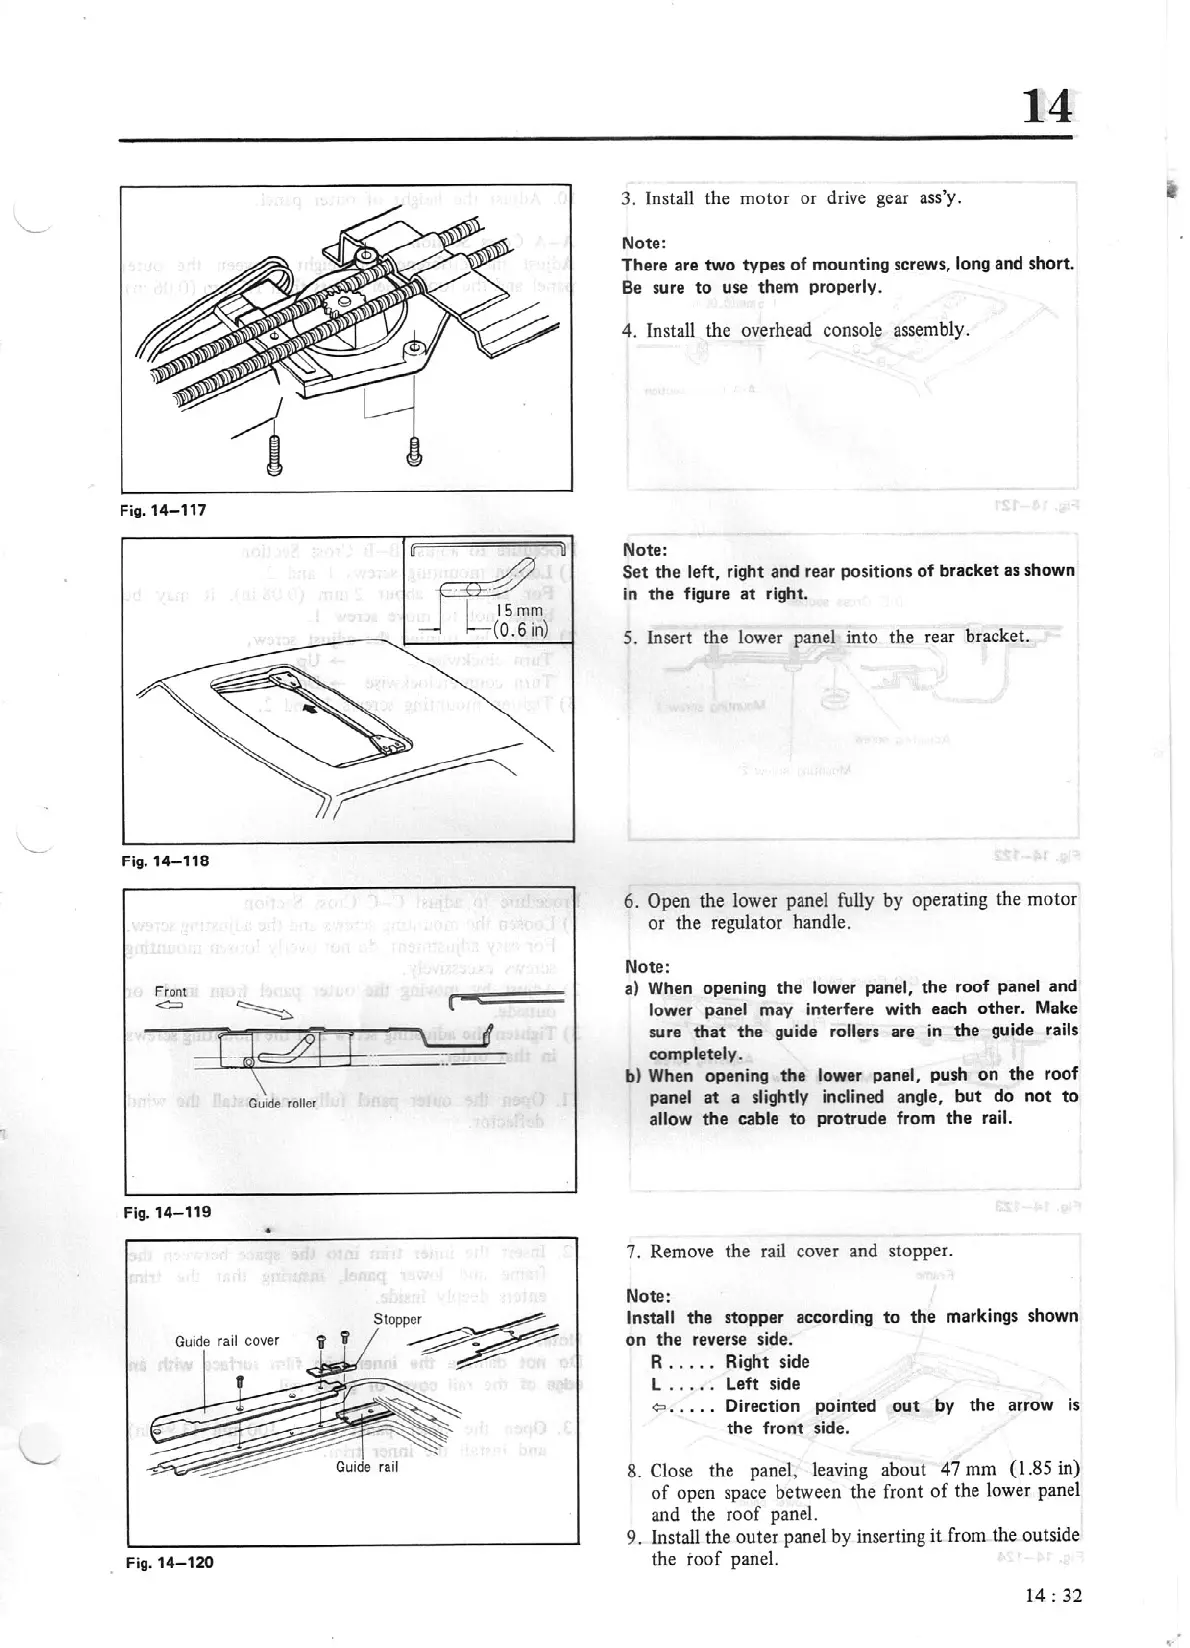
Fig.
14-120
14
3. Install the motor or drive gear ass'y.
Note:
There are two types
of
mounting screws,
long
and short.
Be
sure
to
use them properly.
4.
Install the overhead console assembly.
Note:
Set
the
left,
right and rear
po
s
it
io
ns
of
bracket as shown
in
t
he
figure
at
r
ig
ht
.
5.
Insert the lower panel into the rear bracket.
6.
Open
the lower panel fully by operating the motor
or
the regulator handle.
Note:
a)
When opening
the
lower panel,
the
roof
panel and
lower panel
may interfere with each
other
. Make
sure
that
the
guide
rollers
are
in
the
guide
rails
completely.
b) When opening
the
lower panel,
push
on
the
roof
panel
at
a slightly inclined angle,
but
do
not
to
allow
the
cable
to
protrude from
the
rail.
7.
Remove the rail cover and stopper.
Note:
Install
the stopper according
to
the
markings shown
on
the
reverse side.
R . . . . .
Ri
g
ht
side
L .
....
Left
si
de
~
.
. . . . Direction pointed
out
by
the
arrow
is
the
front side.
8.
Close the panel, leaving about
47
mm
(1.85
in)
of
open space between the front
of
the lower panel
and
the
roof
panel.
9.
Install the outer panel by inserting
it
from the outside
the r
oof
panel.
14
: 32