Fig.
11-4
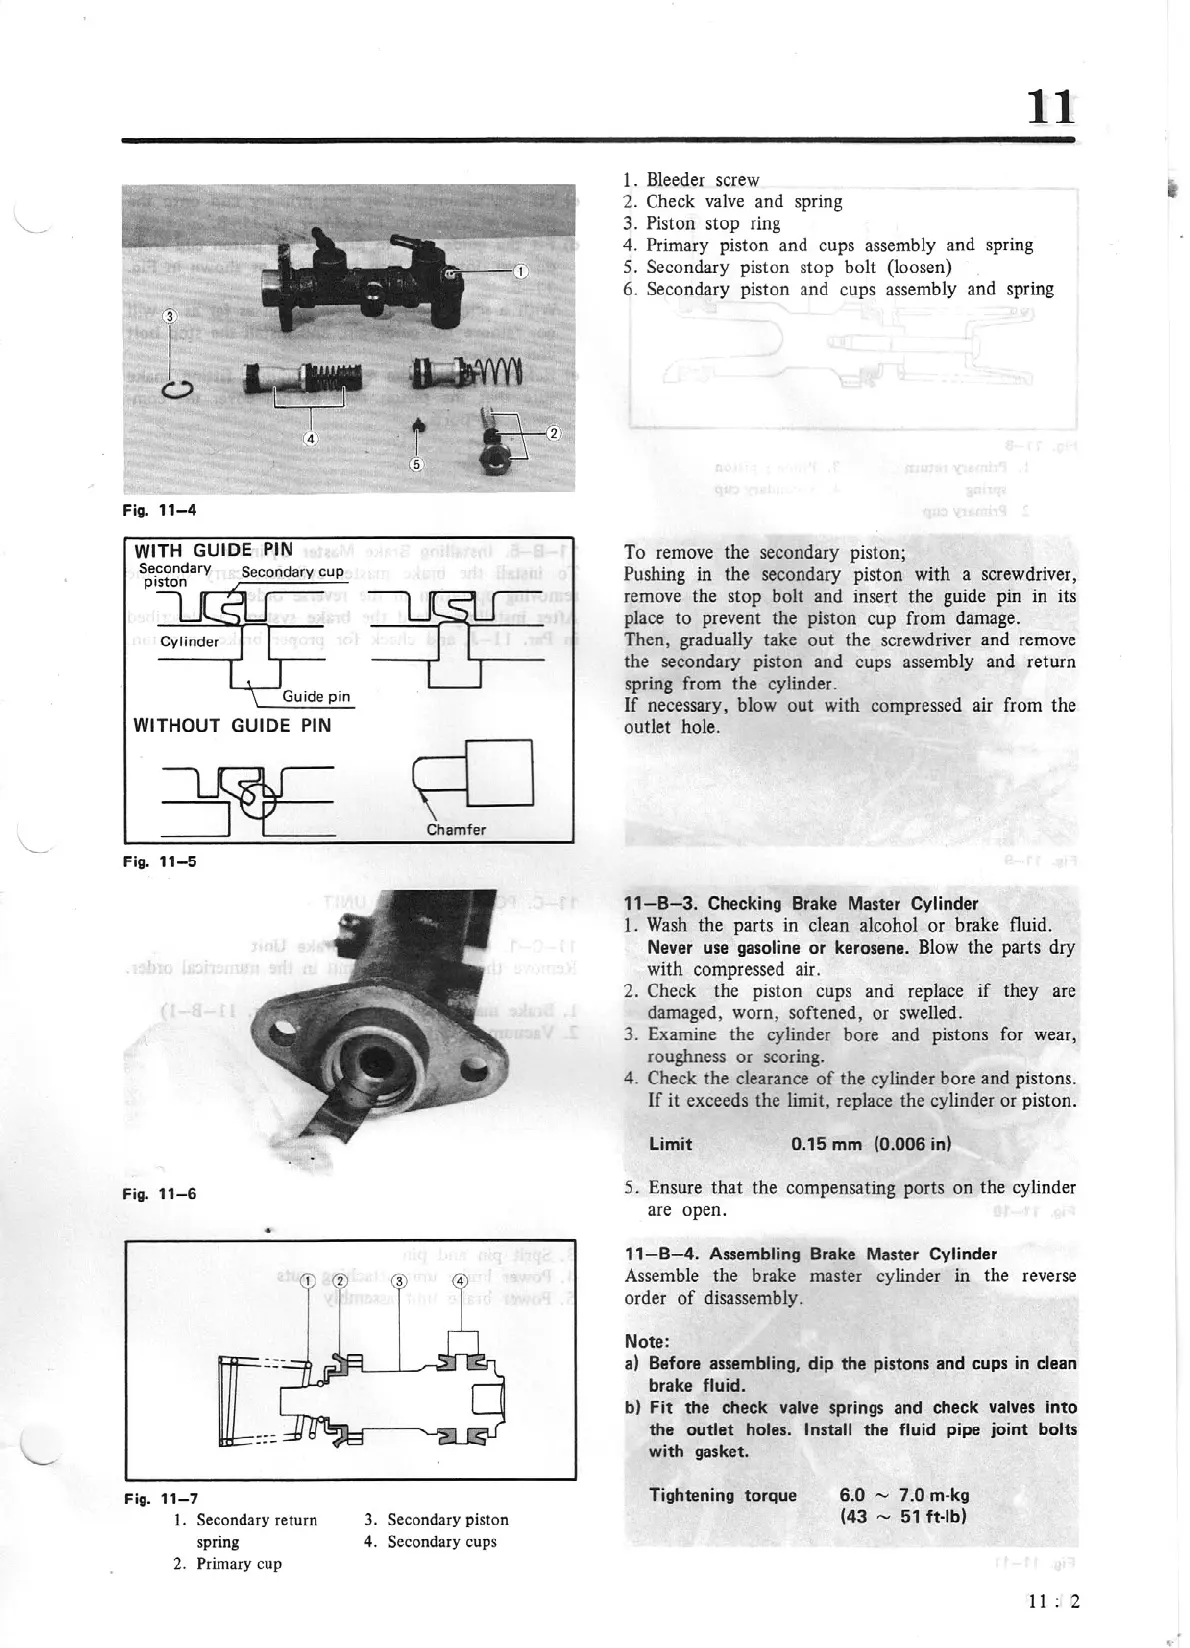
WITH
GUIDE PIN
Secondary Secondary
cup
piston
WITHOUT GUIDE
PIN
Fig.
11-5
Fig.
11-6
•
--
[
---
Fig.
11-7
1. Secondary return
spring
2. Primary cup
~
Chamfer
3. Secondary piston
4.
Secondary cups
11
1 . Bleeder screw
2. Check valve and spring
3. Piston stop ring
4. Primary piston and cups assembly and spring
5. Secondary piston s
top
bolt (loosen)
6. Secondary piston and cups assembly and spring
To remove the secondary piston;
Pushing in the secondary piston with a screwdriver,
remove the stop bolt and insert the guide pin in its
place
to
prevent the piston cup from damage.
Then, gradually take
out
the screwdriver and remove
the secondary piston and cups assembly and return
spring from the cylinder.
If
necessary, blow
out
with compressed air from the
outlet hole.
11-B-3.
Checking Brake Master Cylinder
1. Wash the parts in clean alcohol or brake fluid.
Never use gasoline
or
kerosene. Blow the parts dry
with compressed air.
2.
Check the piston cups and replace
if
they are
damaged, worn, softened, or swelled.
3. Examine the cylinder bore and pistons for wear,
roughness or scoring.
4. Check the clearance
of
the cylinder bore and pistons.
If
it
exceeds the limit, replace the cylinder or piston.
Limit
0.15
mm
(0.006
in)
5. Ensure
that
the compensating ports on the cylinder
are open .
11
-B-
4.
Assembling Brake Master Cylinder
Assemble the brake master cylinder in the reverse
order
of
disassembly.
Note:
a)
Before assembling, dip the pistons and cups in clean
brake fluid.
b)
Fit
the check valve springs and check valves into
the
outlet
holes. Install the fluid pipe joint bolts
with gasket.
Tightening torque
6.0
"' 7
.0
m-kg
(43
- 51 ft-lb)
11
: 2
..